How to connect a USB Camera to QVR Pro?


Last modified date: 2025-02-05

You can add a USB camera to QVR Pro. This allows you to build a surveillance system on a more affordable budget.

  1. Install QVR Pro on your device.
    Note
    If you have already finished QVR Pro, proceed to the next step.
    1. Log on to QTS.
    2. Go to App Center > Surveillance.
    3. Locate QVR Pro and then click Install.

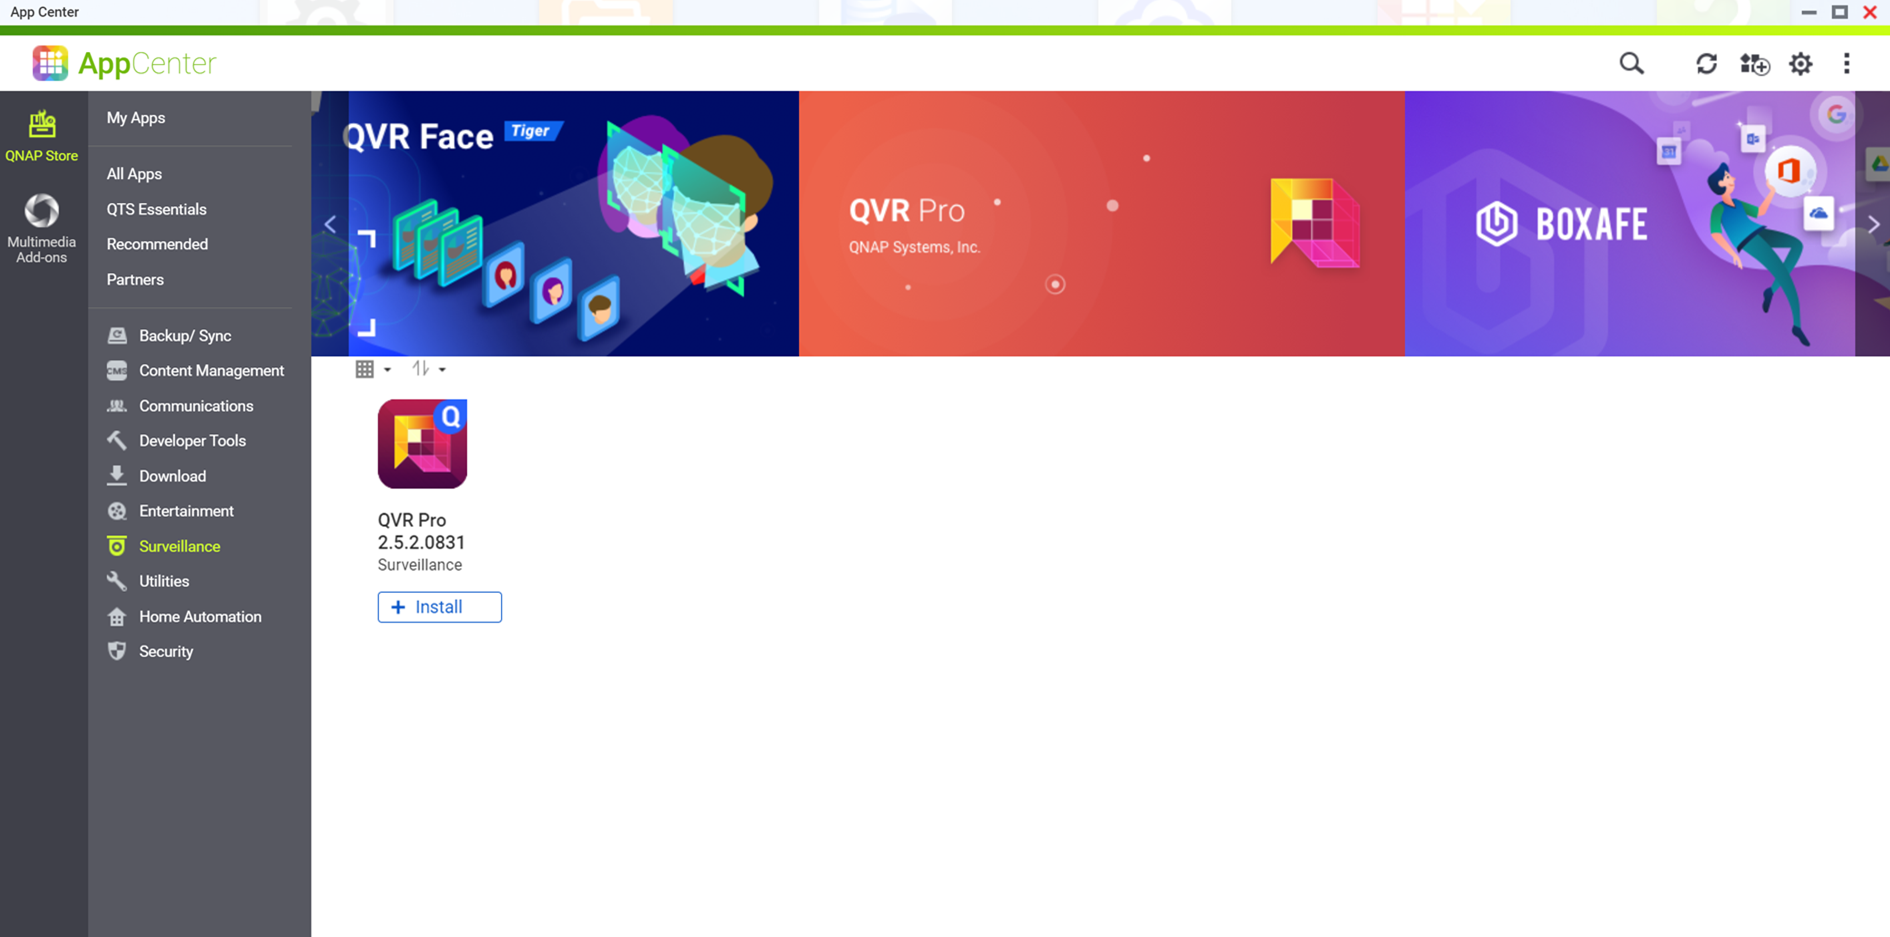
      QTS downloads the QVR Pro installer.
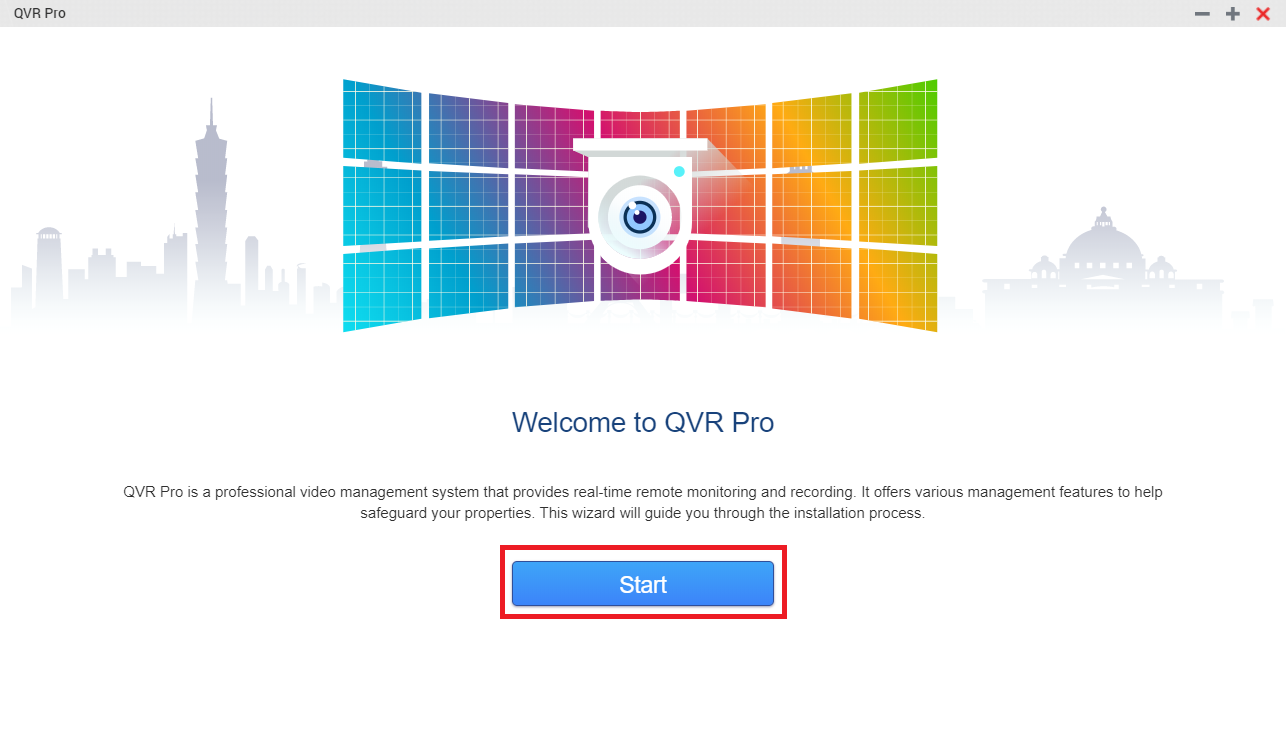
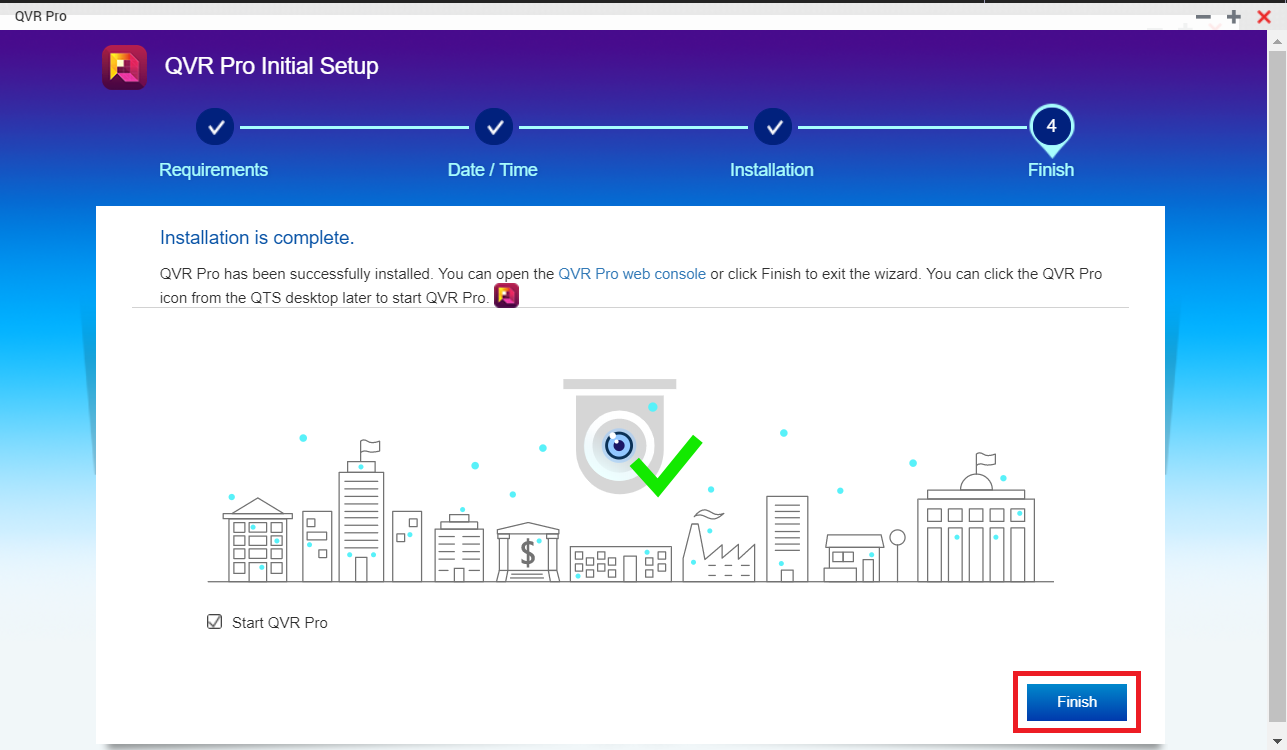
    4. Click Open.

      The QVR Pro Initial Setup window opens.

    5. Click Start.
    6. Verify that your system meets the minimum requirements and then click Next.
      Note
      A minimum of 8 GB of memory is required for using an HDMI local display.
    7. Review the date and time settings and then select I have confirmed that the date and time settings are correct.
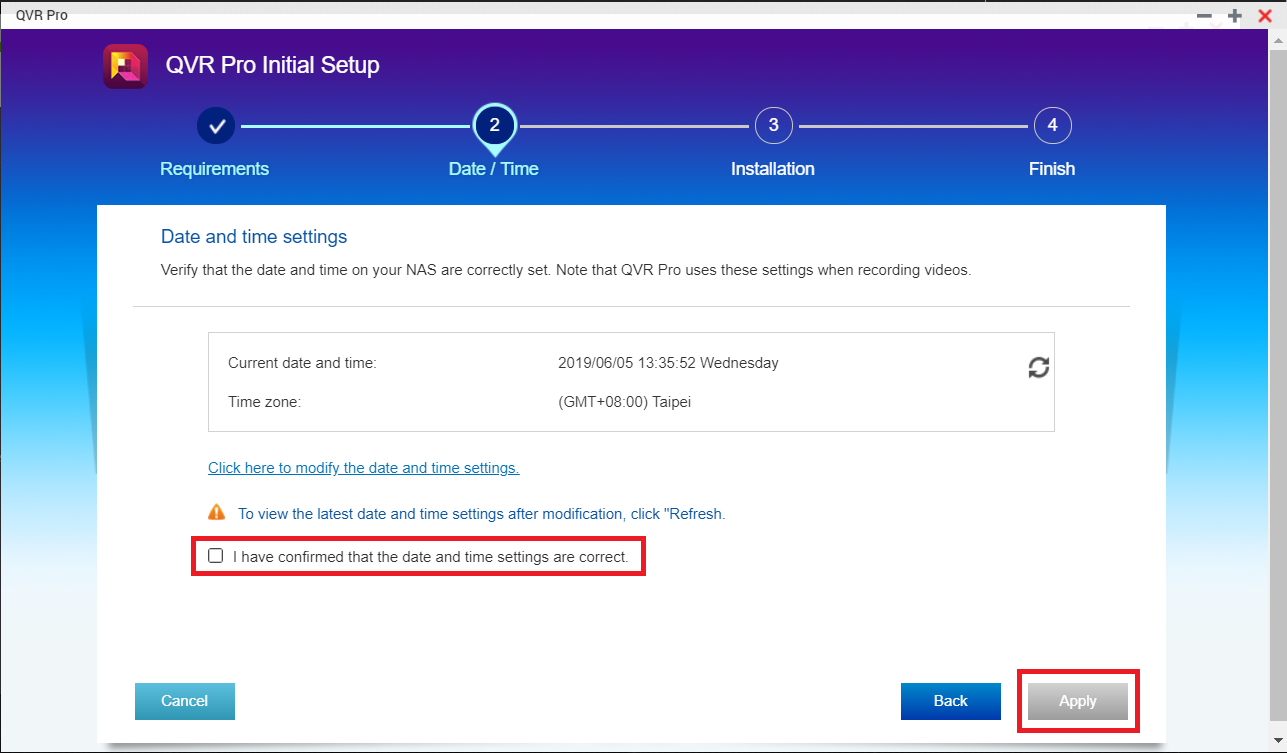
    8. Click Apply.

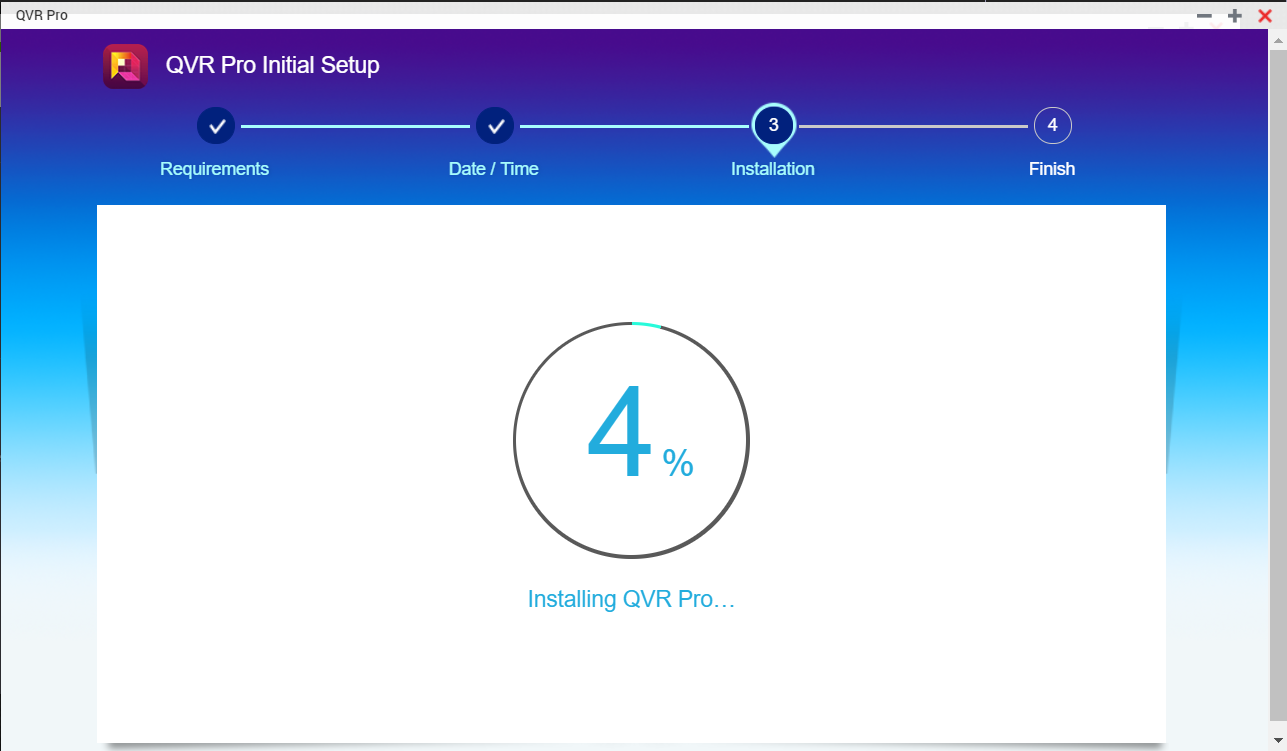
      QTS installs QVR Pro and a confirmation message appears.

    9. Click Finish.
    10. QVR Pro is now installed on the NAS.

  2. Add a recording space.
    1. Open Recording Storage from the desktop or main menu.
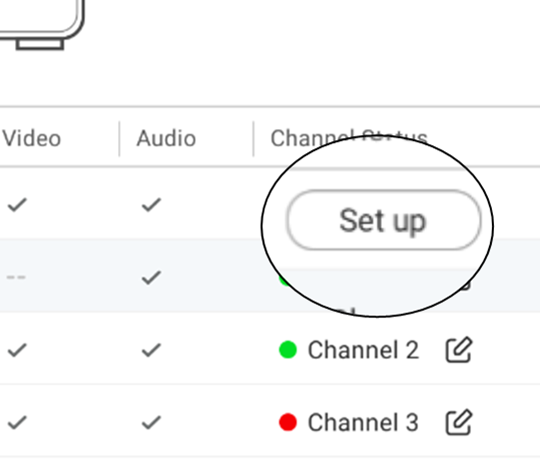
    2. Go to Recording Space.
    3. Select one of the following options.
      • Local - Add a local recording space to allocate a fixed amount of storage space for video recordings.
      • HybridMount - Add a cloud recording space using HybridMount shared folders and allocate a fixed amount of storage space for video recordings.
    4. Click one of the following buttons.

      Button

      Description

      +

      Click to add your first recording space.

      Add

      Click to add more recording spaces.

    5. Specify the following information.

      Field

      Task

      Name

      Specify a name for the recording space.

      Note:

      Name requirements:

      • Length: 1-30 characters.
      • Valid characters: A-Z, a-z, 0-9
      • Valid special characters: space ( ), hyphen (-), underscore (_), and period (.)

      Overwrite Trigger Threshold

      Select the overwrite trigger threshold.

      Note:

      QVR Pro starts overwriting the oldest recording data when the percentage of used recording space exceeds the specified threshold.

    6. Select a volume or a shared folder.
    7. Specify the estimated size of allocated space.
    8. Click Next.
    9. Optional: Assign a spare volume or a spare shared folder if available.
    10. Click Next.
    11. Review the summary.
    12. Click Apply.
    13. Click Finish.
  3. Add a USB camera.
    1. On QTS, go to App Center > Surveillance.
    2. Locate QUSBCam2 and then click Install.

      QTS installs QUSBCam2.

    3. Click Open.
    4. Connect a USB camera to the NAS.
    5. Click Set Up.
    6. Select an unassigned channel and then click Add.

    7. Keep the default settings of the USB camera.
    8. Click Apply.
    9. Go to All Channels and check whether the preview thumbnail functions properly.
      Note
      You can share your USB camera streams via HTTP or RTSP with QVR Pro.
      For details, see How to share USB camera streams?
  4. Add the camera to QVR Pro.
    1. On QVR Pro, open Camera Settings from the desktop or main menu.
    2. Click one of the following buttons.

      Button

      Description

      +

      Click to add your first camera.

      Add

      Click to add more cameras.

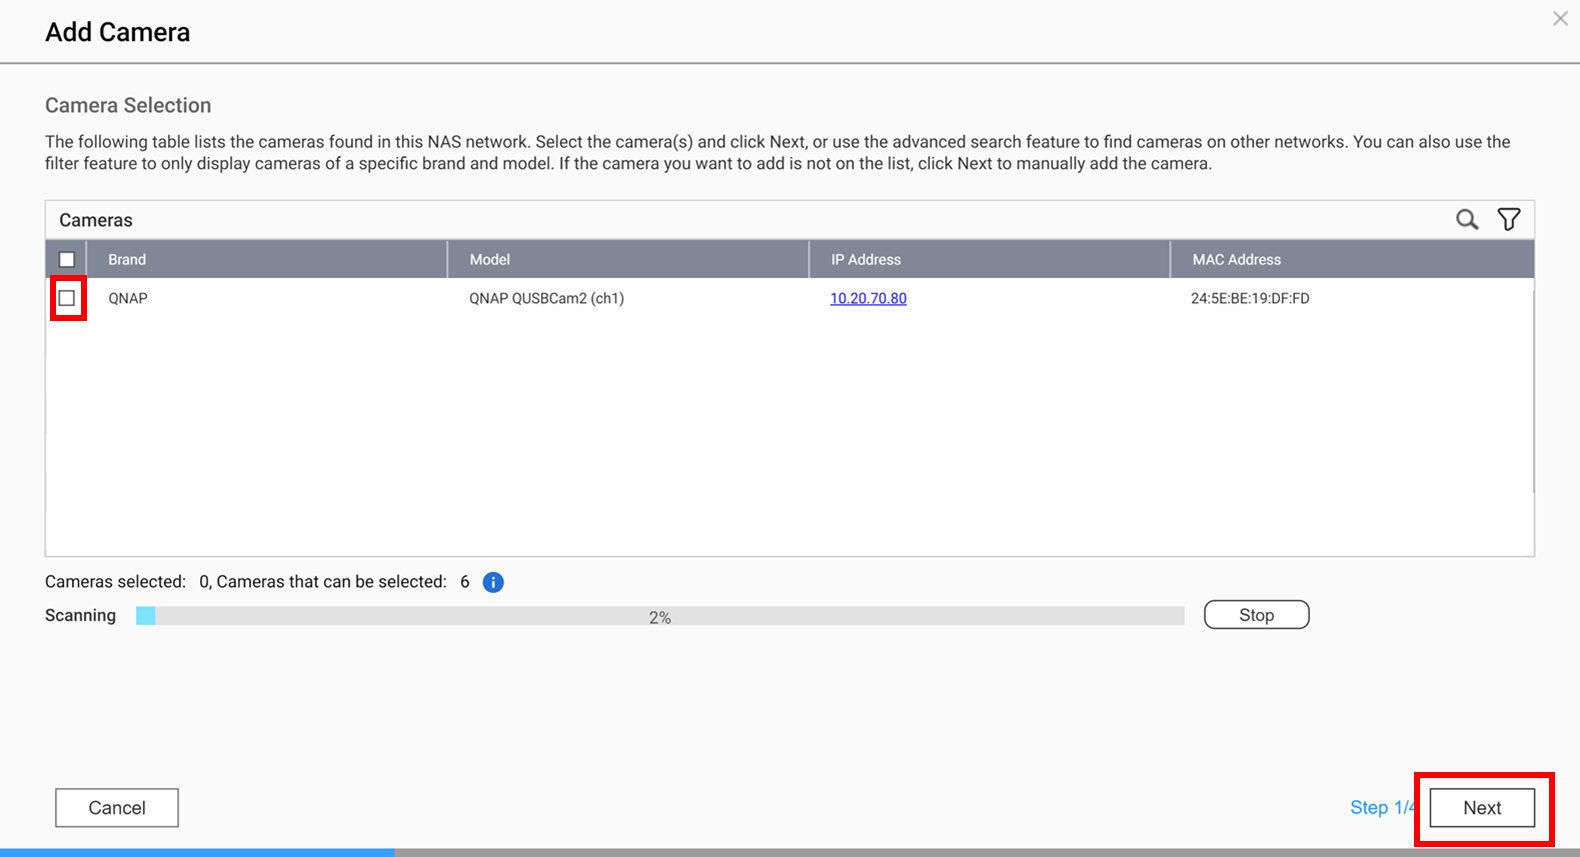
      The Camera Selection screen appears.

    3. Select the USB camera and then click Next.
    4. Enter the login credentials.
      Tip

      You can click Test to verify the camera connection.


    5. Click Next.
    6. Select Edit later and then click OK to keep the default settings.
      Tip

      You can configure the streaming and recording settings at a later time.


    7. Click Finish.

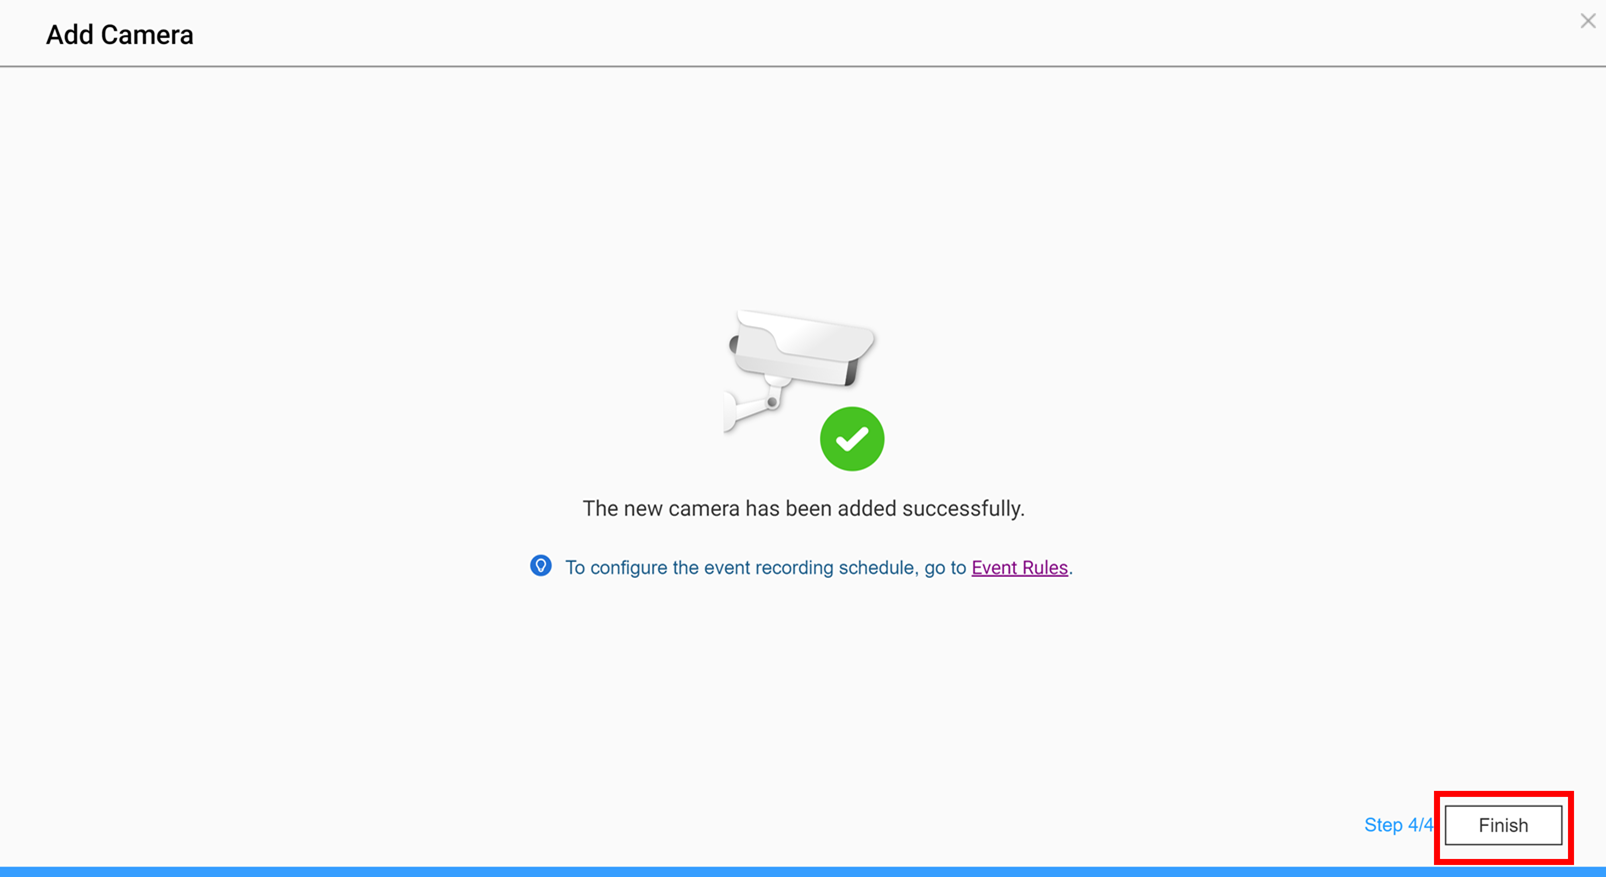
      The USB camera is successfully added to QVR Pro.

Was this article helpful?

42% of people think it helps.
Thank you for your feedback.

Please tell us how this article can be improved:

If you want to provide additional feedback, please include it below.

Choose specification

      Show more Less

      This site in other countries/regions:

      open menu
      back to top