How to perform the file sync from QTS to QES
Applied models:
All NAS model
Applied firmware:
QES-2.0.0 or above / QTS-4.3.6 or above with HBS3
Scenarios:
I purchased a new QNAP NAS with QES system and I would like to do the data sync from my old QNAP NAS with QTS system to the new one.
Solution:
Please follow the steps below to proceed it:
1. In the NAS with QES, please configure
a. In Backup Station >> Backup Server >> Rsync Server, make sure the port 873 is configured.
b. In Backup Station >> Backup Server >> Rsync Server, tick the checkbox of Allow remote Rsync server to back up data to NAS and apply it.
 c. Remember to enable SSH Service on the port that you plan to do the sync in Control Panel >> System >> Network >> Service Binding > SSH Service and apply it

2. In the NAS with QTS, please start to configure the sync job
-
Go to App Center >> Download and install Hybrid Backup Sync
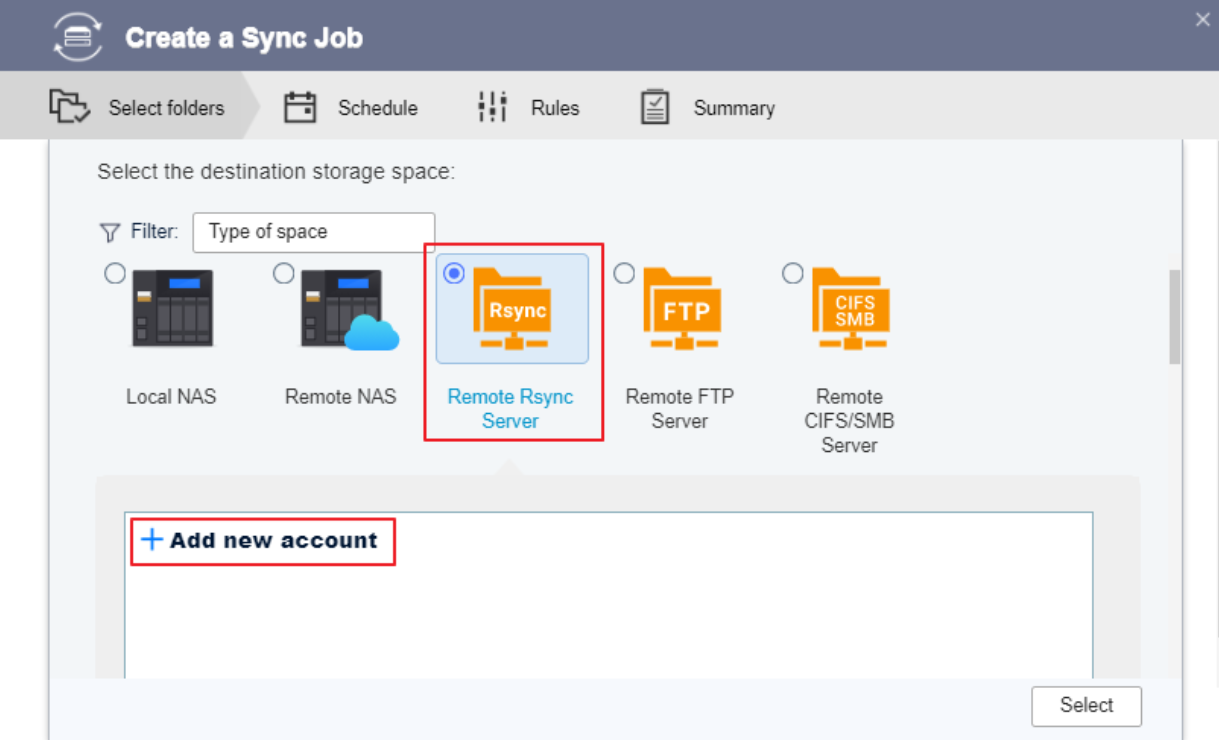
- Go to Hybrid Backup Sync >> Sync >> Create >> One-way Sync Job >> Create a Sync Job, choose Remote Rsync Server and then click on Add new account create it.

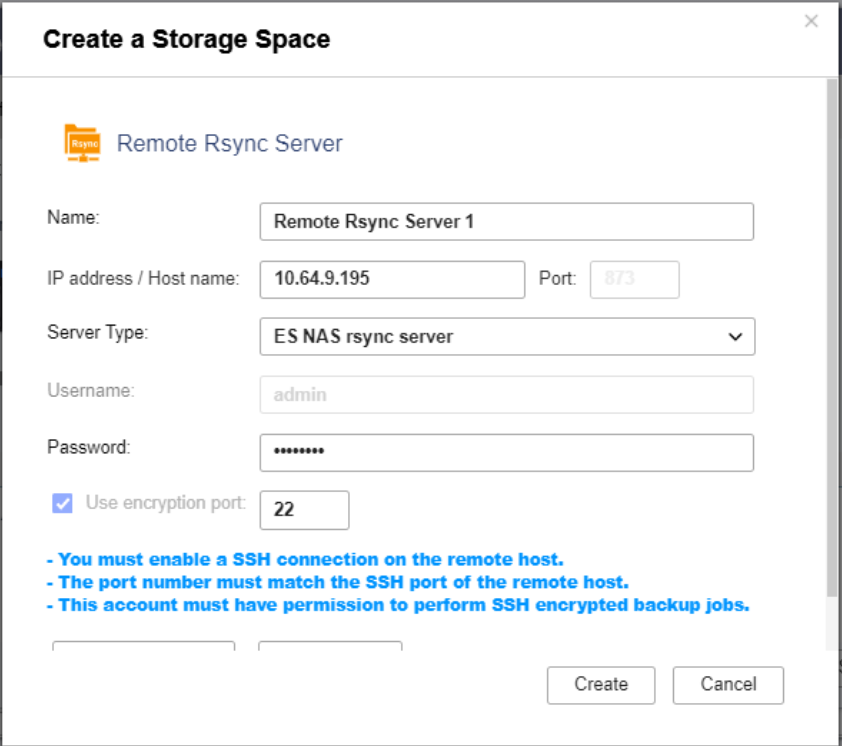
- Enter IP address of QES NAS
- Select Server Type as ES NAS rsync server
- Enter the Admin’s password of QES NAS and create it.

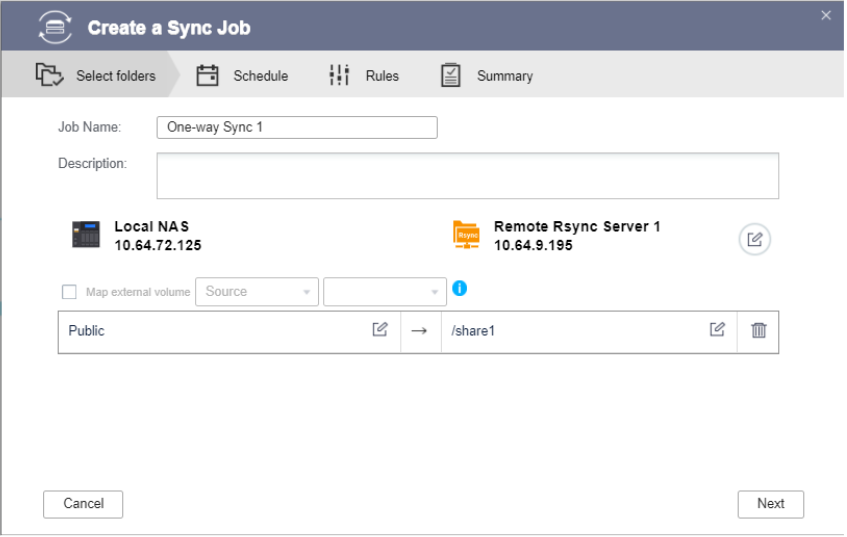
- Select the source folder and the destination folder and then click Next to configure the rest of sync options.

- The sync job is created and you can click on Sync Now to start the sync.


