Using QNAP NAS VLAN with Virtualization Deployment
General Information
VLAN (Virtual Local Area Network) can be used to create different network segments for different devices to communicate with each other as if they were in a private network regardless of their physical location. Devices joined to a VLAN can only be accessed by other devices of the same VLAN ID.
QNAP NAS can be integrated in a VLAN by using the VLAN feature. By adding the NAS to the VLAN, only the devices using the same VLAN are able to access the NAS. This increases the data security of the NAS.
This tutorial shows you how to set up a VLAN in a VMware vSphere environment and how to join the NAS to a VLAN to allow private access to the NAS.

Configure VLAN on a switch
To allow VLAN packets to be transmitted through a switch/router, you may need to configure port settings.
Important: In this example, we use a QSW-M408-4C switch and have configured the network port to support 802.1Q.
- Log into the switch with the administrator's account.
- Enter the following commands (where XX is the specific network port number for VLAN communication).
# enable
# configure terminal
# interface gigabitEthernet 0/XX
# switchport mode trunk
Tip: Refer to the user manual of your switch for VLAN configuration.
Enable VLAN on QNAP NAS
Important: VLAN is only supported by x86-based QNAP NAS.
- Log into the NAS as an administrator.
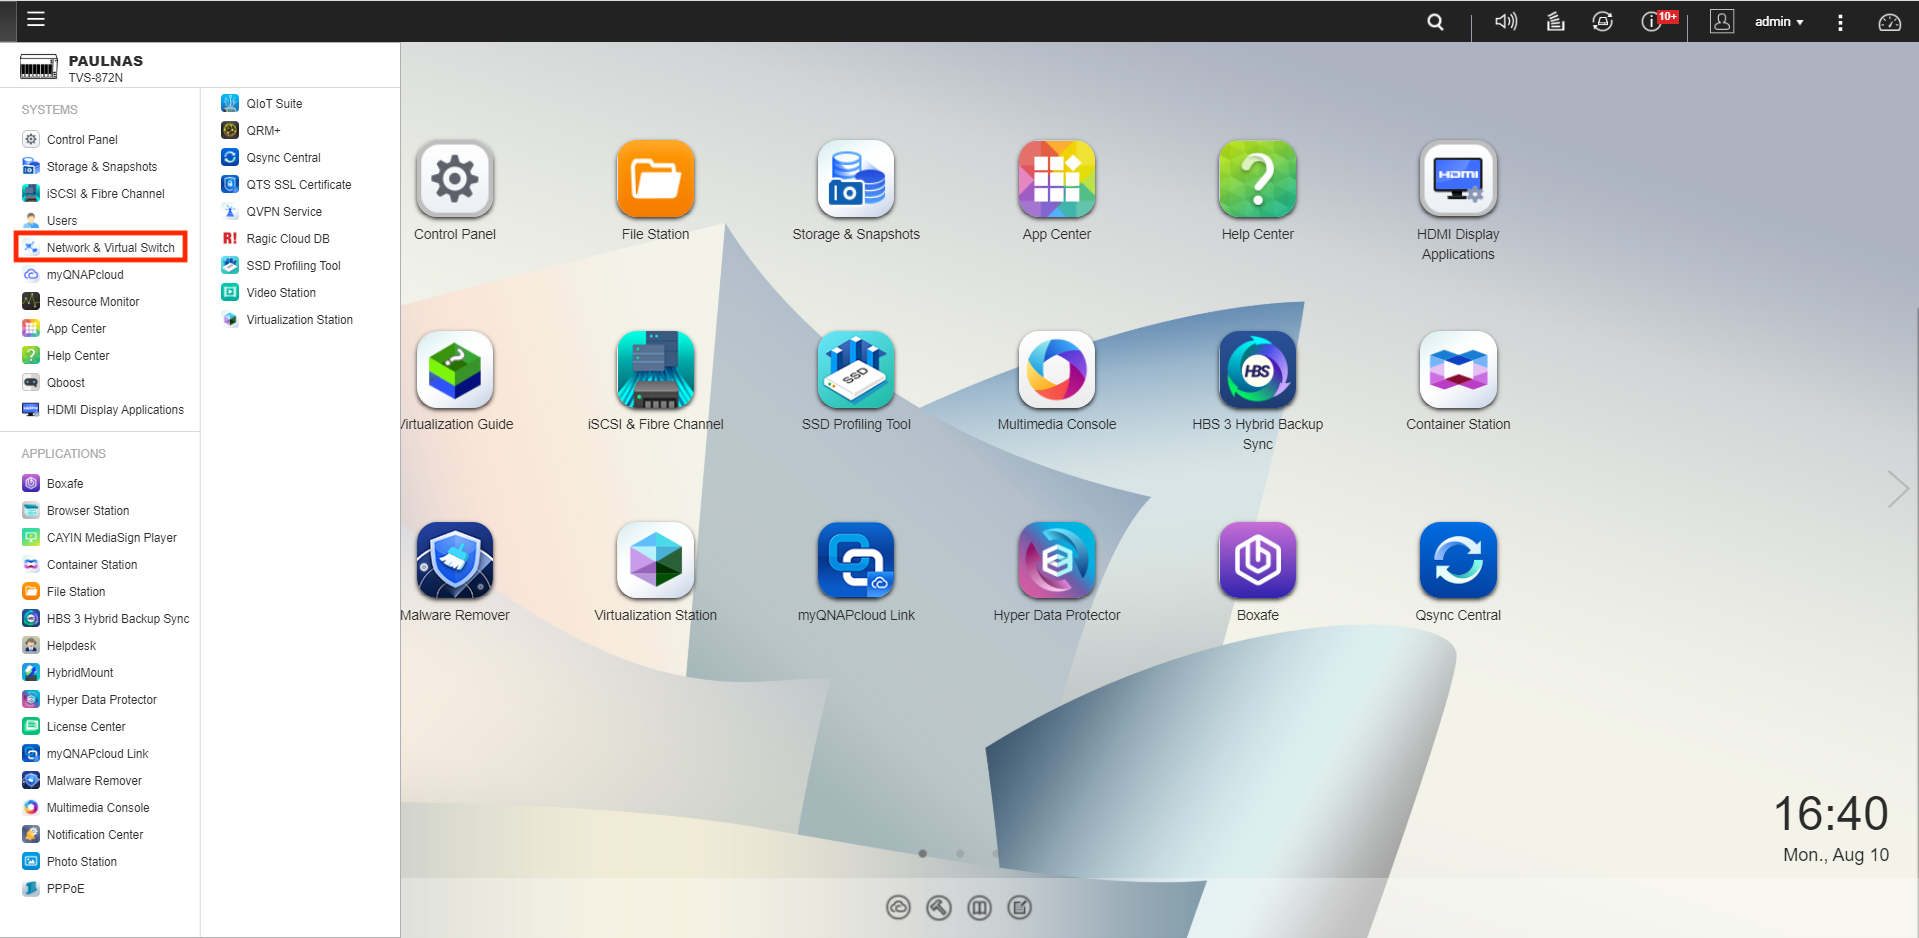
- Open Network & Virtual Switch.

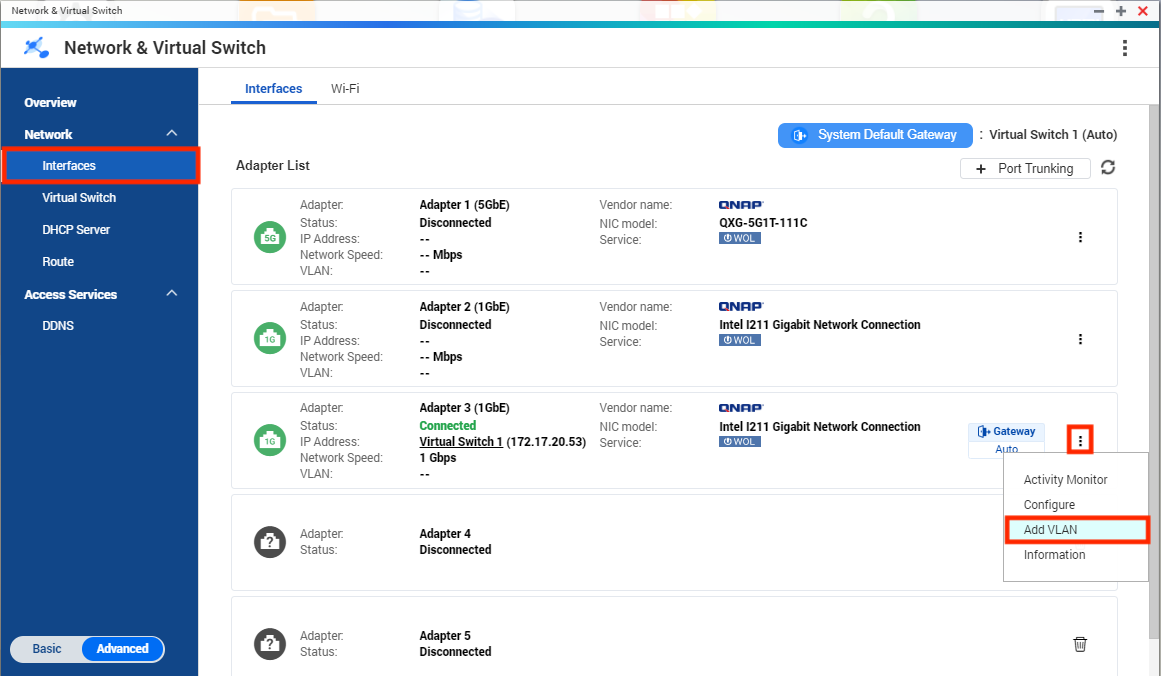
- Go to Network > Interfaces.

- Choose the network interface to add a VLAN ID to.
- Click
 > Add VLAN.
Tip: If your NAS has two LAN interfaces, we recommend enabling VLAN on only one interface. This allows you to still connect to the NAS using the other interface if an incorrect VLAN is chosen. If you change the VLAN on every network interface and lose connectivity, hold the NAS reset button for 3 seconds to restore the default network configuration.
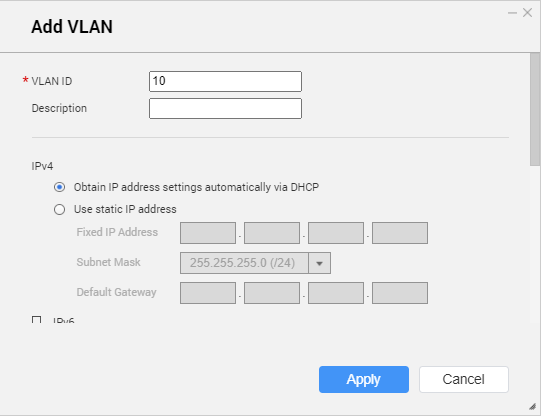
The Add VLAN window opens. - Enter a VLAN ID.
Important: The VLAN ID must be between 0-4094.

- Click Apply.
Configure VMware vSphere VLAN
- Open VMware ESXi.
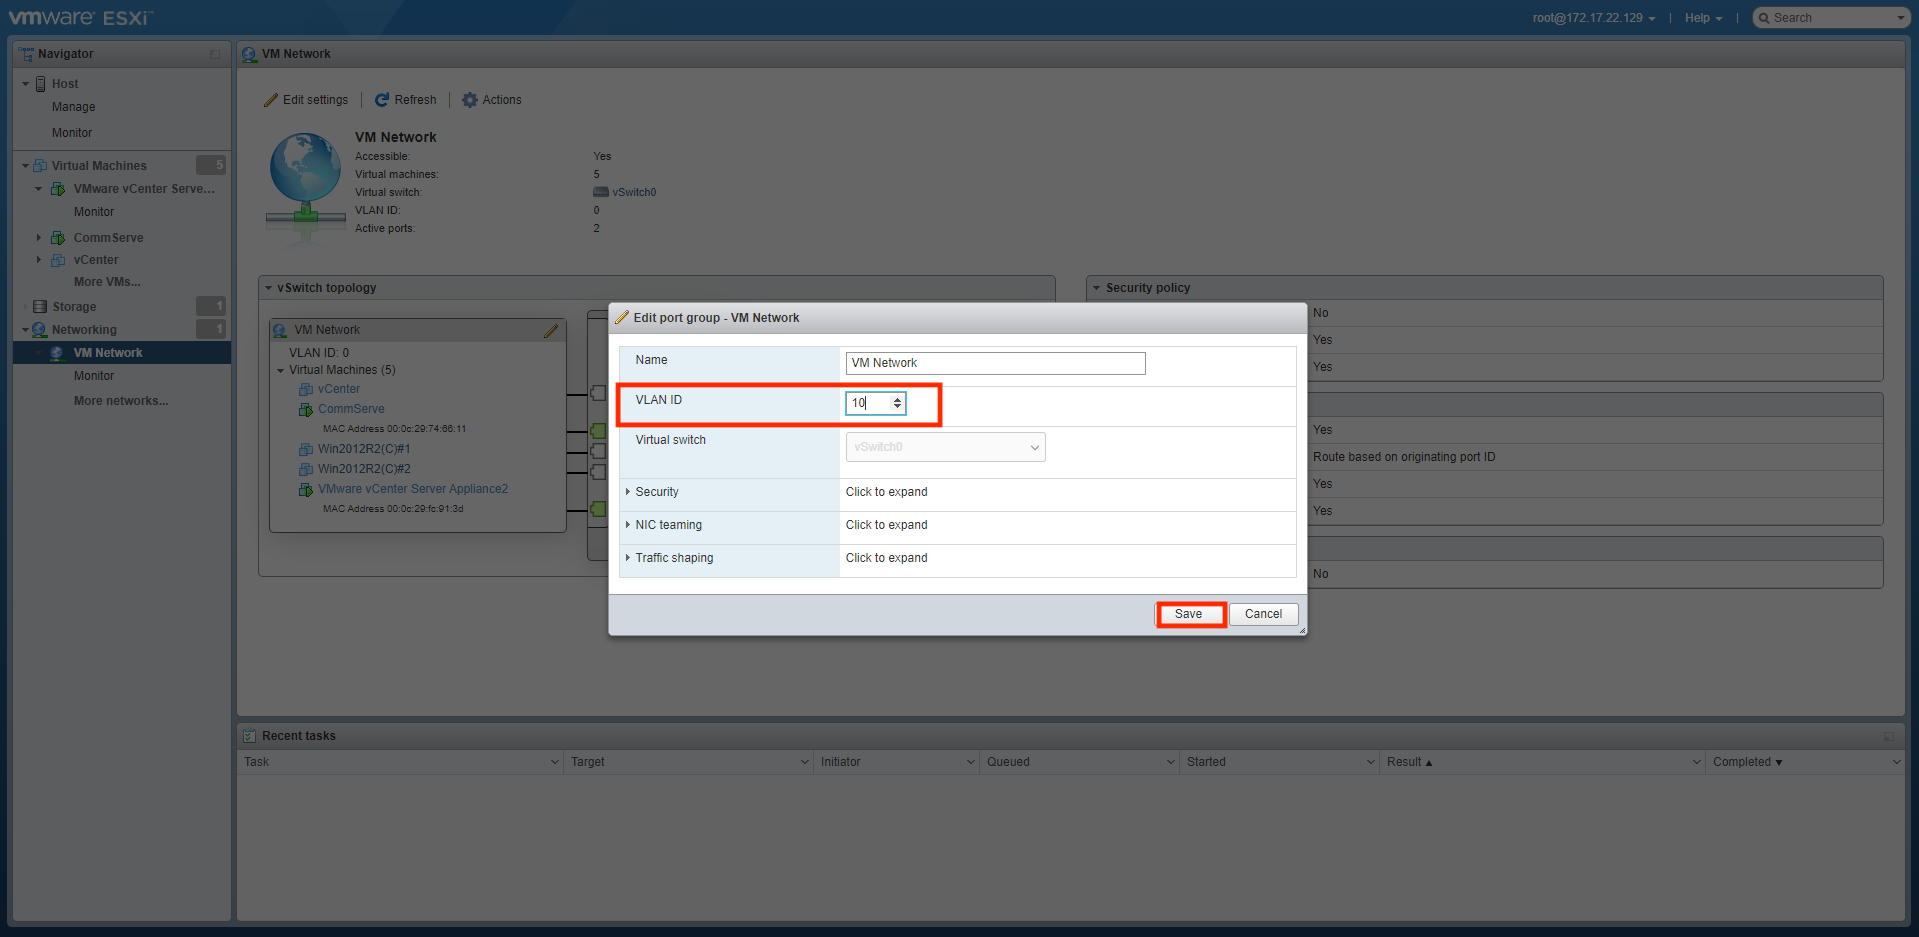
- Go to Networking > VM Network.
- Click Edit settings.

- The Edit port group - VM Network window opens.
- Enter the VLAN ID.

- Click Save.
- Open the virtual server management console.
- You can now set up a datastore that connects to the NAS or use the network command in the console to test the connection.
Important: Refer to your virtualization system’s documentation for more information.


