Creating a SmartURL on myQNAPcloud for Remote Access


Datum poslední úpravy: 2020-08-17

myQNAPcloud provides you with remote access to your QNAP NAS. With myQNAPcloud, even when you are away from the home or office, you can still easily access, manage, and share files stored on your NAS.

You can create a SmartURL on myQNAPcloud and use this link to remotely access your QNAP NAS from any web browser.

  1. Log on to QTS.
    Note:

    The default URL of QTS is http://<IP address>:<port>. For example, http://10.00.00.00:8080.

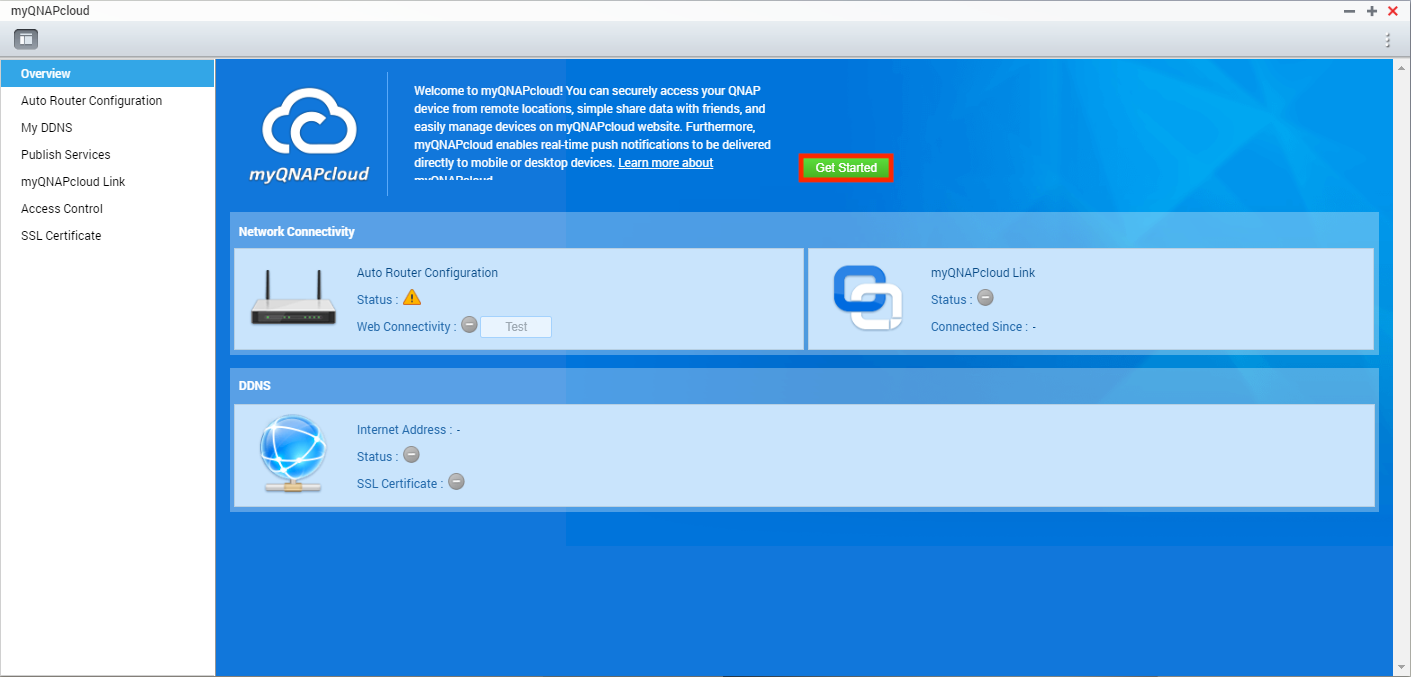
  2. Go to myQNAPcloud > Overview.
  3. Click Get Started.

    The myQNAPcloud wizard appears.

  4. Click Start.
  5. Specify your myQNAPcloud ID and password and then click Next.
    Note:

    Your myQNAPcloud ID is the email address that you used to register for an account.

  6. Specify the device name and then click Next.
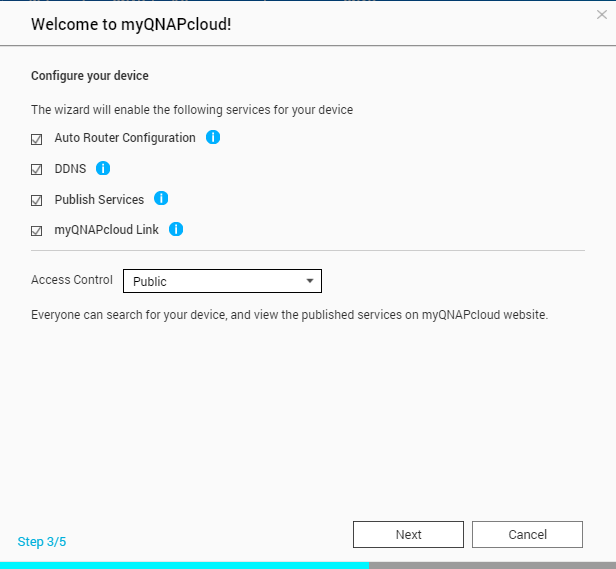
  7. Ensure that Auto Router Configuration, DDNS, Publish Services, myQNAPcloud Link are selected.
  8. Specify the access control and then click Next.
    • Public

    • Private

    • Customized

    The registration is completed and the Summary screen appears.

  9. Click Finish.

myQNAP generates a SmartURL that you can use to remotely access your NAS from web browsers.

To copy the SmartURL, return to the Overview screen.
Byl tento článek užitečný?

61% lidí si myslí, že to pomáhá.
Děkujeme vám za vaši zpětnou vazbu.

Sdělte nám prosím, jak lze tento článek vylepšit:

Pokud chcete poskytnout další zpětnou vazbu, uveďte ji níže.

Zvolte specifikaci

      Zobrazit více Zobrazit méně

      Tato stránka v jiných zemích / oblastech:

      open menu
      back to top