How do I store Boxafe data on a separate NAS with iSCSI?
Applicable Products
Boxafe 2.0 or later
Introduction
Backup data in Boxafe is stored in the Boxafe storage path, which is a shared folder on the NAS device. The Boxafe storage path can be any shared folder on the NAS device. Using iSCSI (Internet Small Computer System Interface), the path can be set to a shared folder on separate NAS device. Storing Boxafe backup data on a separate NAS device via iSCSI allows you to implement flexible storage architecture and scaling.
How to store Boxafe data on a separate NAS with iSCSI
Assuming the primary NAS is the NAS running Boxafe, and the secondary NAS is the iSCSI Target and where Boxafe data will be stored, perform the following steps:
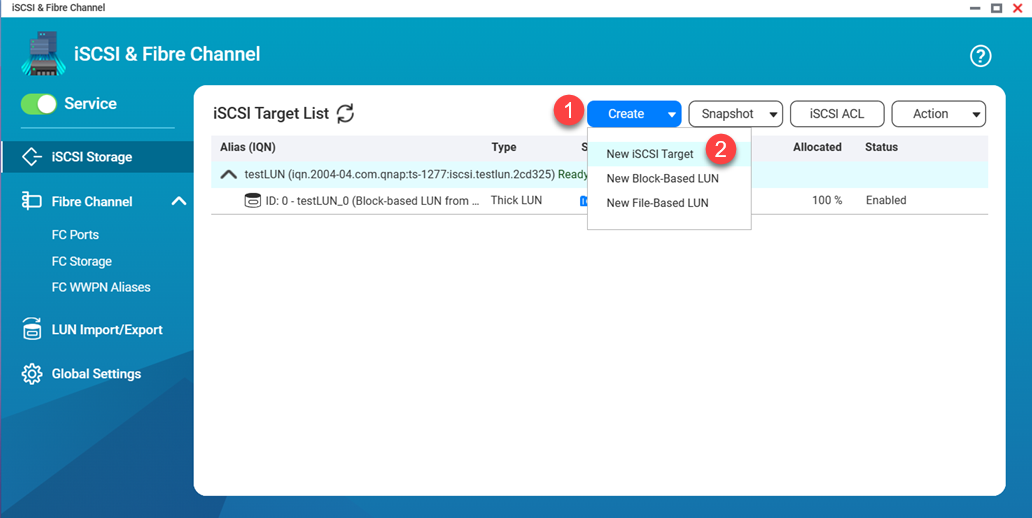
Step 1: Create an iSCSI target on the secondary NAS
- Log on to the secondary NAS as an administrator.
- Open iSCSI & Fibre Channel.
- Click Create > New iSCSI Target.
 The iSCSI Target Creation Wizard appears:
- On the Introduction tab, click Next.
The Configure tab appears. - On the Configure tab, specify the Name and Target alias of the iSCSI Target.
- Click Next.
The CHAP tab appears. - For CHAP Authentication, select No CHAP.
- Click Next.
The Network Protocol tab appears. - Select one or more network adapters the iSCSI Target can use.
- Click Next.
The Summary tab appears. - Review the iSCSI Target details.
- Click Apply.
The Block-Based LUN Creation Wizard appears. Here you need to create a LUN for the iSCSI Target.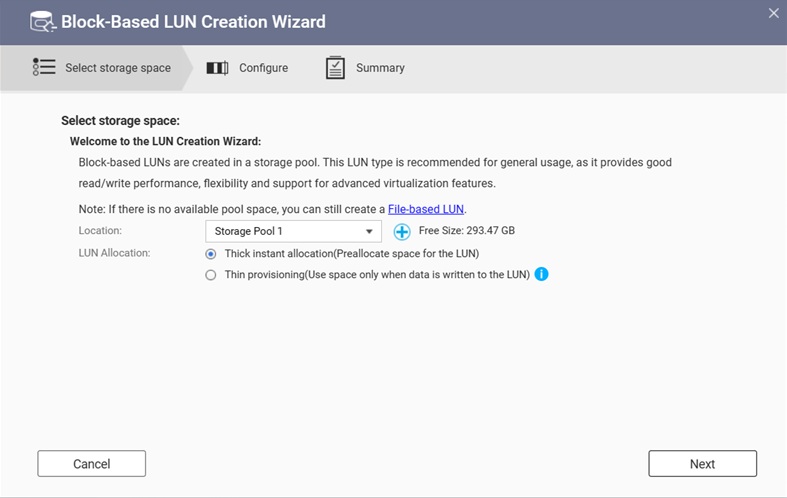
- On the Select storage space tab, for Location, select the storage pool where the Boxafe backup data will be stored.
- Click Next.
The Configure tab appears. - Specify the LUN Name and LUN Capacity.
- Click Next.
The Summary tab appears. - Click Finish.
The iSCSI Target is created on the secondary NAS.
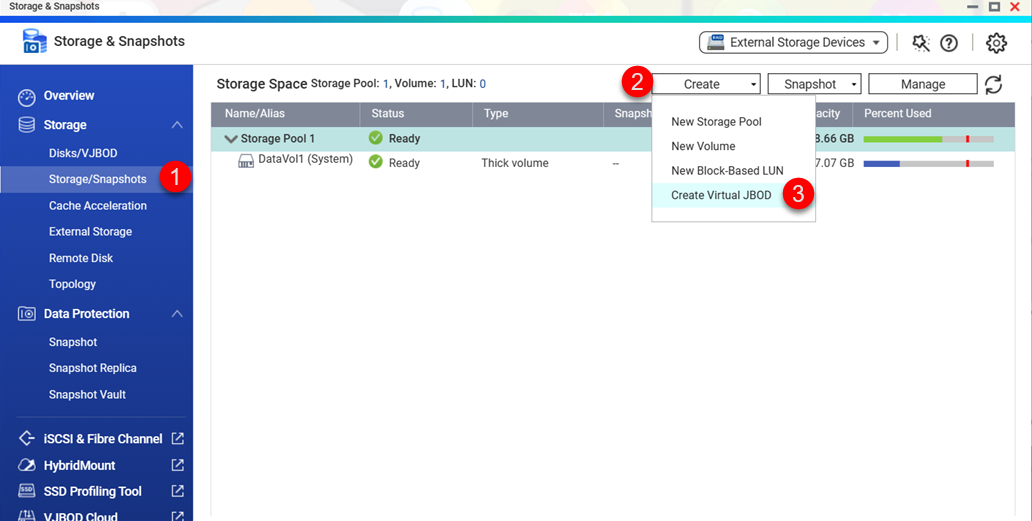
Step 2: Create a virtual JBOD and storage pool on the primary NAS
On the primary NAS you need to create a virtual JBOD, a storage pool, and a volume in the storage pool. Perform the following steps:
- Log on to the primary NAS as an administrator.
- Open Storage & Snapshots.
- Go to Storage/Snapshots.
- Click Create > Create Virtual JBOD.
 The Create Virtual JBOD's Disk Wizard:
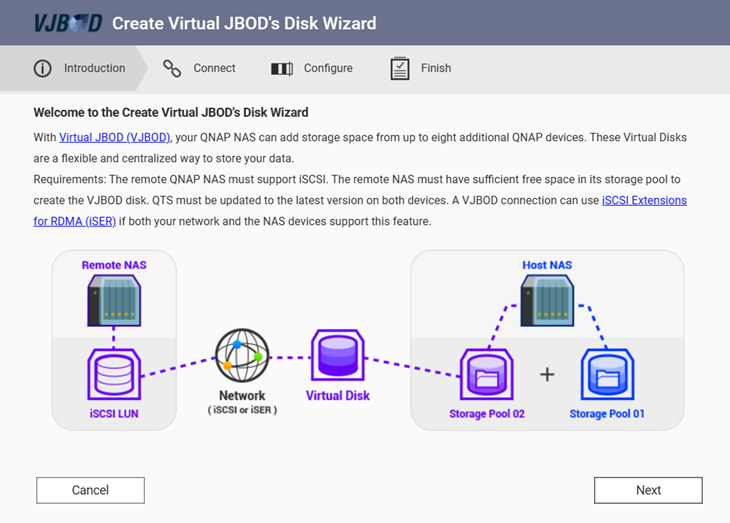
- On the Introduction tab, click Next.
The Connect tab appears. - Specify the NAS IP address, Account, and Password of the secondary NAS.
- Click Next.
The Select Interfaces page appears.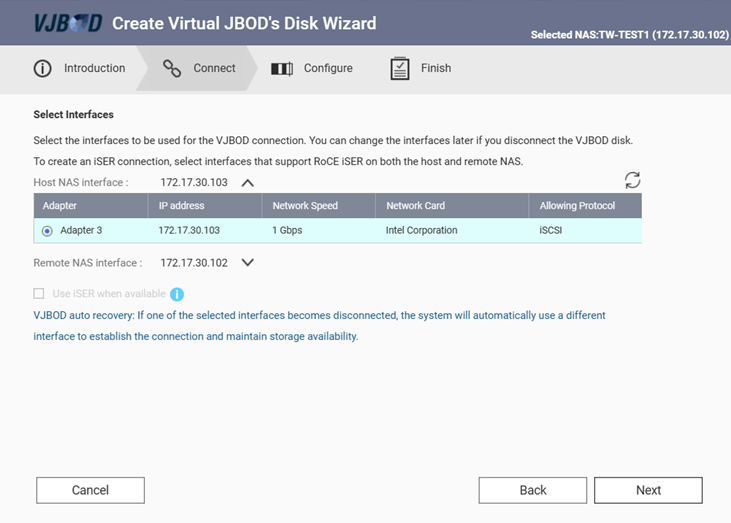
- Optional: Click
 and specify the network adapters that will be used for the virtual JBOD connection.
 - Click Next.
The Setup Virtual Disk's LUN page appears. - Select Choose an existing iSCSI LUN on the selected NAS.
- Click Next.
The Configure tab appears. - Select the LUN that was created in the first part of this tutorial.
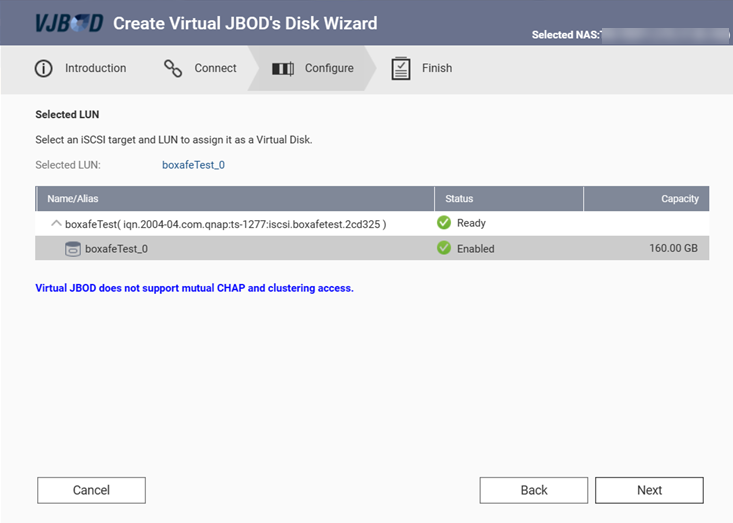
- Click Next.
The CHAP Authentication page appears. - Do not enable CHAP authentication.
- Click Next.
The Summary page appears. - Click Next.
The Finish tab appears. - Click Finish.
The Attach and Recover Storage Pool confirmation window appears.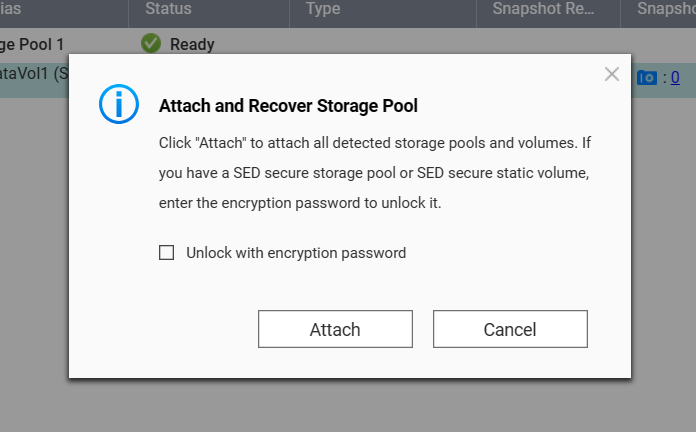
- Click Cancel.
The Virtual JBOD is created and appears in Storage & Snapshots > Storage > Disks/VJBOD > Disks (tab).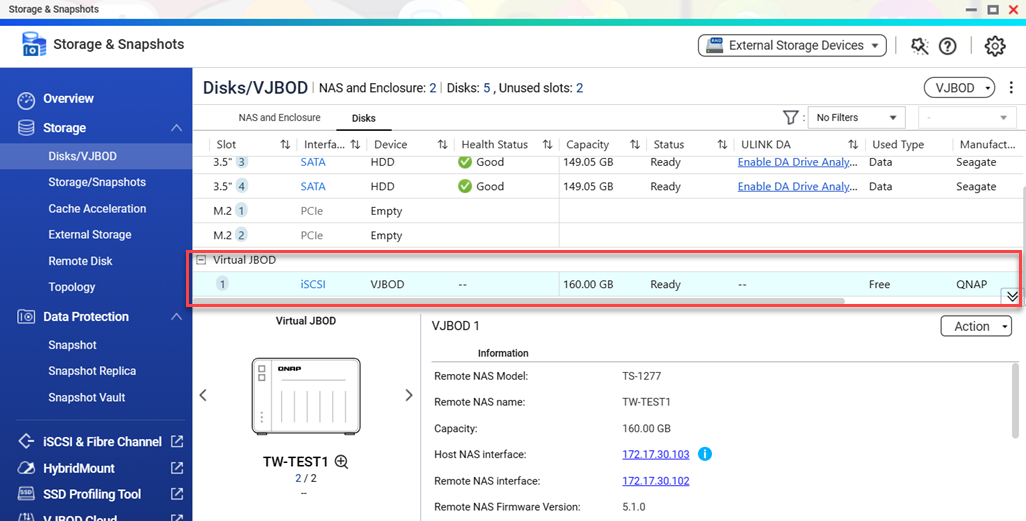
- Go to Storage/Snapshots.
- Click Create > Create New Storage Pool.
 The Create Storage Pool Wizard appears.
 - Click Next.
The Select Disk(s) tab appears. - For Enclosure Unit, select Virtual JBOD.
- Select the virtual JBOD you created in the previous steps of this tutorial.
- Click Next.
The Configure tab appears. Configure any additional settings here if needed. - Click Next.
The Summary tab appears. - Review the storage pool details.
- Click Create.
A confirmation window appears informing you that all data will be erased on the virtual JBOD disks. - Click OK.
The storage pool is created. X Create Completed window appears.
- Click Close.
- For more information on virtual JBODs, see VJBOD (Virtual JBOD) (QTS 5.2.x) or VJBOD (Virtual JBOD) (QuTS hero h5.2.x).
- For more information on storage pools, see Storage pools (QTS 5.2.x) or Storage pools (QuTS hero h5.2.x).
Step 3: (QTS) Create a volume on the primary NAS
If the operating system on your primary NAS is QTS, create a volume:
- Go to Storage > Storage/Snapshots and click Create > New Volume.
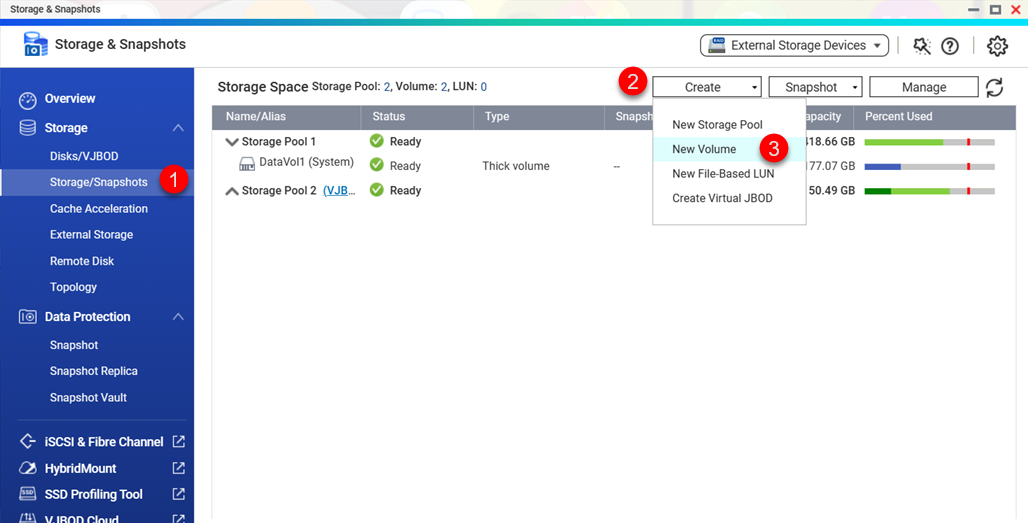 The Volume Creation Wizard appears.
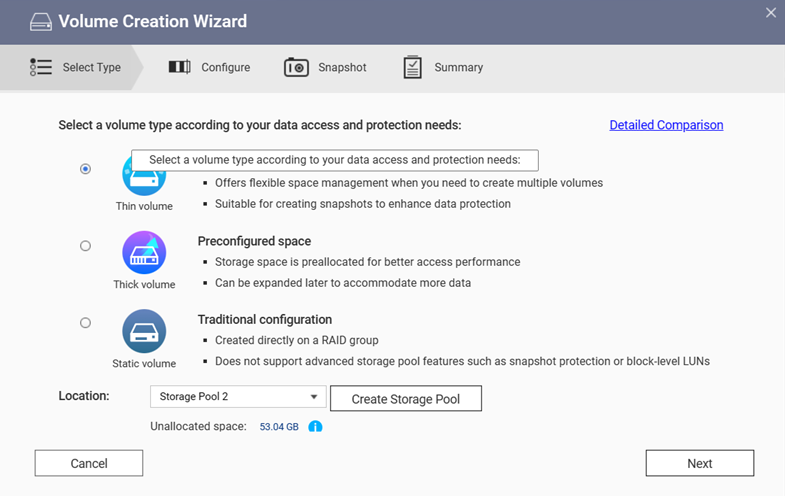
- For Location, select the storage pool you created in the previous steps of this tutorial.
- Click Next.
The Configure tab appears. - Configure any additional options if needed.
- Click Next.
The Snapshot tab appears. - Configure snapshots if needed.
- Click Next.
The Summary tab appears. - Review the new volume details.
- Click Finish.
The Volume X is Being Created window appears.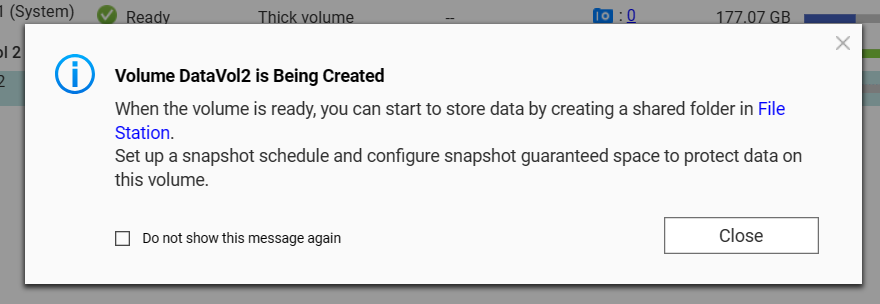
- Wait until the volume is successfully created before continuing to the next step.
Step 4: Create a shared folder on the primary NAS
Create a new shared folder on the new volume you created on the primary NAS:
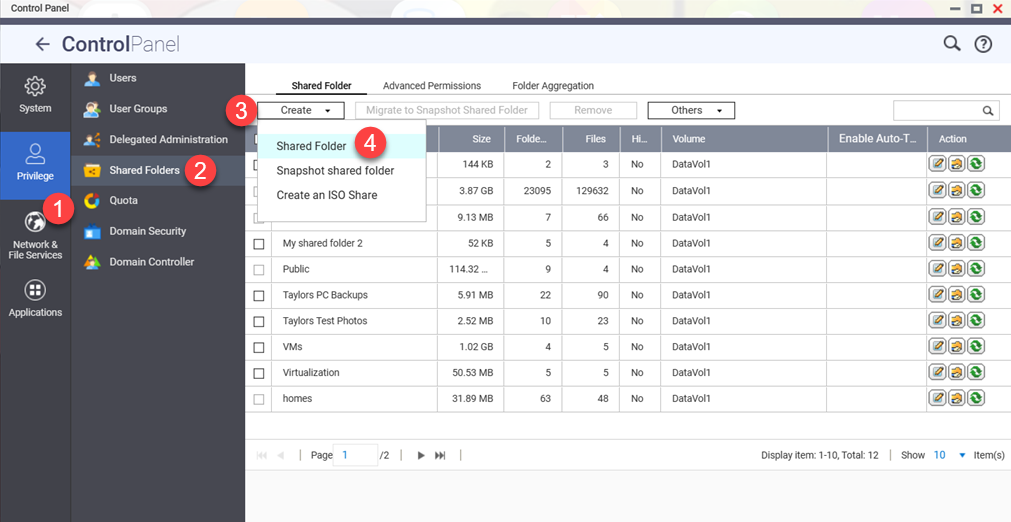
- Go to Control Panel > Privilege > Shared Folders > Shared Folder on the primary NAS.
- Click Create > Shared Folder.
- For Folder Name, specify a folder name.
- For Disk Volume, select the new volume created in previous steps of this tutorial.
- Optional: Configure other shared folder options.
- Click Next.
The Configure access privileges for users tab is displayed. - Configure user access privileges.
- Click Next.
The Properties tab is displayed. - Configure properties for the shared folder.
- Click Finish.
A new shared folder is created.
Step 5: Configure the Boxafe storage path on the primary NAS
The shared folder created in the last step of this tutorial is visible on the primary NAS as a normal shared folder but is physically stored on the secondary NAS via iSCSI. You must set the Boxafe storage path on the primary NAS to the folder on the primary NAS:
- Open Boxafe on the primary NAS.
- Go to Settings > Preferences > Storage Settings.
- Next to Storage path, click
 .
. The Storage Path Configuration window appears.
 - Select Use a pre-existing Boxafe storage path.
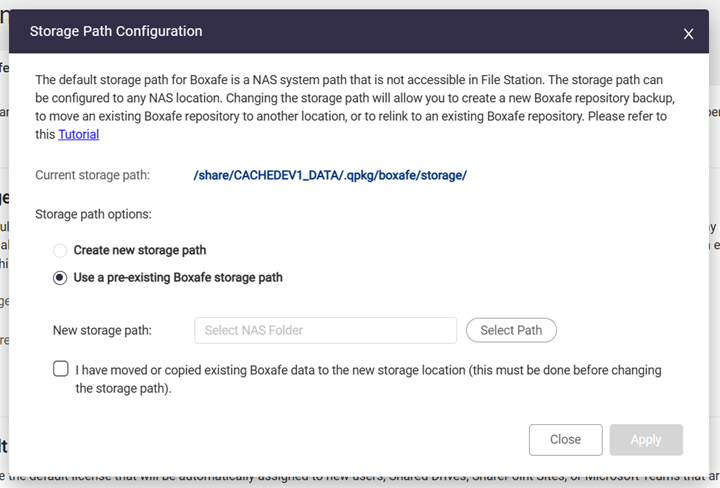
- Next to New storage path, click Select Path.
The Select NAS Folder window appears. - Select the shared folder created in previous steps of this tutorial.
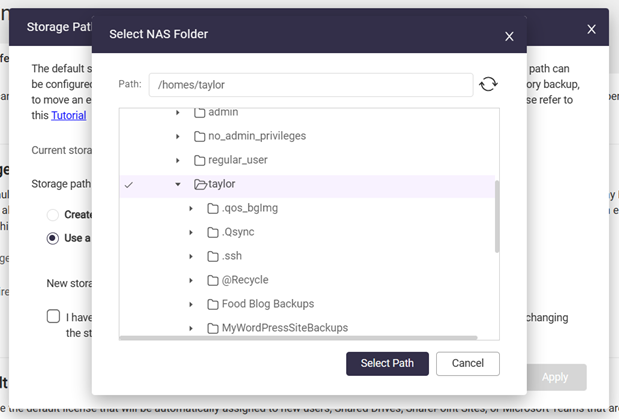
- Click Select Path.
- Select I have moved or copied existing Boxafe data to the new storage location.
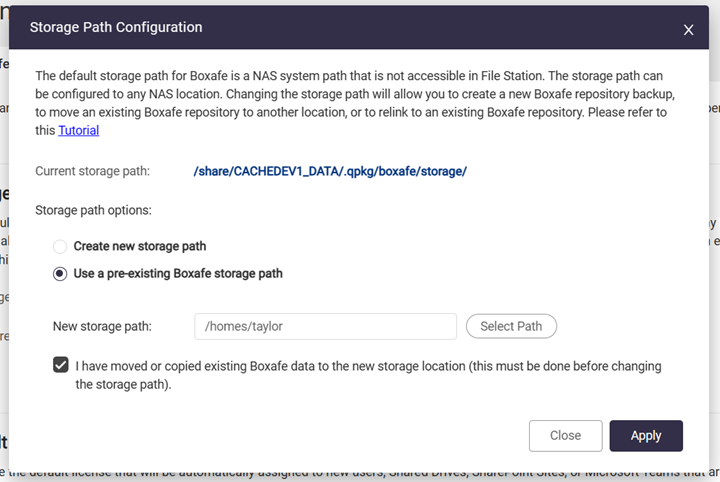
- Click Apply.
The Confirmation Storage Path Change window appears. - Enter your NAS account password.
- Click Confirm.
It may take several minutes to apply the new storage path. After the new storage path is successfully applied, a success window appears.
- Click OK.
- Refresh the browser page.
Boxafe will now use the shared folder physically located on the secondary NAS to store backup data.


