With increasingly stringent regulations on how information is stored, many countries require government agencies, financial institutions, and health care providers to comply with strict data archiving regulations. These regulations often include restrictions on tampering with archived data that has resulted in WORM (write-once-read-many) becoming increasingly common.
To meet the security requirements of enterprise storage, HBS 3 now supports S3 Object Lock to help you protect important organizational information. S3 Object Lock allows you to store objects using a WORM model and help prevent objects from being deleted or overwritten for a fixed amount of time or indefinitely. For details on S3 Object Lock, see here.
Important: This feature is only available in HBS 3 18.0.1012 or later.
You will need your Amazon S3 access key and secret key from the S3 web console.
- Open HBS 3.
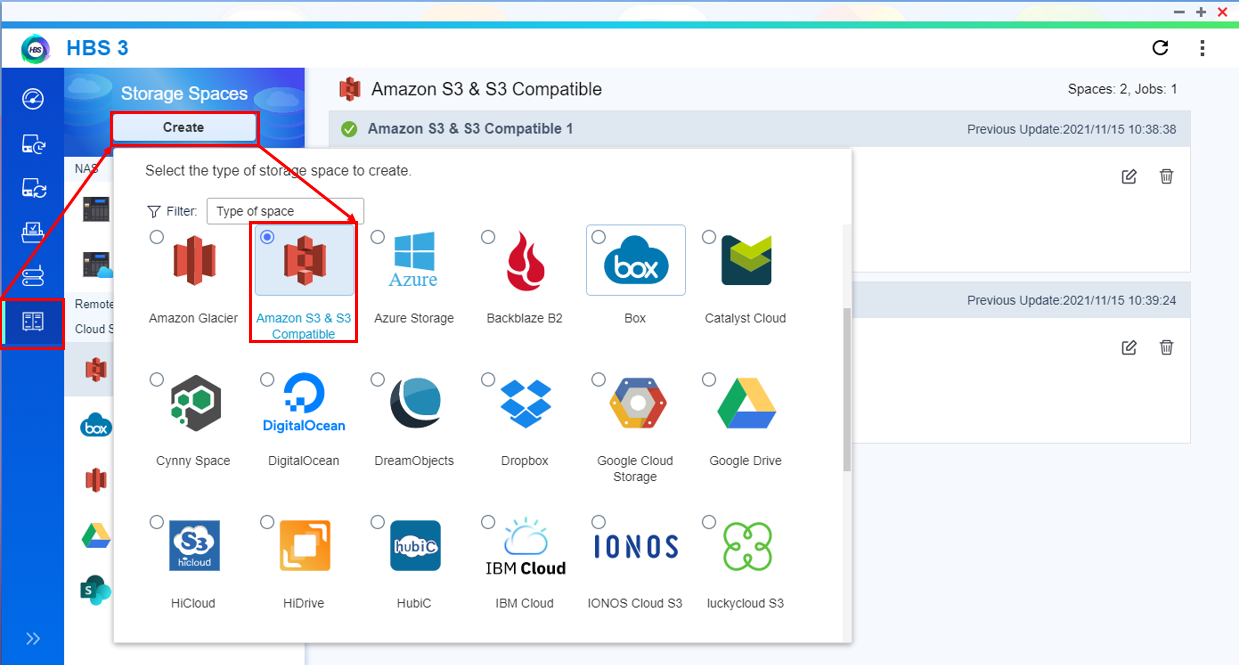
- Go to Storage Spaces.
- Click Create.
A storage space selection window opens.
- Select Amazon S3 & S3 Compatible.
The Create a Storage Space window opens.
- Configure the storage space settings.
| Setting | User Action |
| Name | Specify a name to identify the storage space. |
| Service provider | Specify the AWS regional service provider. |
| Access key | Enter your AWS access key. |
| Secret key | Enter your AWS secret key. |
- Optional: Select additional settings.
| Setting | Description |
| Use specific bucket | Allows you to control which bucket to use. |
| Use a proxy server | Allows you to use the system proxy server or configure another proxy server. |
| Use SSL connection | Requires SSL connection when accessing the remote NAS. |
| Validate SSL certificate | Verifies the validity of the cloud services SSL certificate. |
- Click Create.
HBS 3 creates the storage space.
- Go to Backup & Restore.
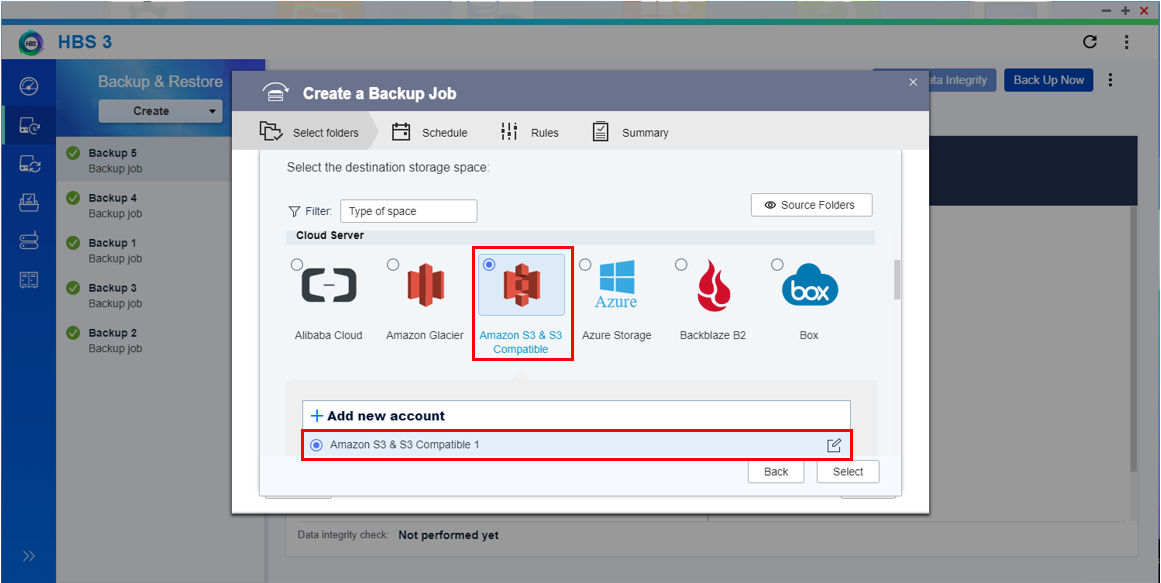
- Click Create, and then click New backup job.
The Create a Backup Job window opens.
- Select the source and destination.
- Select the source.
Important: Selecting a folder also selects all files and subfolders located inside.
The window displays the number of folders selected and their total size.
- Click Next.
- Click Amazon S3 & S3 Compatible.
- Select the storage space you previously created.
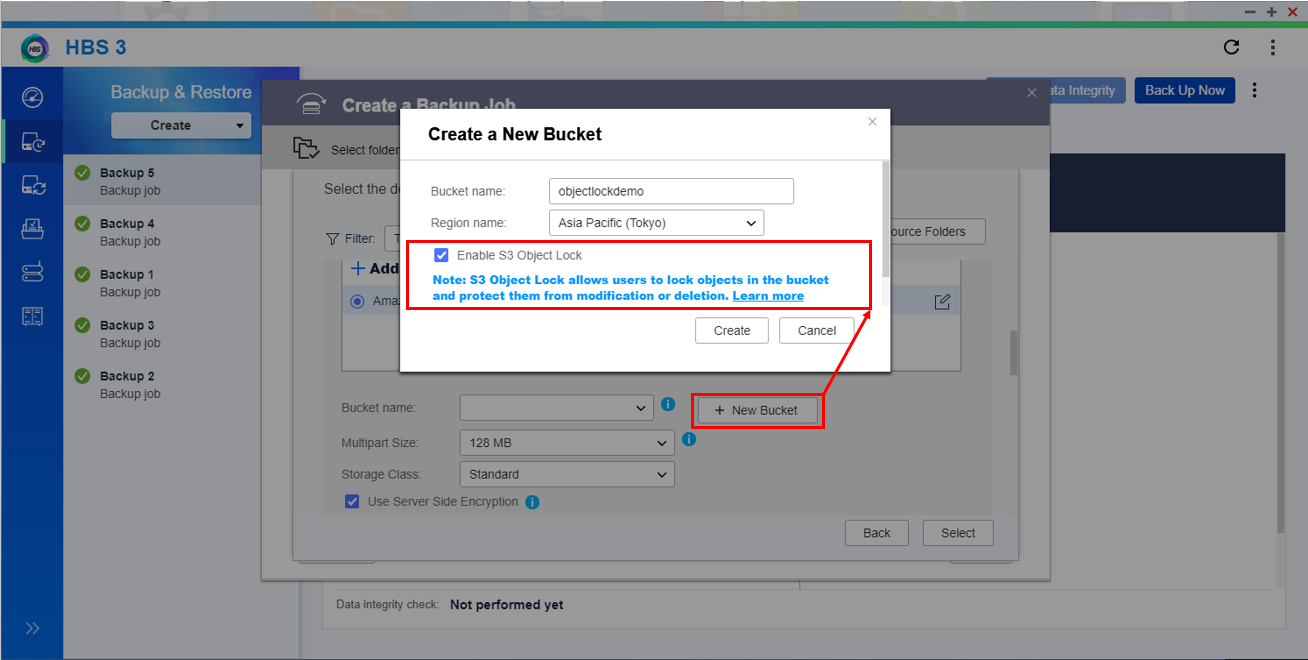
- Click + New Bucket .
The Create a New Bucket window opens.
- Configure the bucket settings.
| Setting | User Action |
| Bucket name | Enter a name used to identify the bucket. |
| Region name | Select the region where the bucket operates. |
| Enable S3 Object Lock | Select to allow users to lock objects in the bucket and protect data from modification or deletion. Note: You must select this option to use WORM storage and force HBS 3 to use the Compliance Object Lock mode for any uploaded objects. |
Tip: You can also select a pre-existing bucket from the Bucket name field. HBS 3 detects whether the bucket supports S3 Object Lock.
- Click Select.
- Select the destination.
- Click OK.
- Click Next.
- Optional: Configure advanced settings.
Note: For details, see the HBS 3 user guide.
- Specify the job identification information.
- Configure the schedule settings.
- Configure the version management settings.
- Configure the data integrity check settings.
- Click Next.
- Optional: Configure job methods.
Note: For details, see the HBS 3 user guide.
- Optional: Configure the job policies.
Note: Some policies are only available with certain destination types.
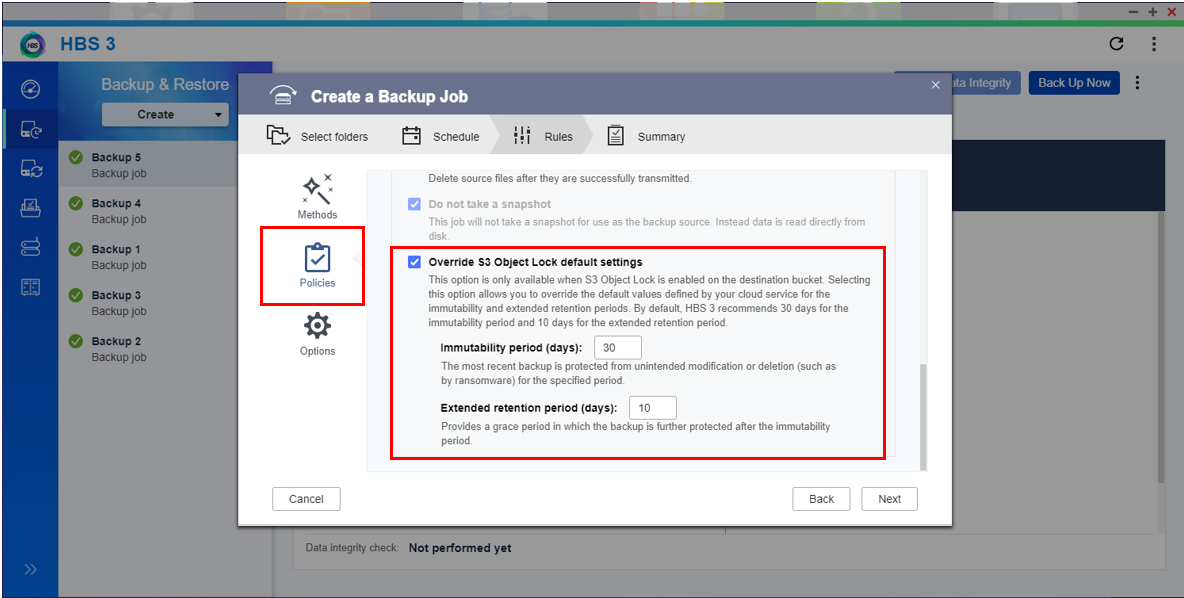
- Click Policies.
Note: For details on other policies, see the HBS 3 user guide.
| Policy | Description |
| Override S3 Object Lock default settings | Allows you to override the default Object Lock settings related to immutability and extended retention periods of an S3 bucket. This option is only available when S3 Object Lock is enabled on the destination bucket. -
Immutability period: Specifies the number of days that the most recent backup is protected from unintended modification or deletion (such as by ransomware). -
Extended retention periods: Specifies a number of days to provide a grace period. During this time, the backup is further protected after the immutability period. Tip: By default, HBS 3 recommends 30 days for the immutability period and 10 days for the extended retention period. |
- Optional: Configure the job options.
Note: Some options are only available with certain destination types.
- Optional: Configure the network interface assignment.
Note: For details, see the HBS 3 user guide.
- Click Next.
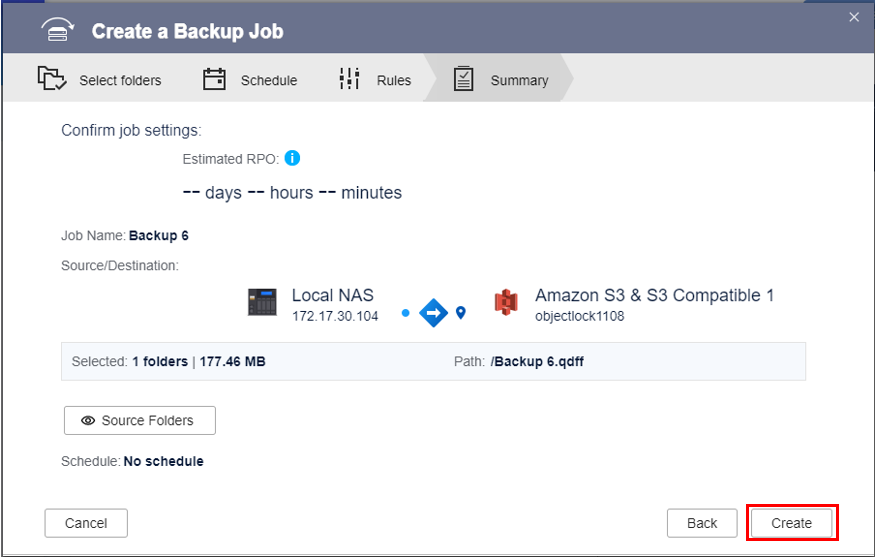
- Review the job summary.
- Click Create.
HBS 3 creates the backup job.
You can now start backing up to your S3 Object Lock storage space.
