How to create and use the iSCSI target service on a QNAP NAS
"A quick, simple method of implementing network storage solutions with high ROI"
- An Introduction to iSCSI and its Benefits
Before you get started - Creating an iSCSI Target
- Creating an iSCSI LUN
- Managing iSCSI Targets and LUNs
- Connecting to an iSCSI target using Microsoft iSCSI initiator in Windows
- Connecting to an iSCSI target using globalSAN iSCSI initiator in Mac OS
- Connecting to an iSCSI Target using Open-iSCSI Initiator on Linux
Additional Linux commands. - Reference: A Comparison of Block-based and File-based LUN Features
1. An Introduction to iSCSI and its Benefits
iSCSI (Internet Small Computer System Interface) is an IP-based (Internet Protocol) storage networking standard for linking data storage facilities. By carrying SCSI commands over IP networks, iSCSI is used to facilitate location-independent data storage and retrieval over LANs (Local Area Networks) and WANs (Wide Area Networks).
iSCSI enables clients such as computers, servers, and virtual machines to use storage from your QNAP NAS as virtual disks. Clients can partition, format, and use virtual disks exactly like local disks, and then use them for storage expansion or as backup destinations.

Before you get started
iSCSI Target: An iSCSI storage server. In this tutorial the target is your NAS.
iSCSI initiator: An iSCSI client. Initiators connect to targets and use their storage.
Warning: Connecting more than one initiator to the same target might result in data loss or damage to the NAS disks.
2. Creating an iSCSI Target
- Go to Storage & Snapshot > iSCSI Storage.
If this is the first time you have used iSCSI then QTS will prompt you to enable
the iSCSI service.

- Click New iSCSI Target.

The iSCSI Target Creation Wizard opens. - Click Next.
- Specify a name and alias, and then click Next.
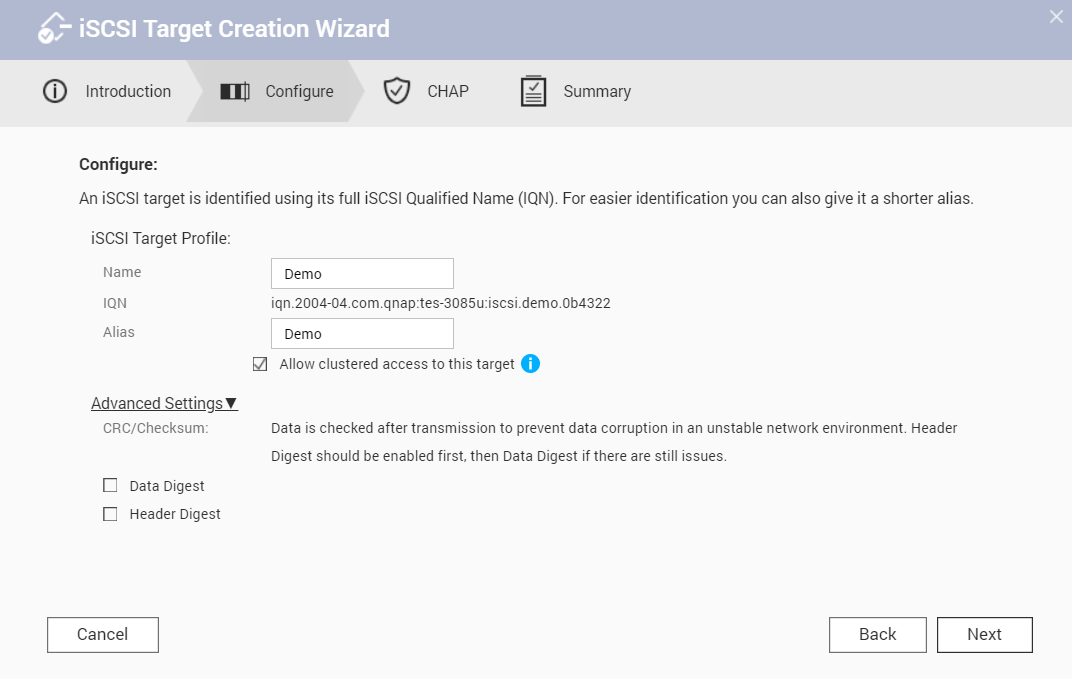
- Optional: Configure CHAP authentication, and then click Next.
Initiators must authenticate with the specified username and password when
connecting.

- Optional: Select Create an iSCSI LUN and map it to this target.
After you have finished creating the target, QTS opens the Block-Based iSCSI
LUN Creation Wizard. Follow this wizard to create a block-based LUN.
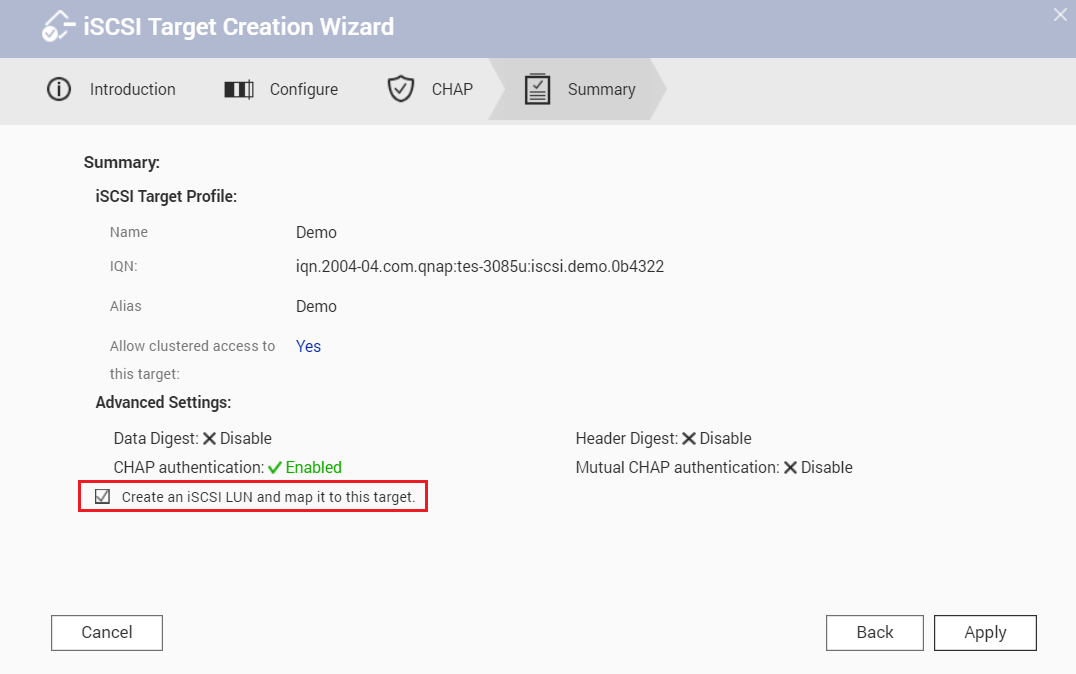
- Click Apply.
QTS creates the target. You can view it at Storage & Snapshots > iSCSI Storage > iSCSI Target List.
3. Creating an iSCSI LUN
An iSCSI LUN is a portion of storage space that can be utilized by initiators by connecting it to a target. There are two types of LUNs available in QTS.
Block-based LUNs use space from a storage pool.
File-based LUNs use space from a volume.
Generally block-based LUNs should be instead of file-based LUNs, as they support more snapshot and virtualization features. For more a more detailed comparison, see the table at the end of this tutorial.
- Go to Storage & Snapshots > Storage/Snapshots.
- Create a LUN by performing one of the following methods.
| LUN Type | Steps |
|---|---|
| Block-based |
|
| File-based |
|
In this tutorial we will create a block-based LUN.

The iSCSI creation wizard opens.
- Select a storage pool.
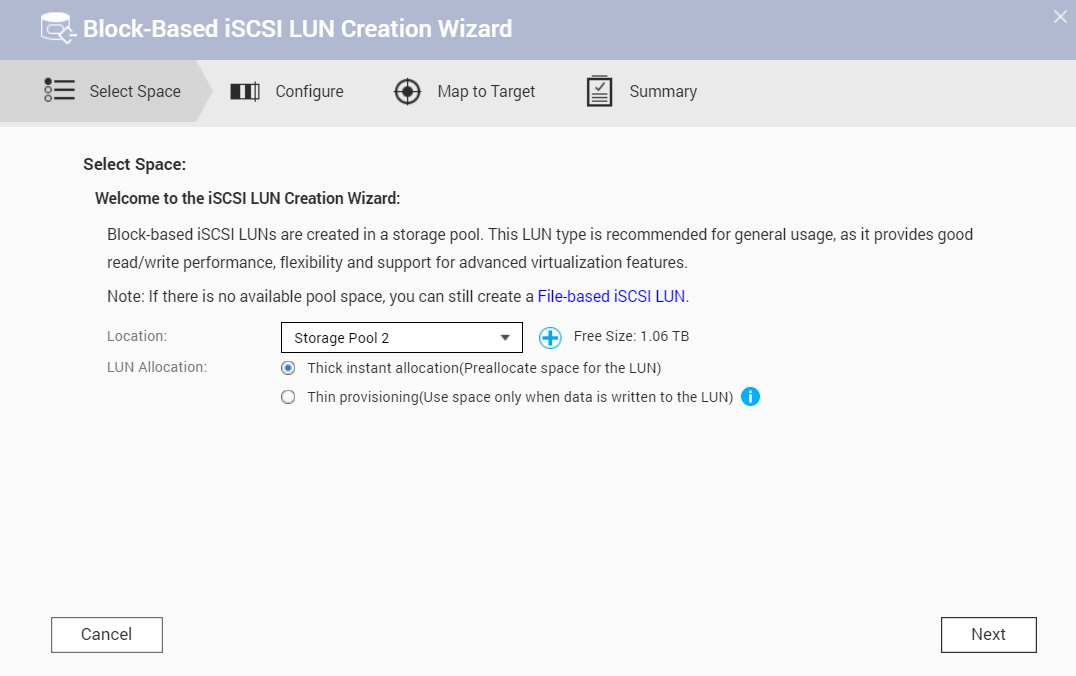
- Select the allocation type, and then click Next.
Allocation Type Description Thick Instant Allocation QES allocates pool space when creating the LUN. This guarantees that the space will be available for connected iSCSI initiators. Thin provisioning QTS allocates storage pool space to a LUN only when it is needed. This offers greater flexibility as empty space is not wasted. However, QTS cannot save data to the LUN if the storage pool runs out of space. - Specify the LUN name.

- Specify the LUN capacity.
- Optional: Configure advanced settings.
For more information on a setting, click its tip. - Click Next.
- Map the LUN to a target.
Mapping an iSCSI LUN to a target allows iSCSI initiators to connect to it.

- Click Next.
- Review the summary, and then click Finish.

QTS creates the iSCSI LUN. You can view it at Storage & Snapshots > iSCSI Storage > iSCSI Target List.
4. Managing iSCSI Targets and LUNs
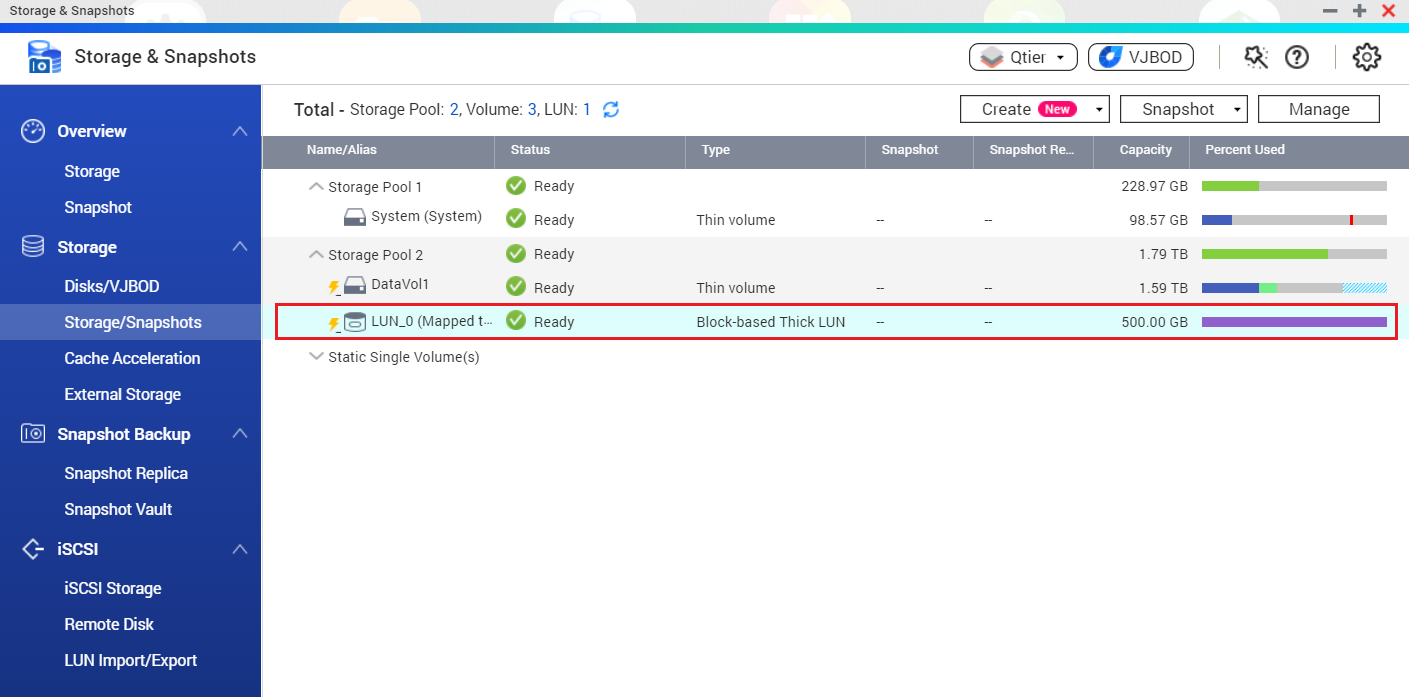
Go to Storage & Snapshots > iSCSI Storage > iSCSI Target List to view and modify iSCSI targets, iSCSI LUNs, and their mappings. Mapped LUNs appear nested under their target.

You can also go to Storage & Snapshots > Storage/Snapshots to view the storage status of block-based iSCSI LUNs.
Note:
- File-based LUNs do not appear in the list at Storage & Snapshots > Storage/Snapshots.
- The health status of a file-based LUN is always the same as its parent volume.

5. Connecting to an iSCSI target using Microsoft iSCSI initiator in Windows
Microsoft iSCSI Initiator is built into all versions of Windows, starting from Windows Vista and Windows Server 2008. You can download and install it on Windows 2003, Windows XP and Windows 2000.
- In Windows, locate and run iSCSI Initiator.
Depending on your Windows version, you can search for it in the Windows program search or find it at Control Panel” > Administrative Tools.

- Optional: Click Yes if Windows prompts you to start the iSCSI service.
- Enter the NAS IP address under Targets > Target, and then click Quick Connect.

iSCSI Initiator searches for available iSCSI targets and adds them to the Discovered Targets list.

- Optional: Add CHAP authentication credentials to the target.
If you configured CHAP authentication on the NAS, then the target will have the status Inactive. You must specify the CHAP username and password to connect.
- Select a target in the Discovered Targets List.
- Click Connect.
- Click Advanced.
- Select Enable CHAP log on.
- Under Name, specify the CHAP username.
- Under Target Secret, specify the CHAP password.
- Click OK and then OK.

The target now has the status Connected. - Format the connected LUN as a disk in Windows.
For this guide, we will be using Windows 10. For older Windows versions you must use Disk Management.
- Search for and run Storage.

- Click Manage Storage Spaces.

- Click Create a new pool and storage space.
- Select one or more iSCSI LUNs, and then click Create Pool.

- Specify the pool formatting options, and then click Create Storage Space.
 The iSCSI LUN space appears as a drive in Windows.

- Search for and run Storage.
6. Connecting to an iSCSI target using globalSAN iSCSI initiator in Mac OS
Mac OS does not include an iSCSI initiator client by default. You will need to install third-party iSCSI initiator software to connect the iSCSI target on your QNAP NAS. For this tutorial we will use GlobalSAN iSCSI Initiator.
- In Mac OS, download and install globalSAN iSCSI Initiator for OS X.
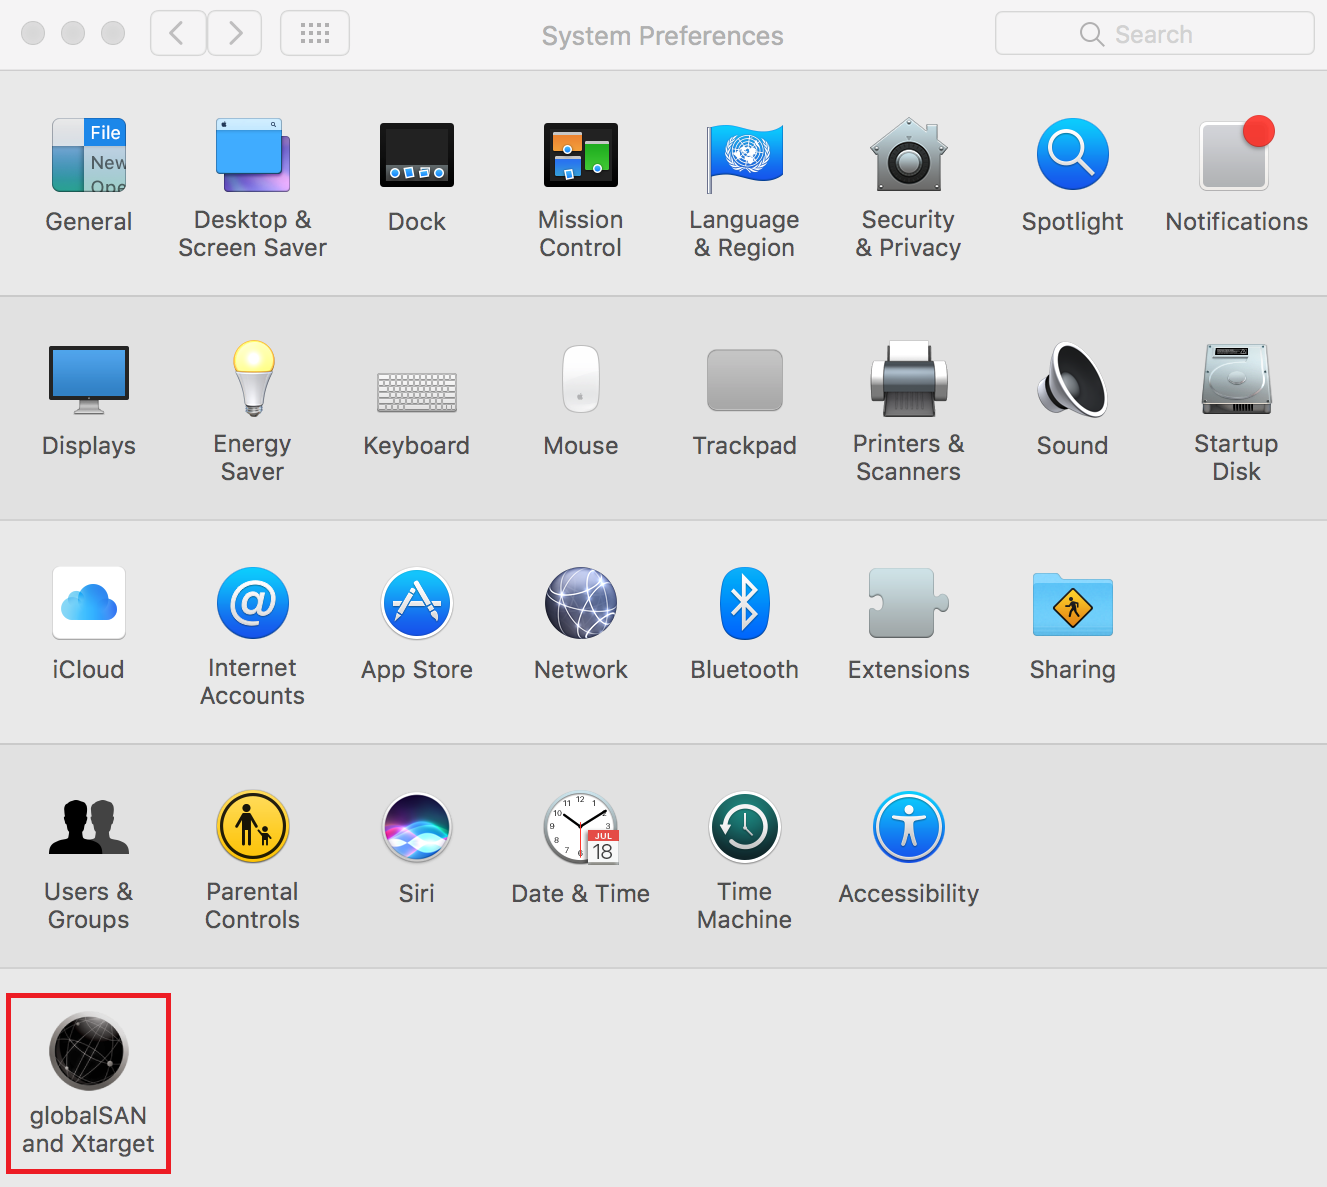
This software requires Mac OS X 10.4 or later. For details, see http://www.studionetworksolutions.com/globalsan-iscsi-initiator. - Go to System Preferences.
- Double-click on globalSAN iSCSI initiator.
- Click +, and then select Portal/Group.

- Specify a name.
- Specify the NAS DNS name or IP address, and then click Add.

- Select a target in the left list.

- Select the IP address to use to connect to the iSCSI target.
- Click Connect.
- Optional: Click Initialize.
If this is the first time you have connected to the target then Mac OS will prompt you to format the disk.


The target’s status changes to Connected. The new drive is ready to use and appears on the Mac OS desktop.

7. Connecting to an iSCSI Target using Open-iSCSI Initiator on Linux
The Linux Open-iSCSI Initiator is a built-in package in Ubuntu 8.04 LTS and later. For more information on Ubuntu, see http://www.ubuntu.com. For Open-iSCSI information and download links, see http://www.open-iscsi.org.
- Install the open-iscsi package.
Run the following command.
| # sudo apt-get install open-iscsi |
- Optional: Add CHAP credentials to iscsid.conf.
- Edit the file.
Run the following command.
- Edit the file.
| # vi /etc/iscsi/iscsid.conf |
- Add the target CHAP username under node.session.auth.username.
- Add the CHAP password under node.session.auth.password.
- Save and then close the file.
- Restart the open-iscsi service.
Run the following command.
| # /etc/init.d/open-iscsi restart |
- Discover all iSCSI targets on the NAS.
In this example the NAS IP address is 10.8.12.31 and the default iSCSI port is 3260.
Run the following command.
| # iscsiadm -m discovery -t sendtargets -p 10.8.12.31:3260 |
- Check the available iSCSI nodes.
Run the following command.
| # iscsiadm -m node |
- Optional: Delete nodes that you do not want to connect to.
Run the following command.
| # iscsiadm -m node --op delete --targetname THE_TARGET_IQN |
- Restart the open-iscsi service to log into all of the available nodes.
Run the following command.
| # /etc/init.d/open-iscsi restart |
Linux displays a login message. Example:
Login session [iface: default, target: iqn.2004-04.com:NAS:iSCSI.ForUbuntu.B9281B, portal: 10.8.12.31,3260] [ OK ]
- Check the device status with dmesg.
Run the following command.
| # dmesg | tail |
- Create a partition.
In this example, the device name is /dev/sdb. Run the following command.
| # fdisk /dev/sdb |
- Format the partition.
Run the following command.
| # mkfs.ext3 /dev/sdb1 |
- Mount the file system.
Run the following two commands.
| # mkdir /mnt/iscsi |
| # mount /dev/sdb1 /mnt/iscsi/ |
The storage is now available to use.
Additional Linux commands.
| Action | Command |
|---|---|
| Test the I/O speed of the iSCSI LUN. | # hdparm -tT /dev/sdb1 |
| Discover targets on the host | # iscsiadm -m discovery --type sendtargets --portal HOST_IP |
| Log into a target | # iscsiadm –m node --targetname THE_TARGET_IQN --login |
| Log out of a target | # iscsiadm –m node --targetname THE_TARGET_IQN --logout |
| Delete a Target | # iscsiadm –m node --op delete --targetname THE_TARGET_IQN |
8. Reference: A Comparison of Block-based and File-based LUN Features
| Feature Name | Block-Based LUN | File-Based LUN |
|---|---|---|
| VAAI Full Copy | ✓ | ✓ |
| VAAI Block Zeroing | ✓ | ✓ |
| VAAI Hardware Assisted Locking | ✓ | ✓ |
| VAAI Thin Provisioning and Space Reclamation | ✓ | |
| Thin provisioning | ✓ | ✓ |
| Space reclamation | ✓ Supported in: VMware ESXi with VAAI, Windows Server 2012 or later, Windows 8 or later |
|
| Microsoft ODX | ✓ | |
| LUN Import/Export | ✓ | ✓ |
| LUN snapshots | ✓ | You must take a snapshot of the parent volume. |


