How to use QNAP NAS as a network render node to support Adobe Creative Suite multiple machines workflow?
최신 업데이트일:
2019-04-02
Adobe support to render one or more compositions from a project using multiple computers over a network in a fraction of the time that a single computer would require. Network rendering involves copying the project and source files to a networked folder, and then rendering the project. This article is to demo how to use virtual machine on QNAP NAS with GPU to accelerate rendering.
*For more information: Adobe official website.
Please take these steps on NAS.
- Add the VGA into the NAS (You need to consider the size of VGA card can be inserted into limited space)
- Create the Windows 10 virtual machine via Virtualization Station from App center.
- Insert Guest Tool before you assign a GPU on this VM (optional)

- Select CD Driver.

- Select “qnap-guest-tools”

- Install all of components.

- Assign GPU on VM
*Remember to install the GPU driver.

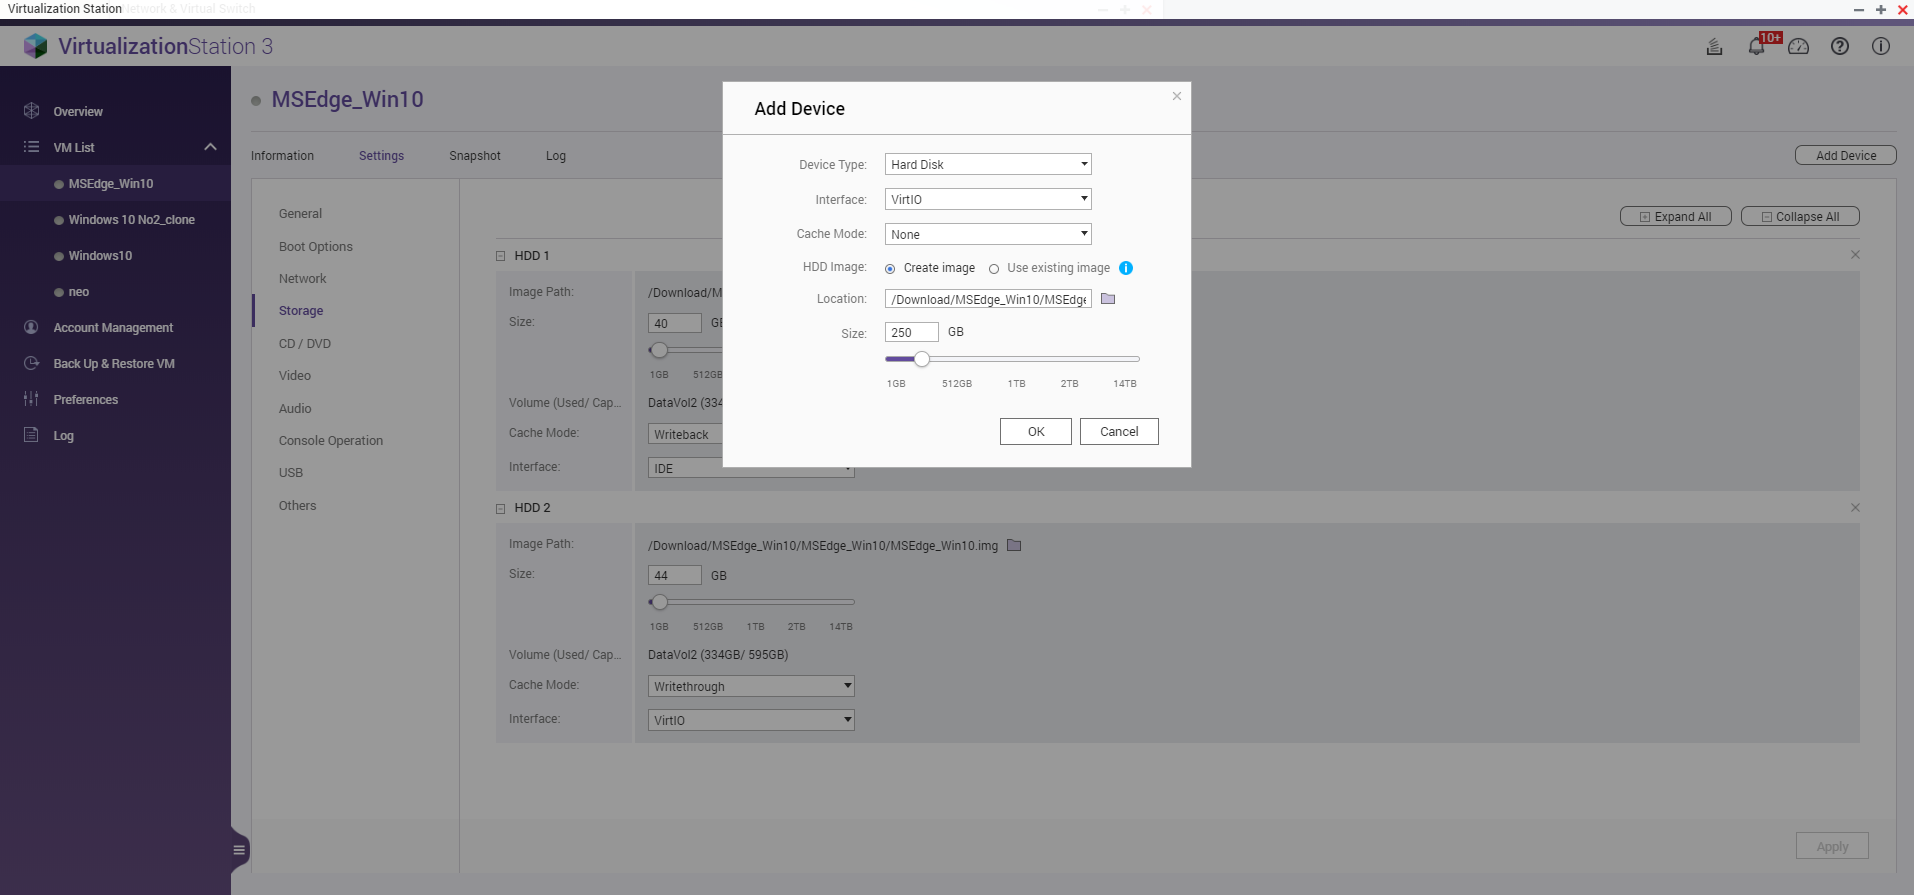
- Add an HDD as your render file storage space.
*Interface: select VirtIO so that your HDD can be same as your NAS IO speed. (In QNAP test environment is 10Gbs)
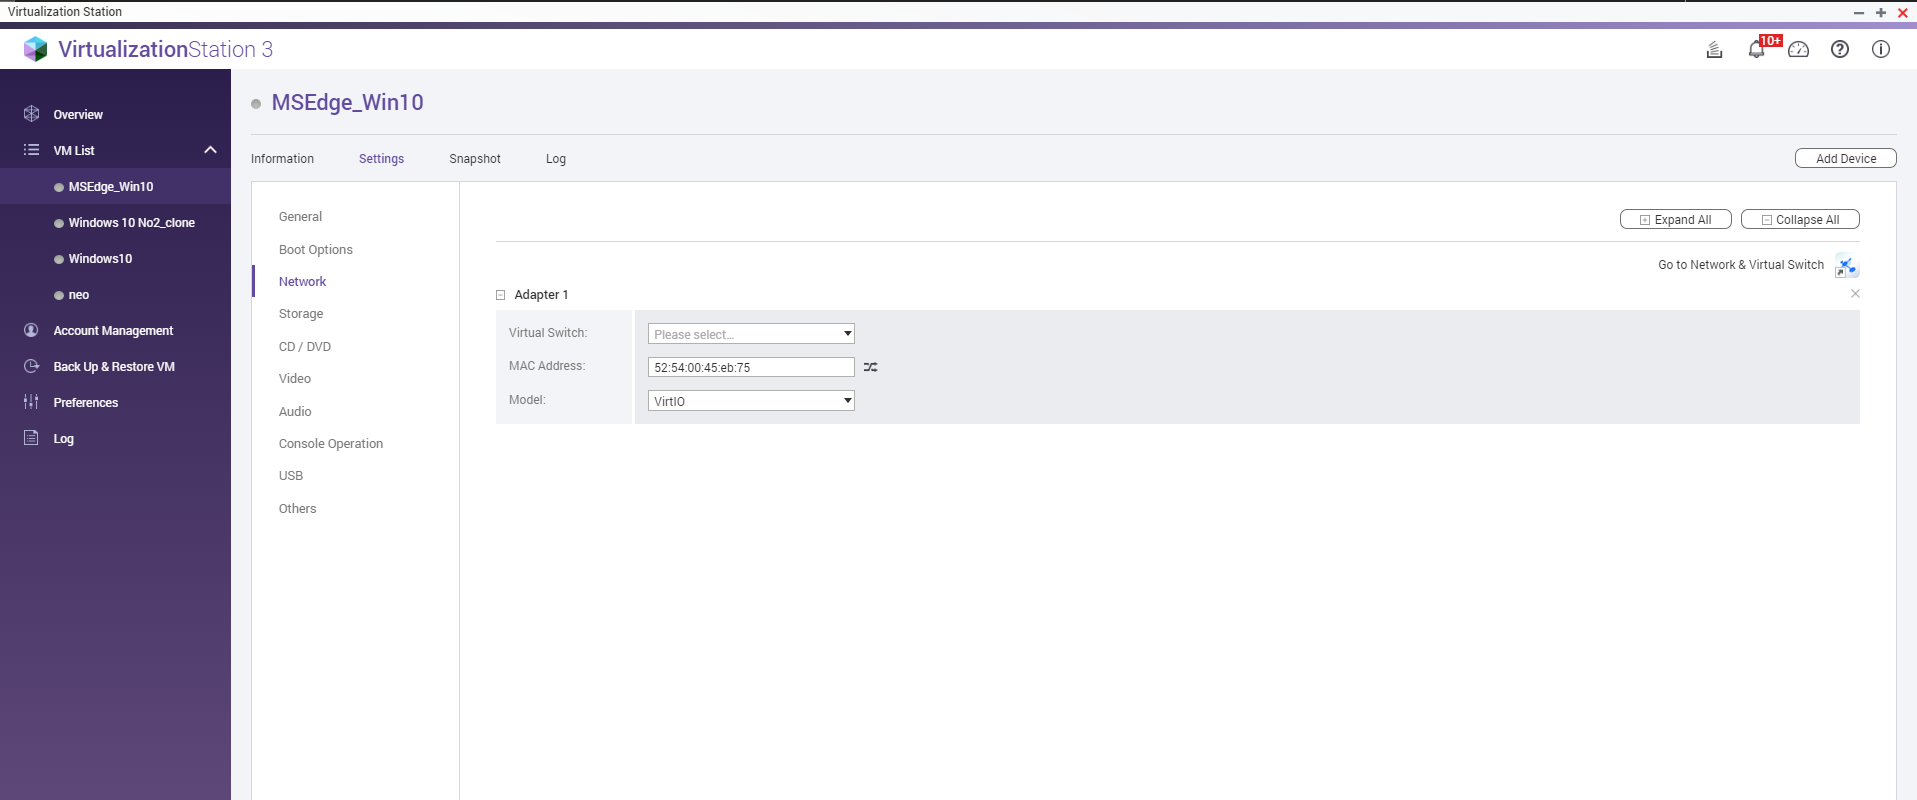
- Set network adapter 1 to VirtIO, so your VM can reach NAS network speed. (In QNAP test environment is 10Gbs)
- Install the Adobe After Effects in this VM- Windows10
- Create the shortcut from "C://Program Files/Adobe/Adobe After Effects XXXX/Adobe After XXXX Render Engine" to the desktop
- Launch this render engine and appoint to the NAS shared folder. (Render Engine >> File >> Watch Folder >> select NAS folder)
* This VM also needs to install all plugins & fonts which used in AE project.
Back to your PC / Mac
- Launch AE, and set the render setting from "Basic" to the "Multi-Machine Settings" & "Multi-Machine Sequence"

- AE >> File >> Dependencies >> collect Files
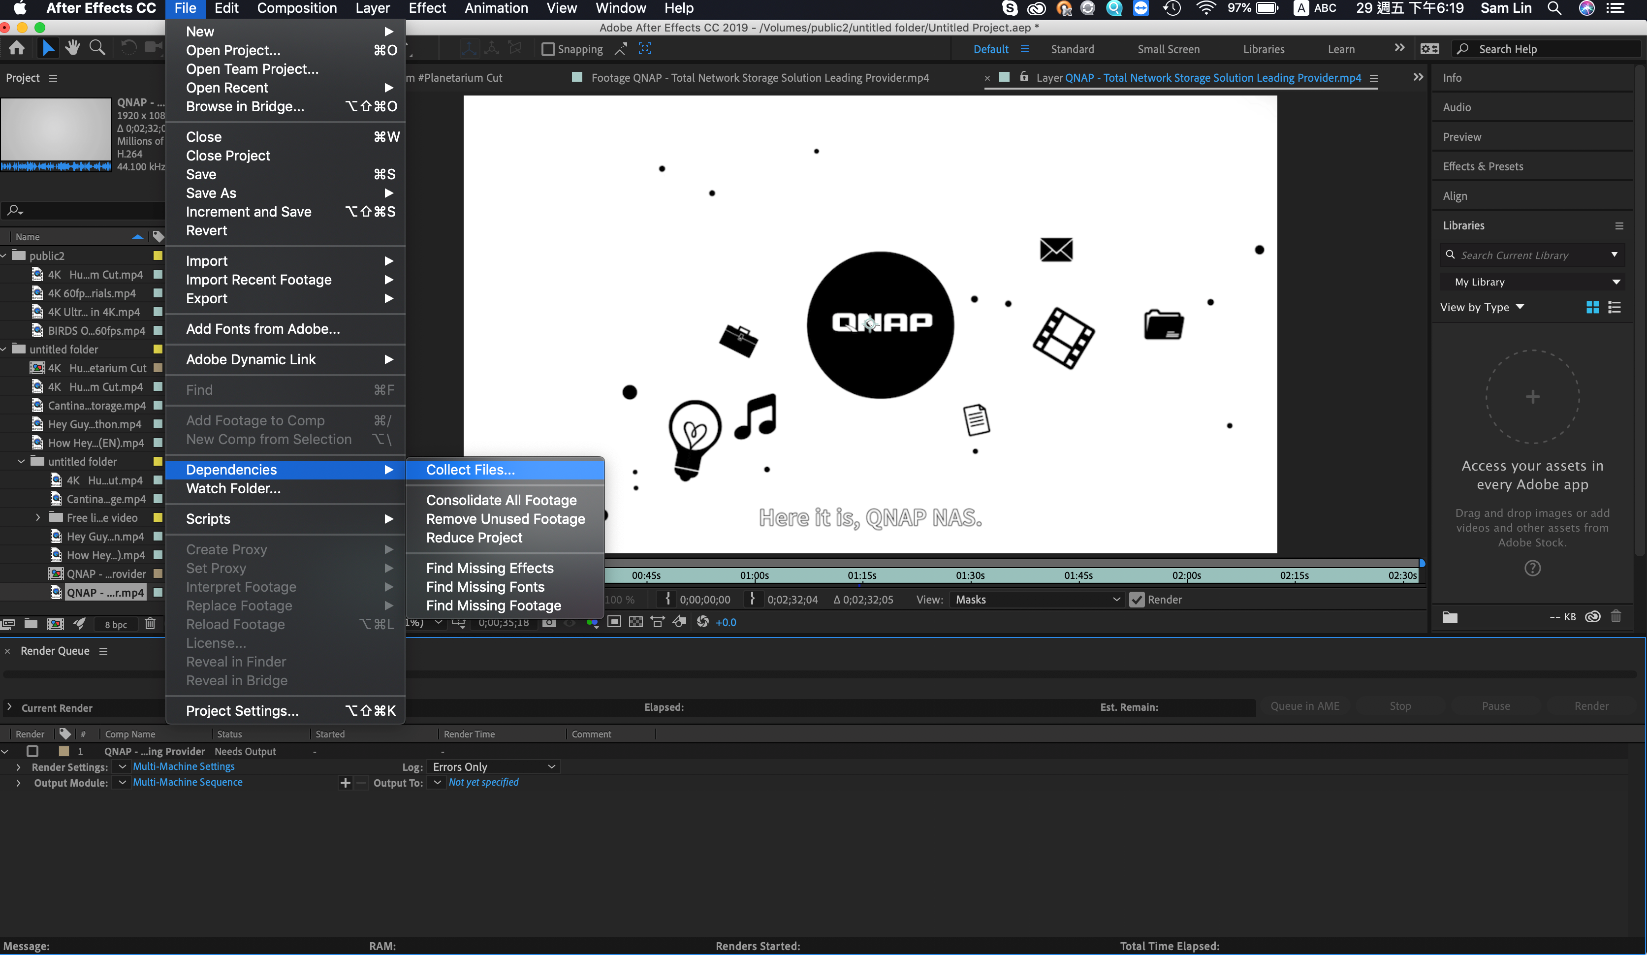
- [Collect Source Files] => Project Only
Check the option of [Enable "Watch Folder" render].
Check the option of [Reveal collected project xxxxx] and set the machine number.
Press the Collect button and choose the target folder. (NAS shared folder)

Back to VM and NAS shared folder
- Then you can see the AE render Engine start to render the file of your project.

- And you can stop the render function in this VM anytime.


