Using Time Machine to Back Up Macs to a QNAP NAS via SMB 3
Release date:
2022-07-20
General Information
This tutorial teaches you how to automatically back up content from a Mac to a QNAP NAS using the SMB 3 protocol.
System Requirements and Compatibility
- A Mac running macOS 10.12 Sierra (or later).
- A QNAP NAS running QTS 4.3.0 (or later).
Backing up multiple Macs with different NAS user accounts
- (Optional) Create a Time Machine backup user.
Tip: A dedicated Time Machine user account can be created to provide additional security, and the ability to set storage quotas for each Mac.- Open Control Panel.
- Go to Privilege > Users.
- Click Create.
- Select Create a User.

- Enter a username and password for the Time Machine backup user.
- (Optional) A storage quota for this account can be set to prevent excessive space usage when backing up.
- Go to Privilege > Quota.
- Check Enable quota for all users.
Tip: It is recommended to use a quota of at least twice your Mac’s total storage space.
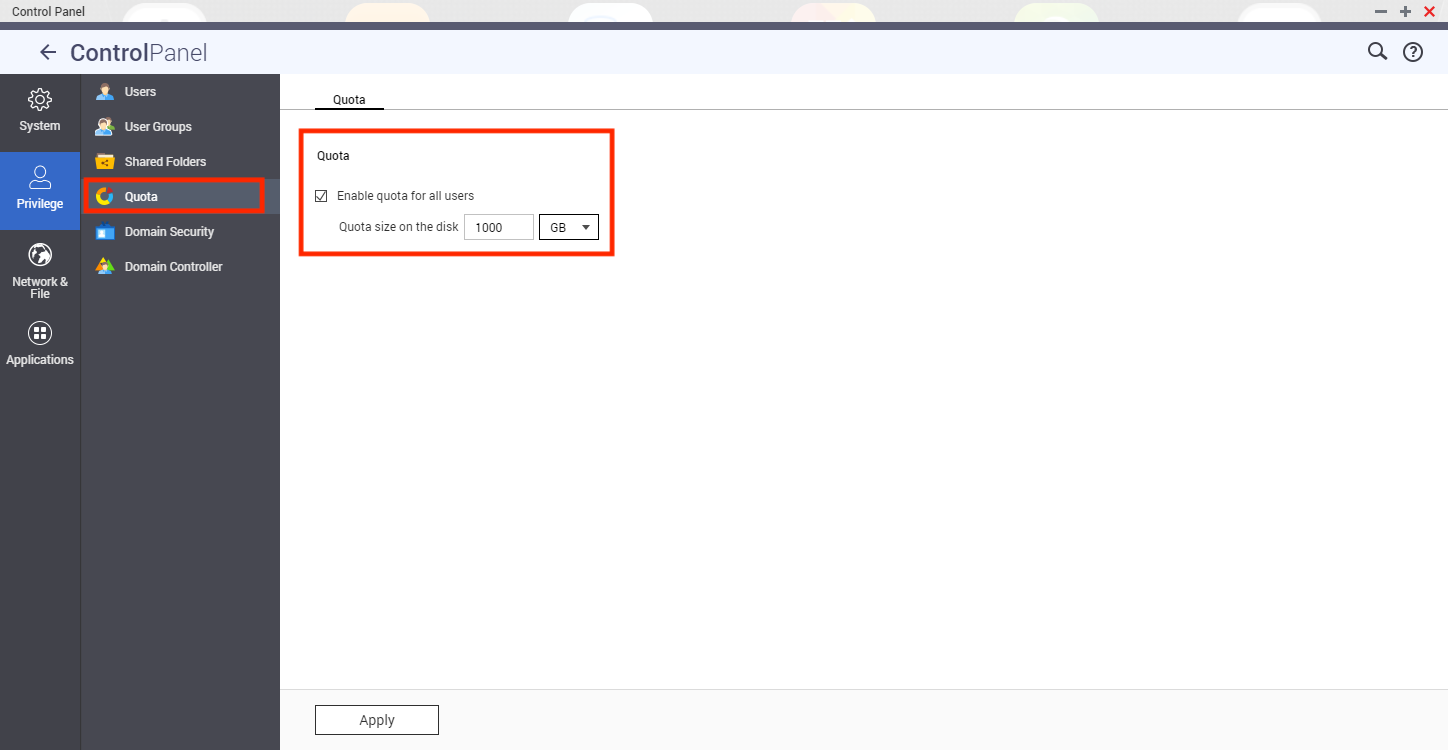

- Click Create.

- Create a Time Machine backup shared folder.
- Open Control Panel.
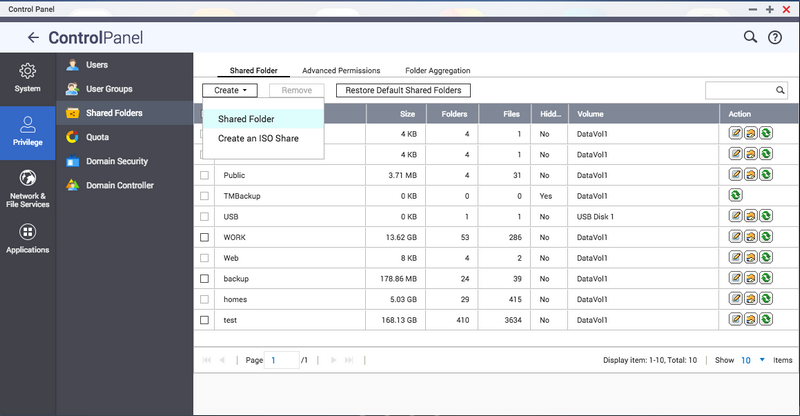
- Go to Privilege > Shared Folders.
- Click Create.
- Select Shared Folder.
The Create A Shared Folder window opens.
- Enter a Folder Name.
- Click Edit.

- Give the Time Machine backup user RW access privileges.

- Click Create.
- Find the new folder in the list of Shared Folders and click
 .
.

- Check Set this folder as the Time Machine backup folder (macOS).

- Click OK.
- Configure QTS to use SMB 3
- Open Control Panel.
- Go to Network & File Services > Win/Mac/NFS > Microsoft Networking.
- Click Advanced Options.

- Under Highest SMB version select SMB 3.

- Click Apply.
- Configure Time Machine to use the NAS for backups
- Connect the NAS to your Mac.
- Open Finder on your Mac.
- Open the Go menu.
- Click Connect to Server.
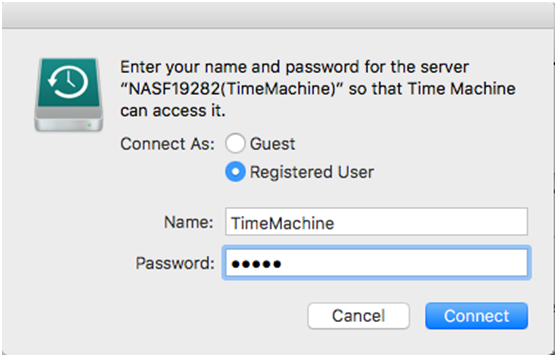
- Enter smb://<NAS name.local or IP address>.
- Enter the username and password of the backup user account.
- This can be your NAS account or the dedicated Time Machine user account.
- Select the NAS shared backup folder.
- Open Time Machine.
- Click Select Disk.
- Select the NAS shared backup folder.
- Click Use Disk.

- Enter the username and password of the backup user account.
Tip: This can be your NAS account or a dedicated Time Machine user account.

- Click Connect.
- You can now use Time Machine to back up this Mac to your NAS.

- Connect the NAS to your Mac.
Backing up one Mac with the shared Time Machine account in HBS 3
- Open HBS 3.
- Go to Services > Time Machine.
- Check Use shared Time Machine account.
- Enter a password for the Time Machine account.
- (Optional) Set a storage quota.
- Select Maximum
- Enter the total capacity in GB.
- Important: If the backup data size is greater than the quota, the Time Machine backup will fail
- Click Apply.

- Configure QTS to use SMB 3
- Open Control Panel.
- Go to Network & File Services > Win/Mac/NFS > Microsoft Networking.
- Click Advanced Options.
- Under Highest SMB version select SMB 3
- Click Apply.
- Configure Time Machine to use the NAS for backups
- If your Mac and NAS are not on the same subnet.
- Open Finder on your Mac.
- Open the Go menu.
- Click Connect to Server.
- Enter smb://<NAS name.local or IP address>/TMBackup.
- Enter the username TimeMachine and the password you created earlier.
- Open Time Machine.
- Click Select Disk…
- Select the NAS shared folder TMBackup.
- Click Use Disk.
Tip: If you hover over the disk you will see that it is an SMB link.

- Enter the username TimeMachine and the password you created earlier.
- Click Connect.
Time Machine can now be used to back up your Mac to your NAS.

Tip: Backups can be located under the shared folder TMbackup.

- If your Mac and NAS are not on the same subnet.


