MediQPACS Beginner Tutorial
About MediQPACS
MediQPACS is a QNAP NAS-based PACS solution that allows you to view and store Digital Imaging and Communications in Medicine (DICOM) images from PACS servers, modalities, and other MediQPACS-enabled NAS on your network. With MediQPACS, your QNAP NAS can provide secure storage and backup support for healthcare information systems (HIS), integrated library systems (ILS), and radiology information systems (RIS).
-
To securely store and back up DICOM images
-
To enable medical professionals to access and view DICOM images securely and easily
- Getting Started
- Application Entity (AE) Management
- Images
- Patients
- DICOM Viewer
- Notifications
- Logging Out
Getting Started
Logging In
Before performing the following steps, ensure that MediQPACS is installed on your NAS. You can download MediQPACS from App Center in QTS.
To log in to MediQPACS, you must use sign-in credentials provided by the NAS administrator. NAS administrators can create personal sign-in credentials for MediQPACS users. For details, see the Users section of the QTS User Guide.
- Go to , or click the MediQPACS shortcut on the QTS desktop.
The MediQPACS login screen opens in a new browser window.

Setting Up the NAS as a PACS Server
After logging in for the first time, MediQPACS administrators must initalize the NAS as a PACS server.
- Select a storage location for DICOM image files.
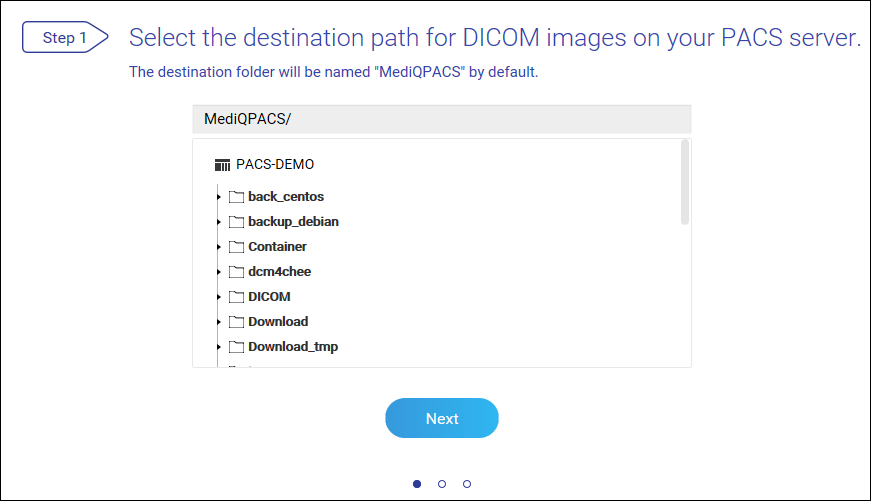 Note:
Note:The destination folder will be named "MediQPACS" by default.
- Initialize your PACS server.
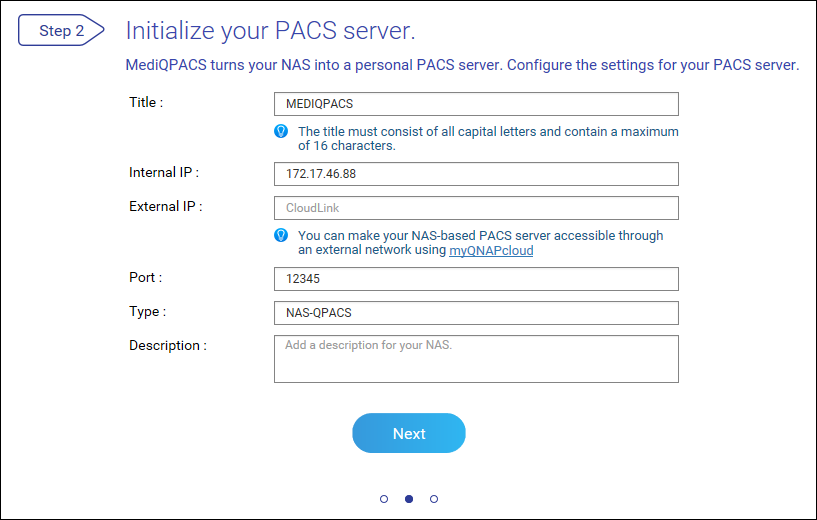
- Click Next.
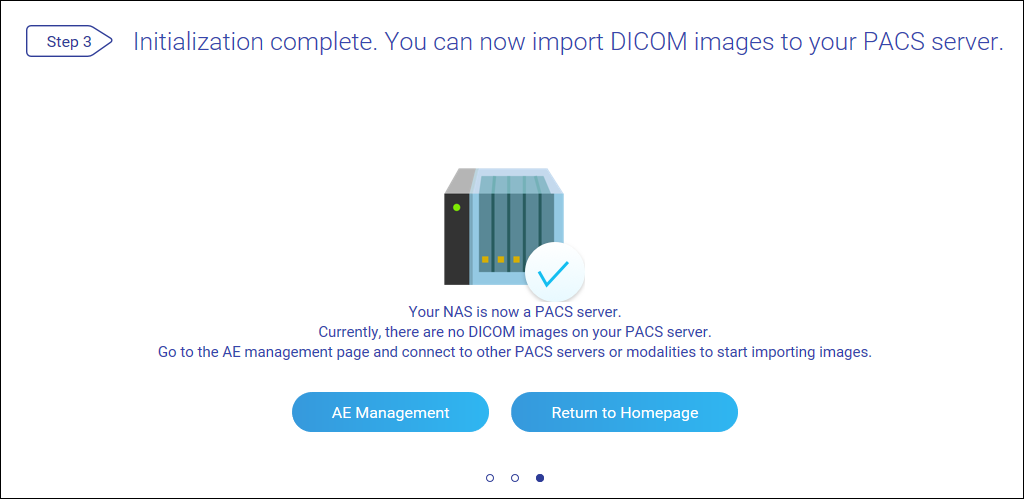
Your NAS is now a PACS server. Click AE Management to go to the AE Management screen or click Return to Homepage to return to the MediQPACS homepage.
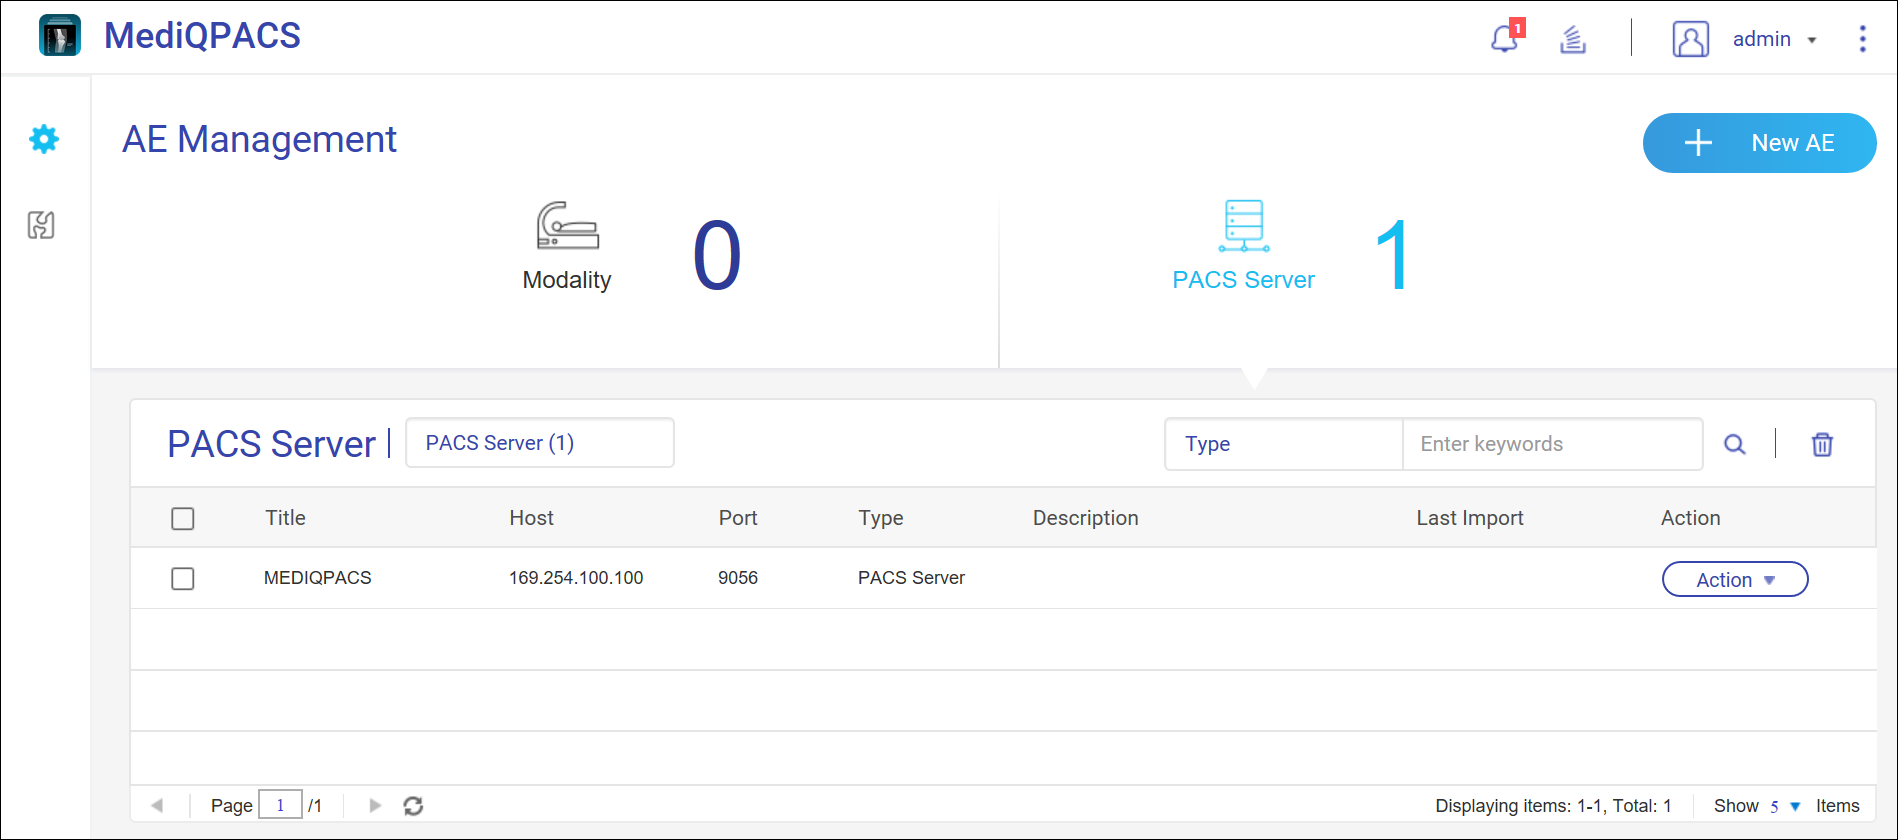
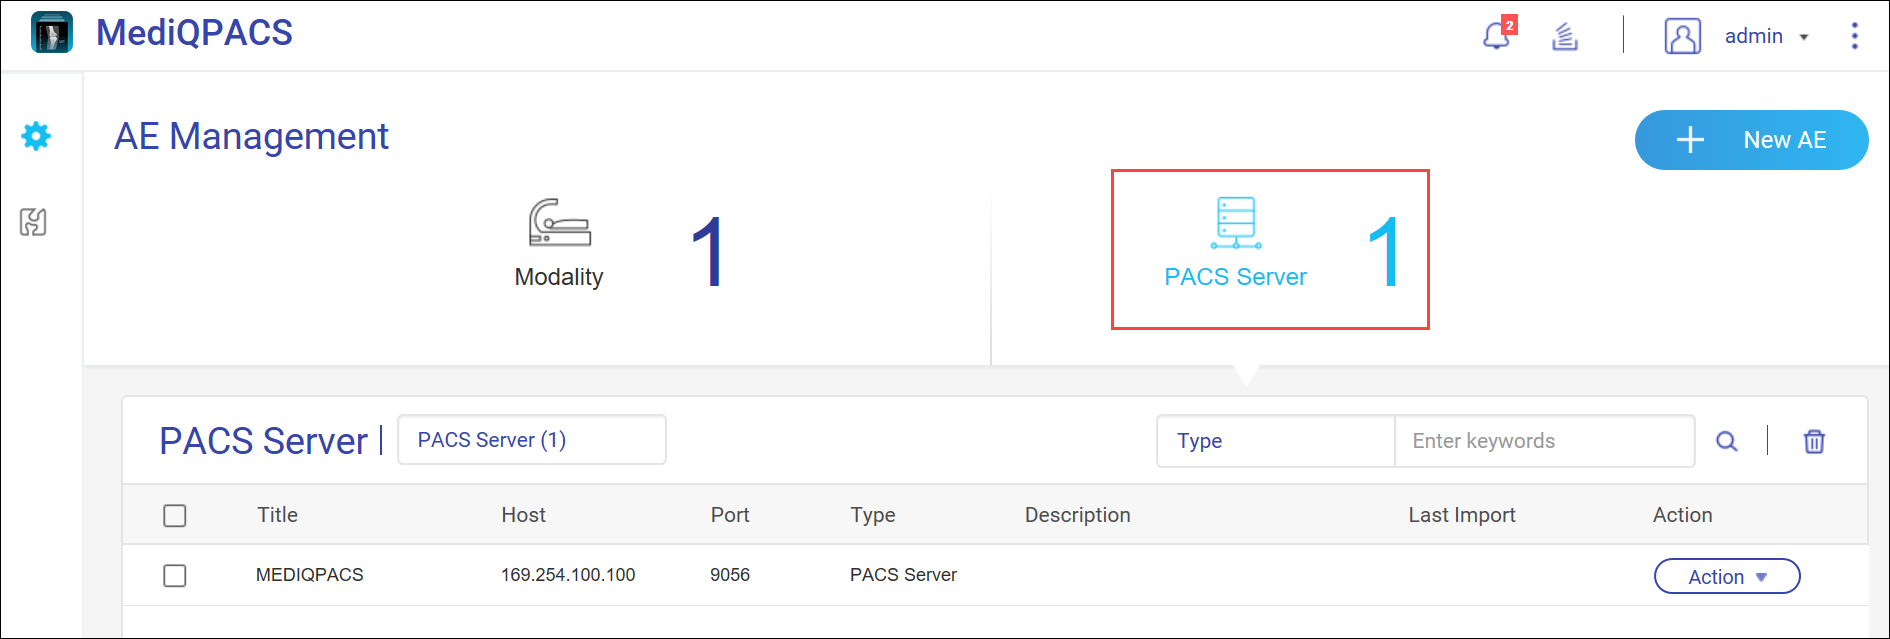
Application Entity (AE) Management
In DICOM, an Application Entity (AE) represents the end-point system or program in a DICOM network, such as a modality or PACS server. When your NAS is configured as a PACS server, it is considered a type of AE.
The AE Management screen in MediQPACS allows users to add, edit, remove, search for, and test connections with other AEs on local or external networks.
Click  to view the AE Management screen.
Adding New AEs
- Click
 .
.
The Add New AE window appears.
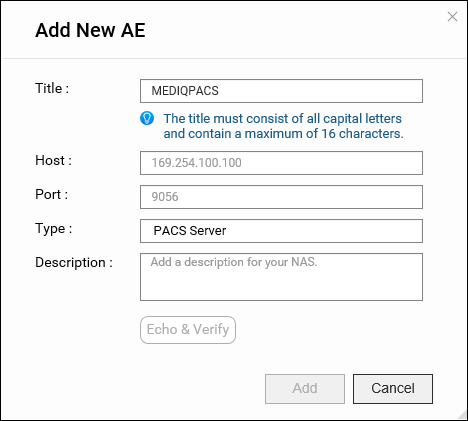
- Click Add.
The AE is added to the corresponding screen.
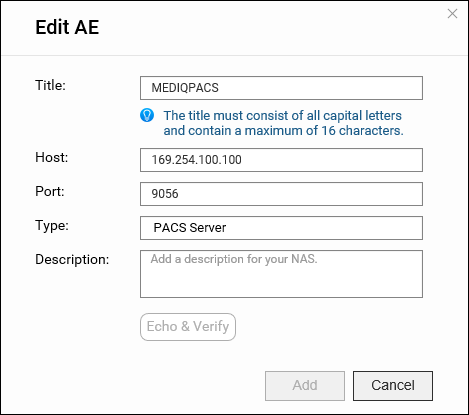
Editing AEs
- Click
 > Edit AE.
The Edit AE window appears.
Searching for AEs
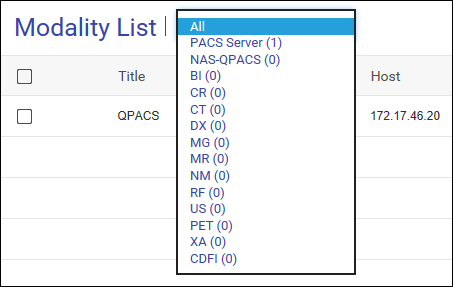
- Select the AE type.
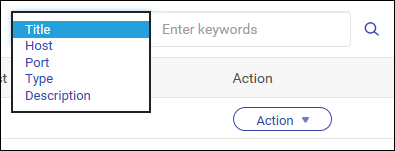
- Select the details to filter.
- Enter your search query and click
 .
.
Removing AEs
- Click > Delete AE.
A dialog box appears.
Images
Users can import DICOM images to their NAS-based PACS server by schedule or import them directly.
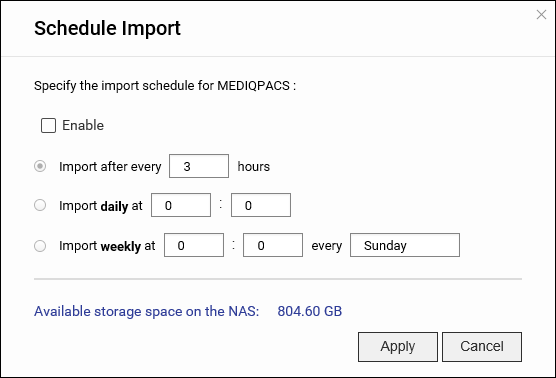
Importing Images Automatically
- Click > Schedule import.
The Schedule Import window appears.
Importing Images Manually
- Click > Import now.
The Import Now window appears.
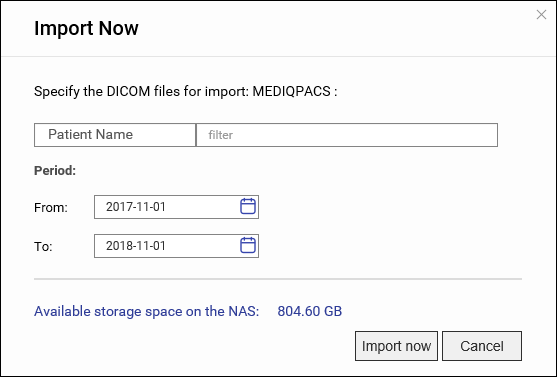
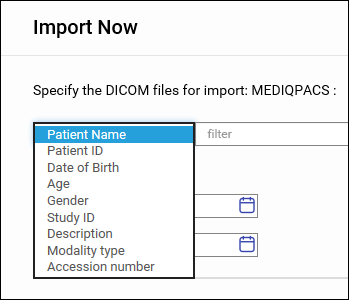
- Select the type of images to import.
Patients
Users can search for patients to find relevant DICOM images and related information.
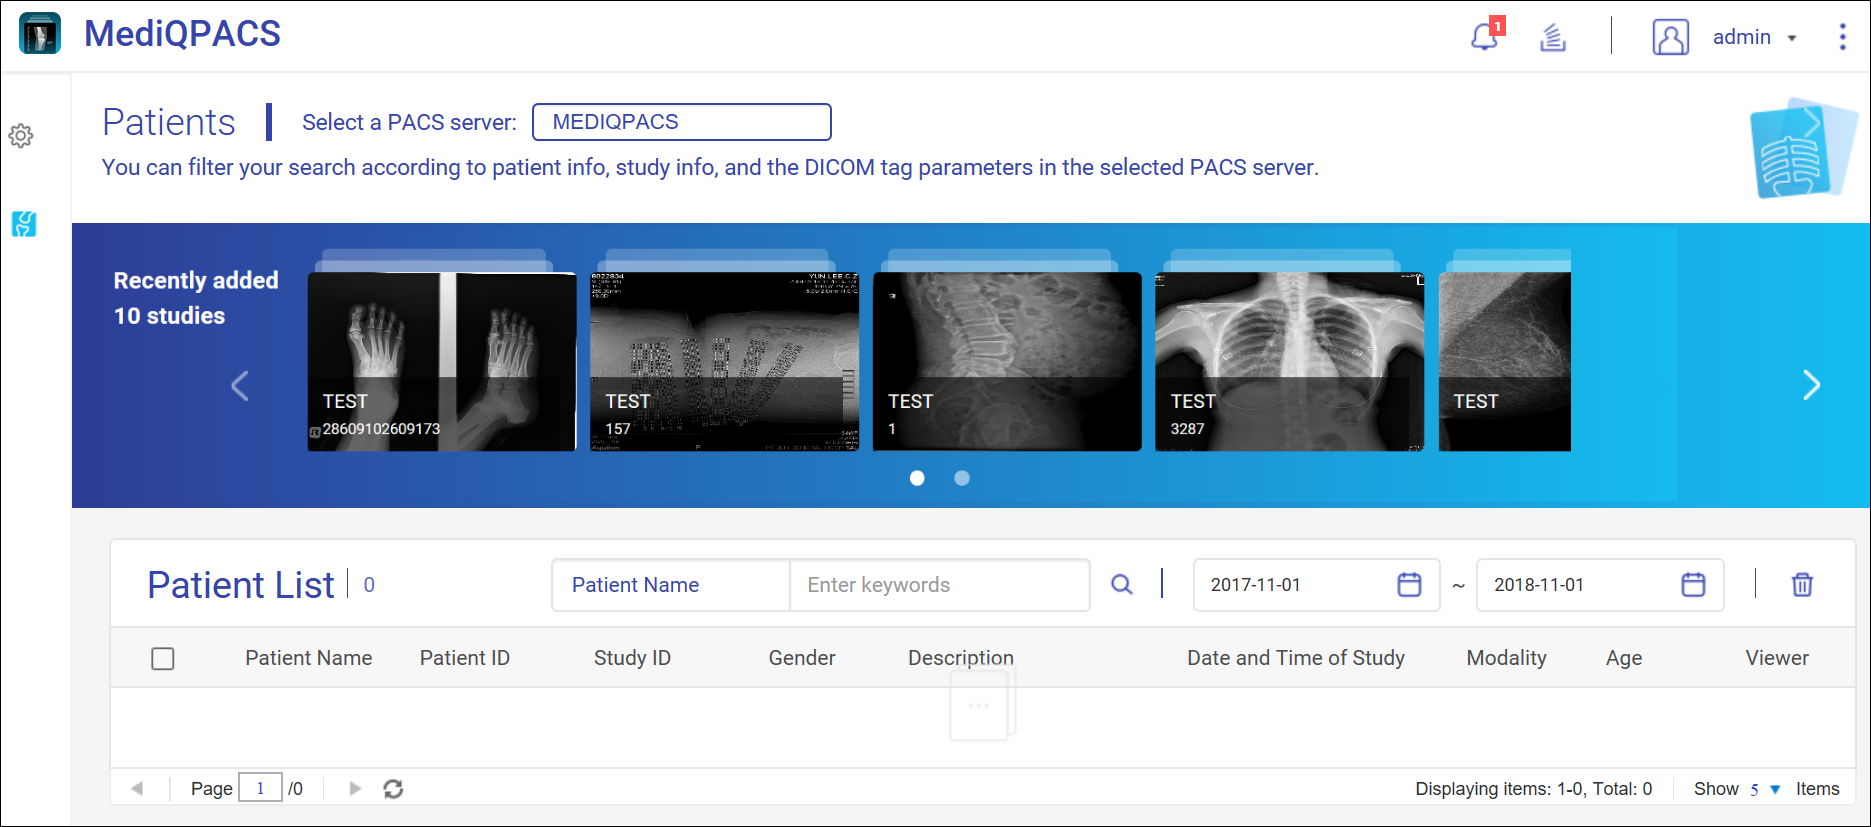
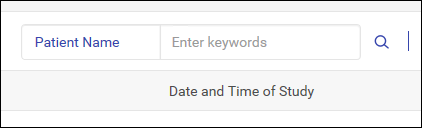
Searching for Patients
- Click
 to view the Patients screen.
 - Select a PACS server.

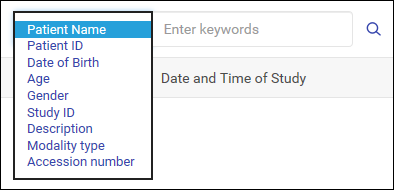
- Select the type of patient information that you want to filter.
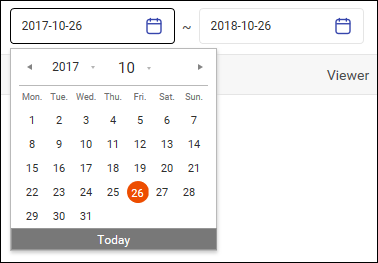
- Specify the time period of the patient information.
- Enter your search query.
- Click .
Image Carousel
The image carousel shows the 10 most recently added patient studies for a selected PACS server.

Select a PACS server and hover your mouse pointer over an image to view studies and corresponding image series. Clicking on a series opens the DICOM Viewer in a new browser window.
Specify a modality type and a time period to display relevant studies on the image carousel.

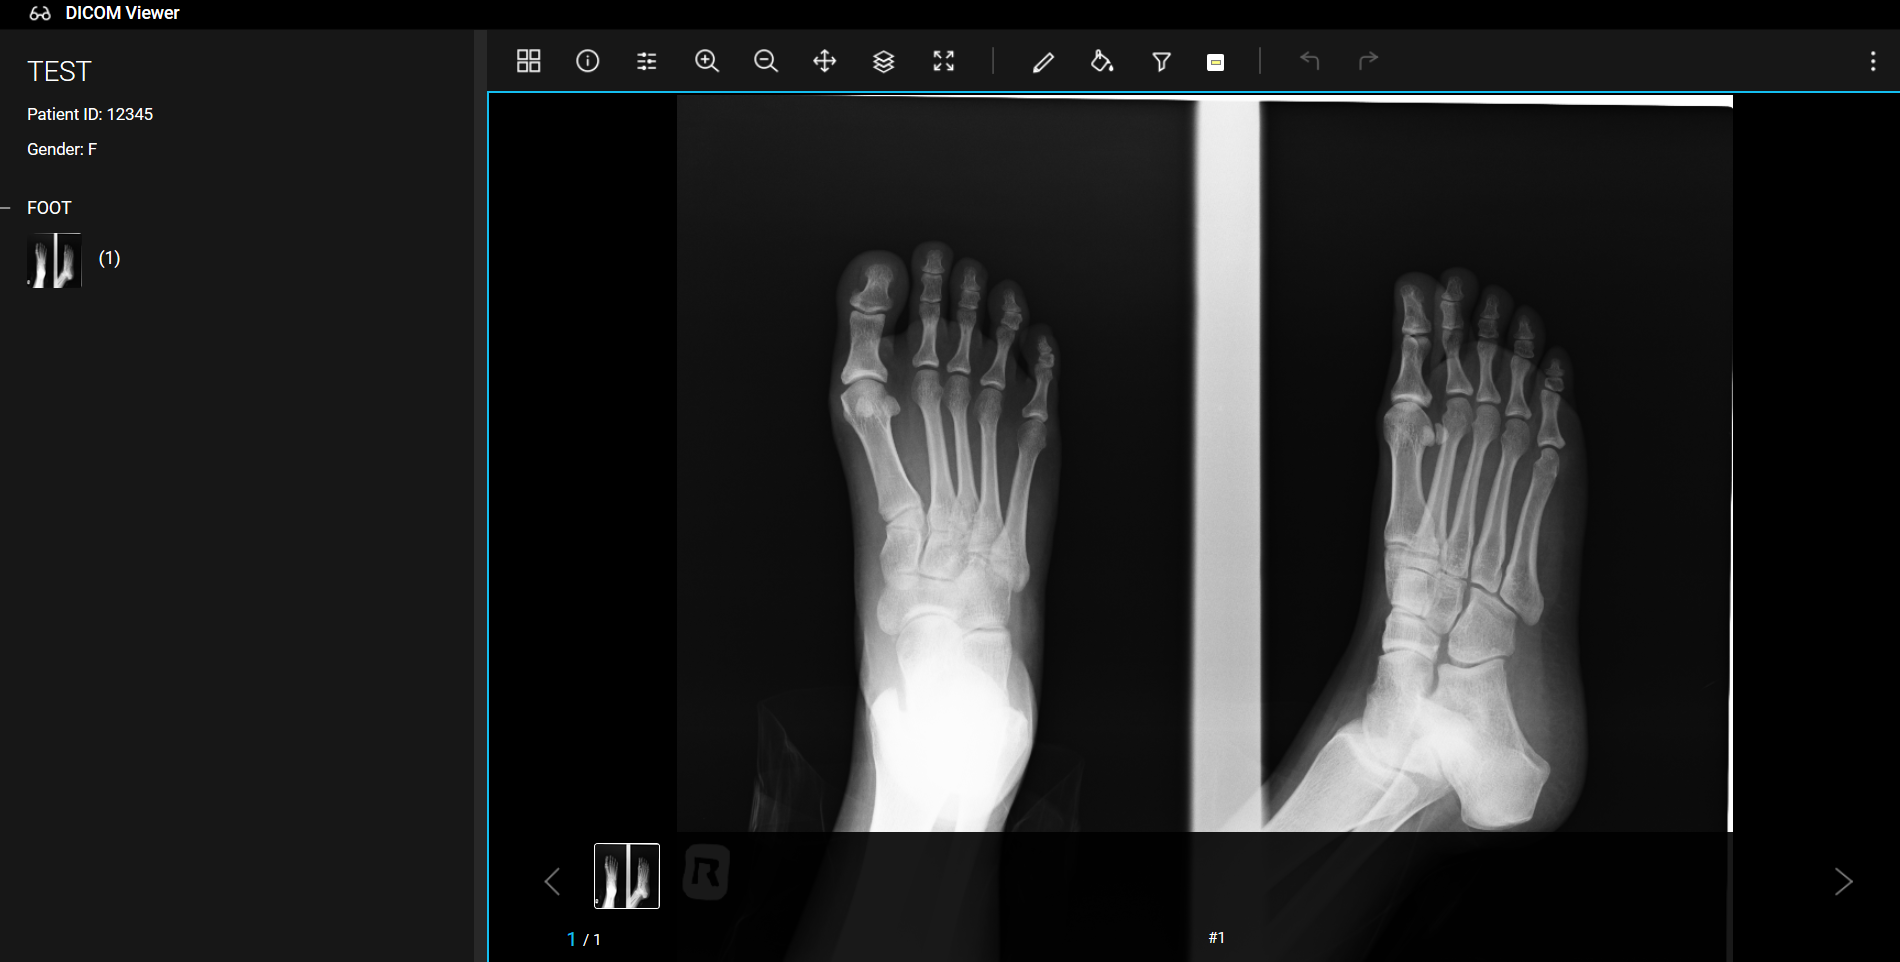
DICOM Viewer
Use the DICOM Viewer to view and analyze DICOM images.
Accessing the DICOM Viewer
DICOM Viewer Tools
The DICOM Viewer provides tools for viewing and analyzing images.

|
# |
Tool |
Description |
|---|---|---|
|
1 |
Layout |
Modify the layout of images. |
|
2 |
Information |
View image details. |
|
3 |
Scroll |
Scroll through images. |
|
4 |
Zoom In |
View a smaller area of an image. |
|
5 |
Zoom Out |
View a larger area of an image. |
|
6 |
Move |
Click and hold the mouse button to move an image around the viewer. |
|
7 |
Windowing |
Use windowing tools to highlight certain aspects of an image. |
|
8 |
Full Screen |
The DICOM Viewer occupies the entire screen. |
|
9 |
Draw |
Use various drawing tools to mark up an image. |
|
10 |
Floodfill |
Fill an area with a specific color. |
|
11 |
Filter |
Use image filtering tools to highlight certain aspects of an image. |
|
12 |
Color |
Change the hue, saturation, and lightness of an image. |
|
13 |
Undo |
Undo the previous action. |
|
14 |
Redo |
Redo the previous action. |
|
15 |
More |
View the draw history or DICOM tags of an image. |
Notifications
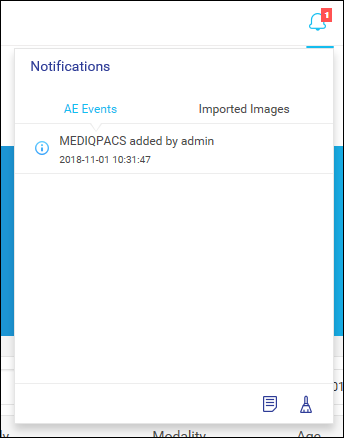
Users can manage notifications in MediQPACS.

Viewing Event Notifications
- Click
 in the upper right.
The Notifications tab appears.
 Note:
Note:Click the Imported Images tab to see image-related notifications.
- Click
 .
.
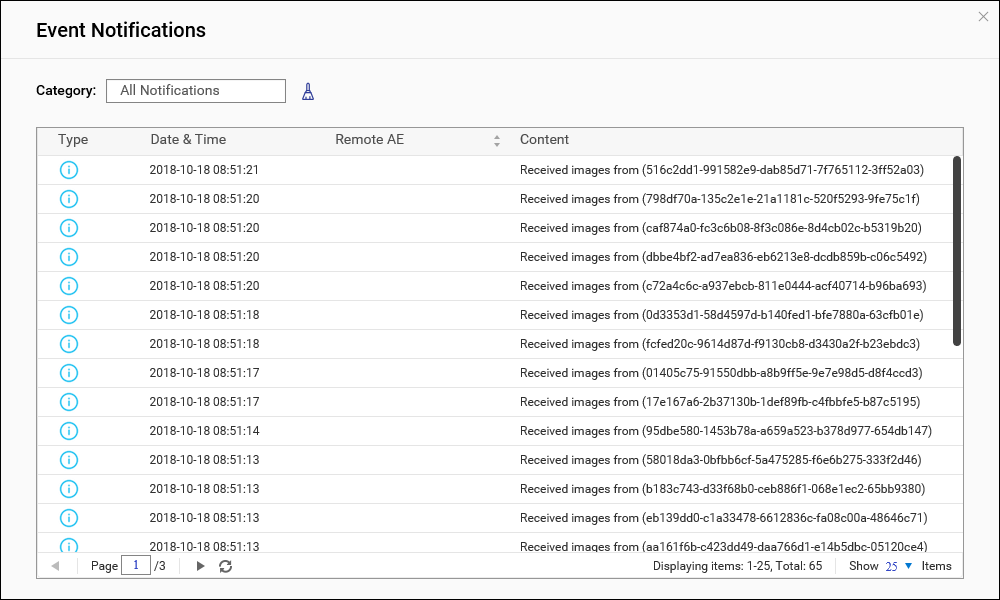
The Event Notifications window appears.
Clearing Notifications
- Click in the upper right.
The Notifications tab appears.
- Click
 .
.
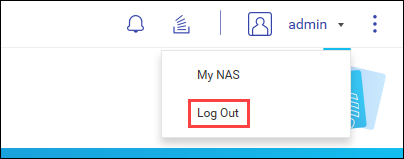
Logging Out
- Click the username in the upper right.
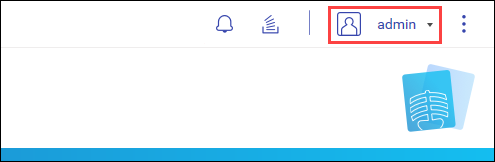
- Click Log Out.