Why does Qphoto save every photo when recording time-lapse videos?
Last modified date:
2023-05-22
By default, Qphoto saves the individual frames of time-lapse videos as a separate photo file. This allows you to make adjustments, such as the time-lapse speed, before recreating the time-lapse videos later in Photo Station.
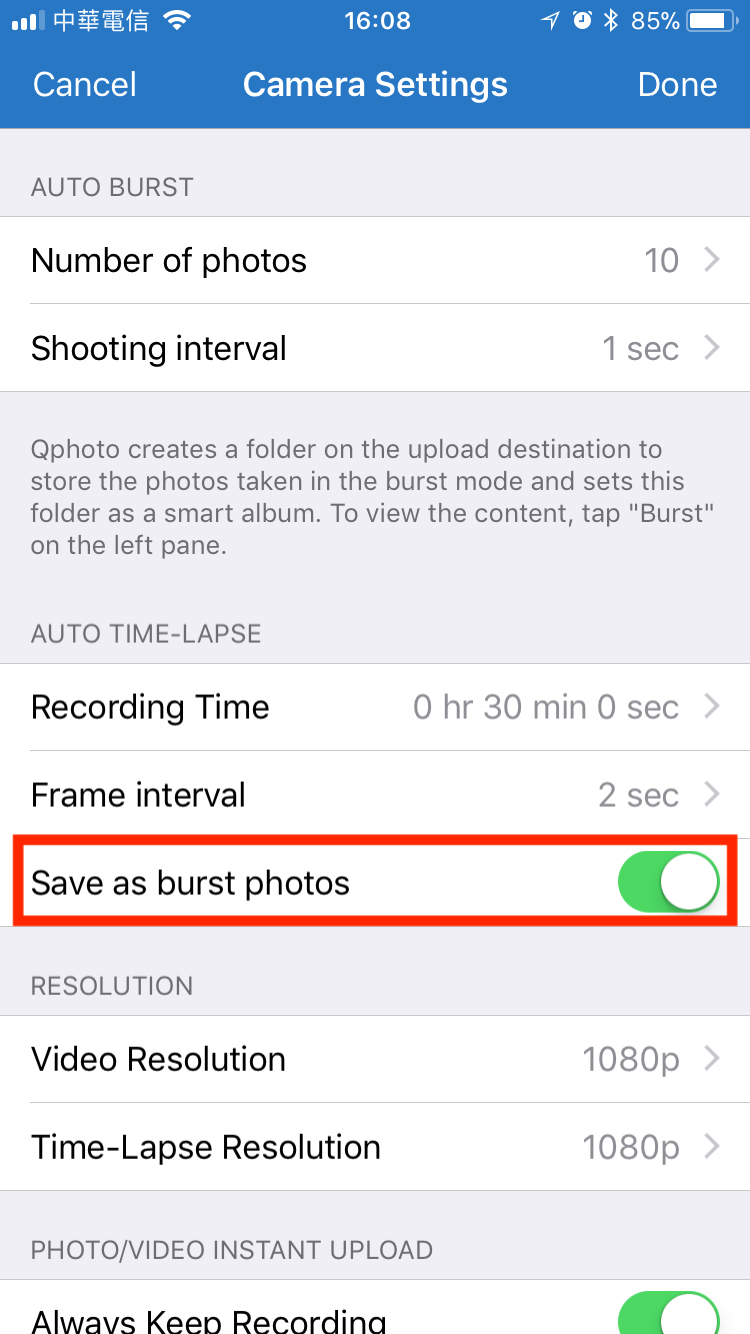
Disabling Burst Photos
Disabling burst photos will stop Qphoto from saving individual photos for every frame of the time-lapse video, but you won't be able to recreate the videos later.
- Open Qphoto.
- Go to Shared Photos, then tap the camera icon.
- Go to Camera Settings > Auto Time-lapse.
- Disable Save as burst photos.
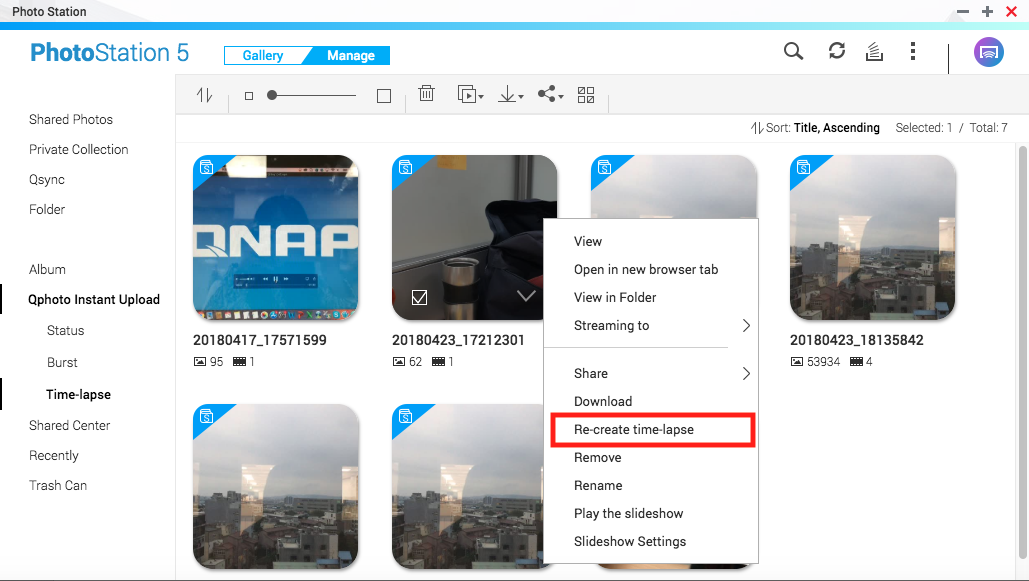
Recreating Time-lapse Videos
If you need to adjust the time lapse video after uploading it to your NAS, you can recreate the video within Photo Station.
Note:
You will be unable to use this feature if you disabled Save as Burst Photos in Qphoto.
- Open Photo Station.
- Go to Qphoto Instant Upload > Time-lapse.
- Right click on a time-lapse video, then choose Re-create time-lapse.
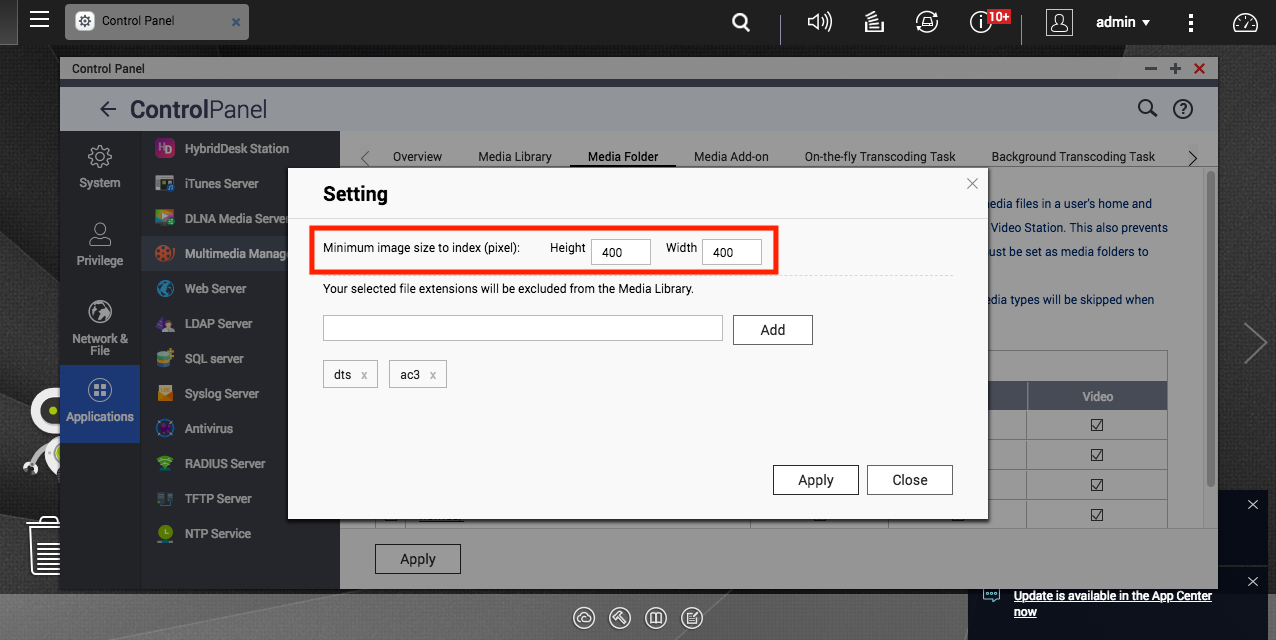
Adjusting Image Index Size in QTS
Time-lapse videos won't be indexed or viewable if their resolution is smaller than the Minimum image size to index setting on the NAS.
- Log in to QTS
- Go to Control Panel > Applications > Multimedia Management.
- Go to Media Folder, then click the Setting button.
- Adjust the Minimum image size to index settings.
- The resolution must be less than or equal to the Time-lapse resolution used in Qphoto.