How to Run LXD Container Instances in Container Station
Last modified date:
2021-10-05
- Overview
- Creating an LXD Container from the Create Page
- Creating an LXD Container by Pulling an LXD Image from the Image Page
- Creating a User in LXD Containers
- Setting Up Static IP Address for LXD Containers
Overview
LXD is the next generation system container manager of Linux containers which is built on top of LXC to provide a new and better user experience.
This tutorial explains how to use Container Station 2.4 to install and run LXD containers.
Note:
LXD containers are only supported by x86-based devices with Container Station 2.4 (or later).
For more information on installing and using Container Station, see How to Use Container Station?
LXD containers are only supported by x86-based devices with Container Station 2.4 (or later).
For more information on installing and using Container Station, see How to Use Container Station?
Creating an LXD Container from the Create Page
- Open Container Station.
- Go to Create.
- In the search bar, look for the operating system or distribution you want to install. Note:
Refer to Linux Containers - Image server for supported operating systems and distributions. - Click

- Go to the LXD Image Server tab.
- Select an image from the list and click Install.

The Create Container window opens. - In the Create Container window, enter a name and allocate CPU and Memory resources to the LXD container.
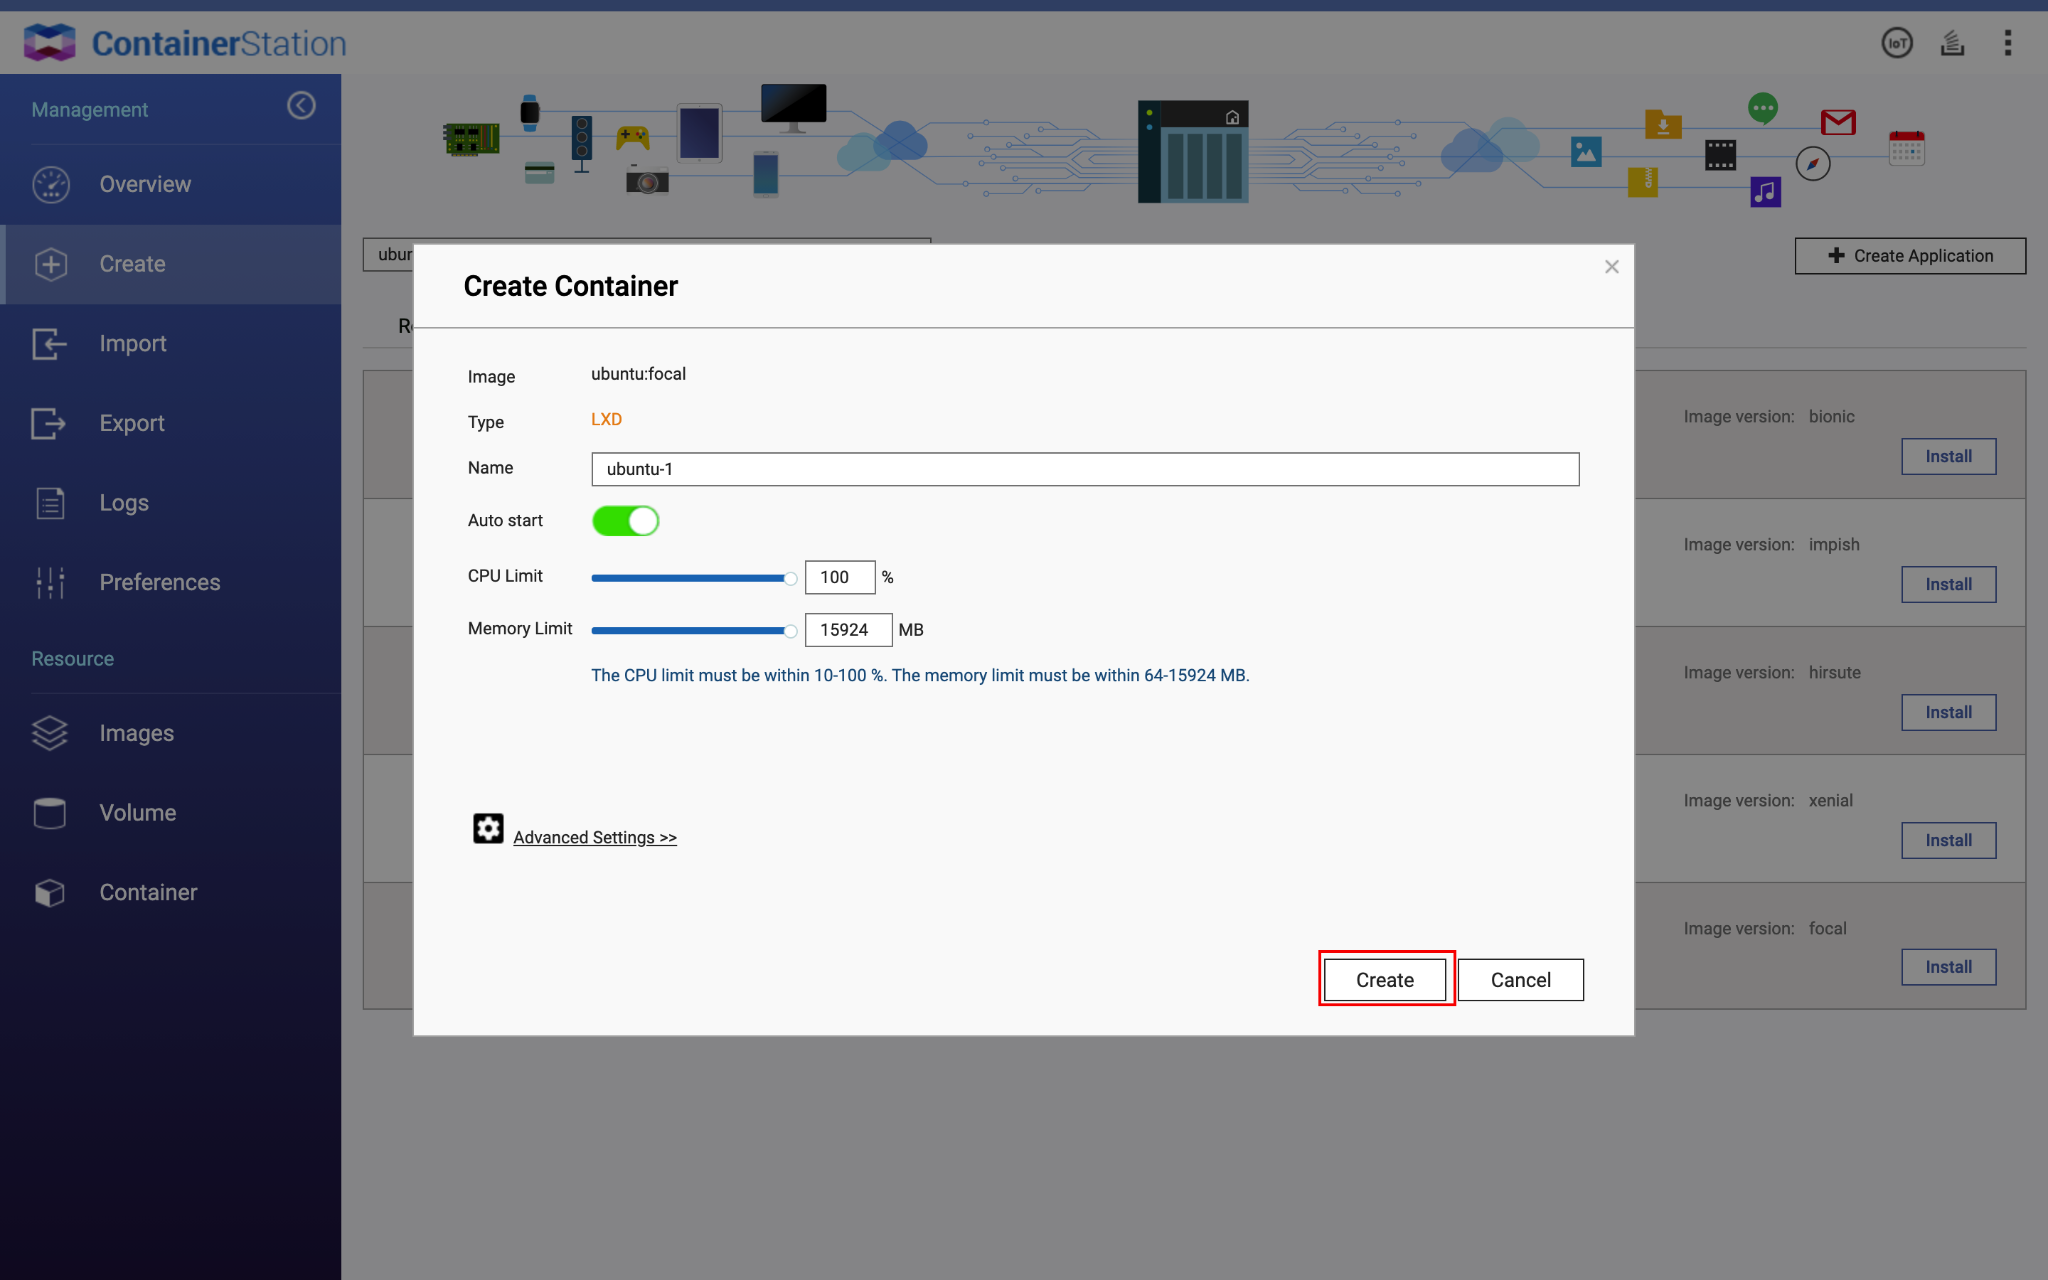 Important:
If Advanced Folder Permissions are enabled in the Control Panel, privileged mode for the LXD container must be enabled or it will not start.
Privileged mode can be enabled by following these steps:- Click Advanced Settings >>.
- Click Device.
- Check Run containers in privileged mode.
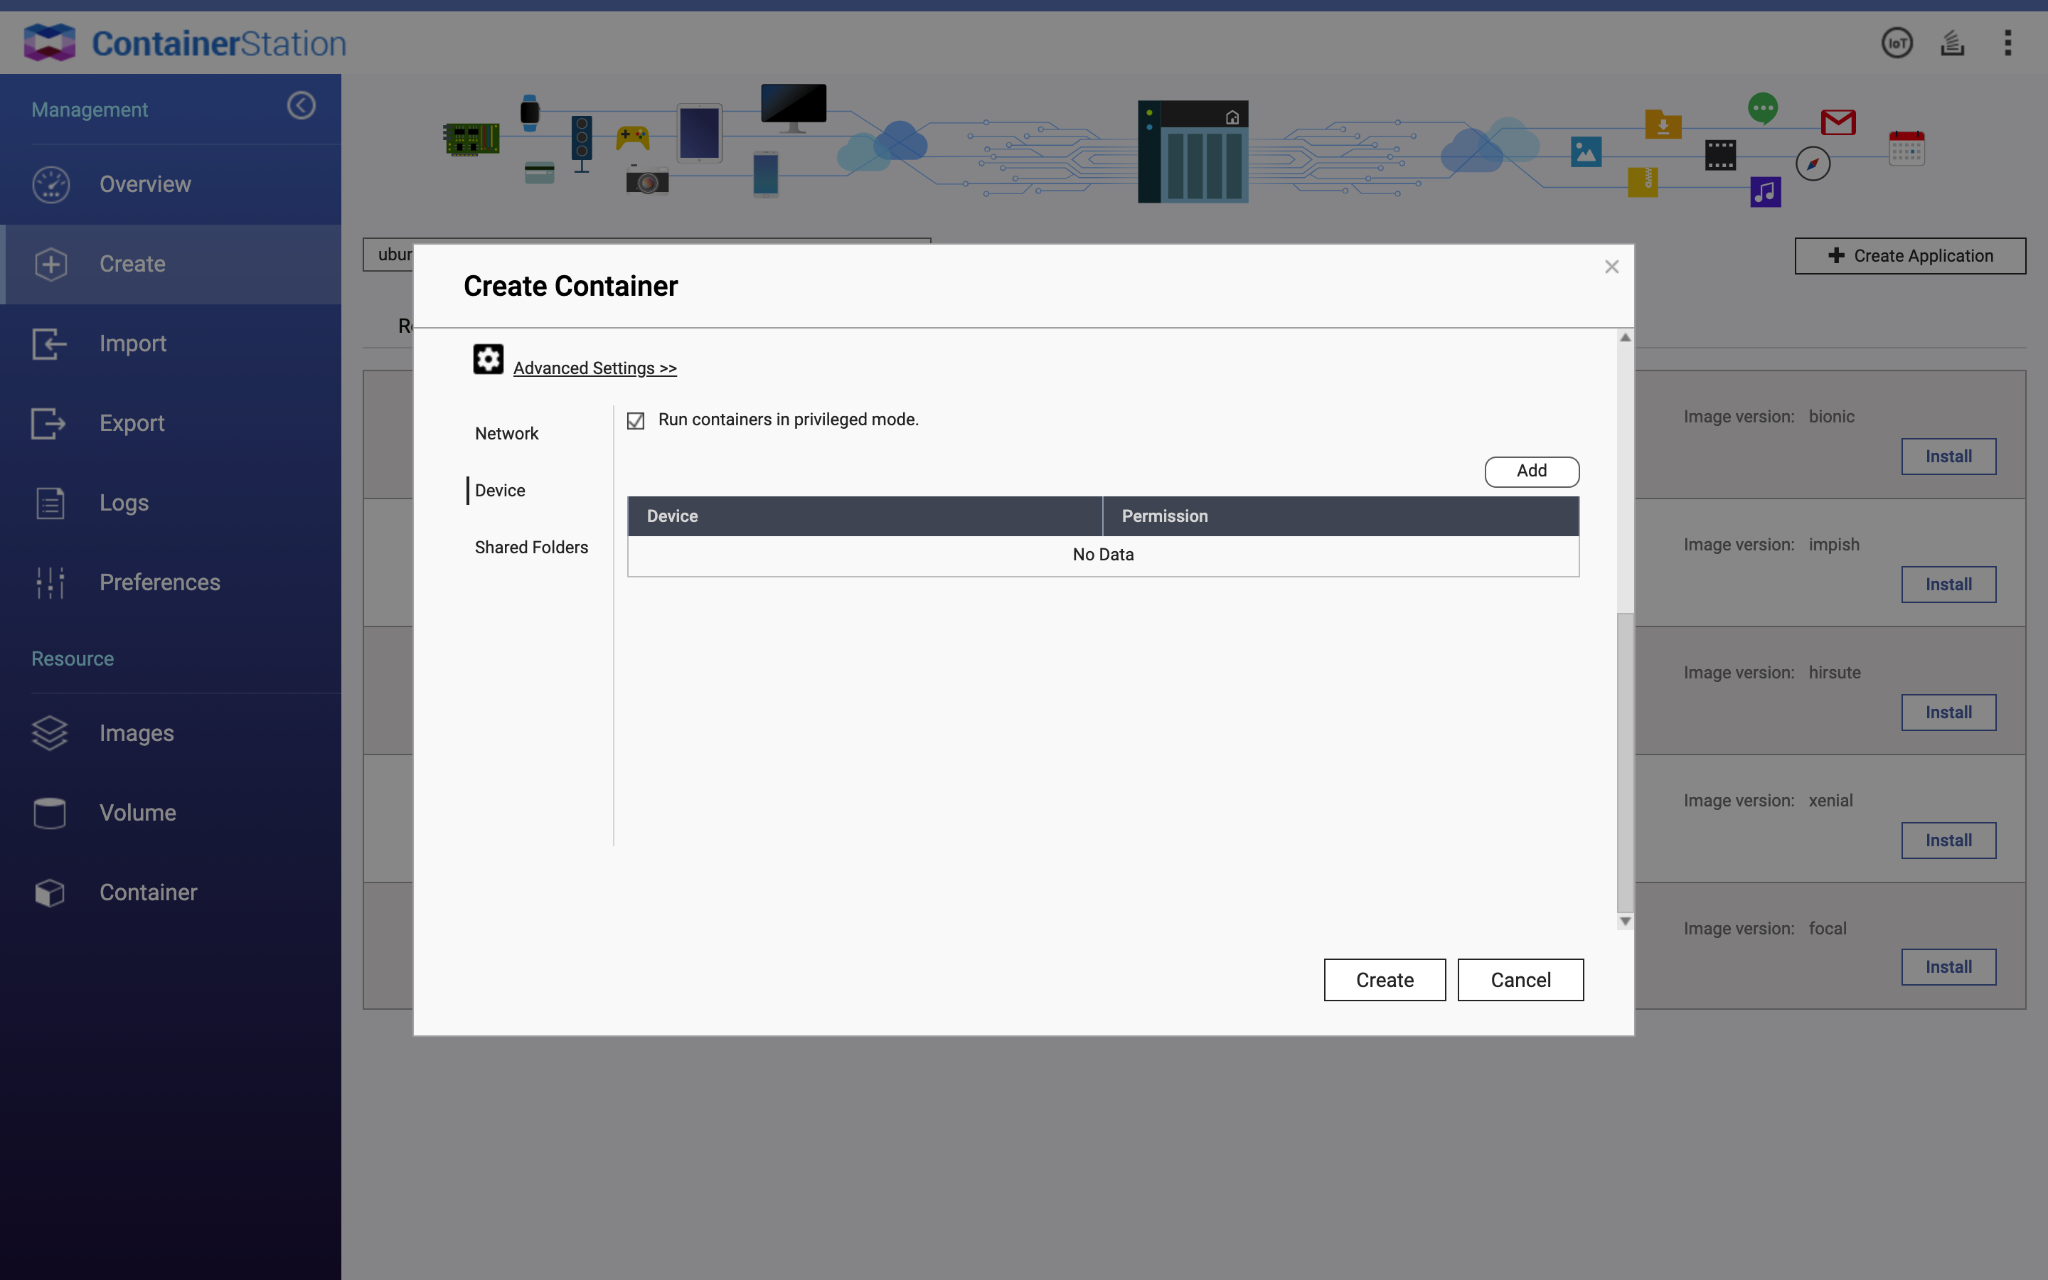
- Click Create.
The LXD container is created.
Creating an LXD Container by Pulling an LXD Image from the Image Page
- Open Container Station.
- Go to Images.
- Click Pull.
- Select LXD Image Server in Registry.
- Enter the desired operating system or distribution in Image Name and desired release version in Image Version. Note:
Refer to Linux Containers - Image server for supported operating systems, distributions and release versions. - Click Pull.
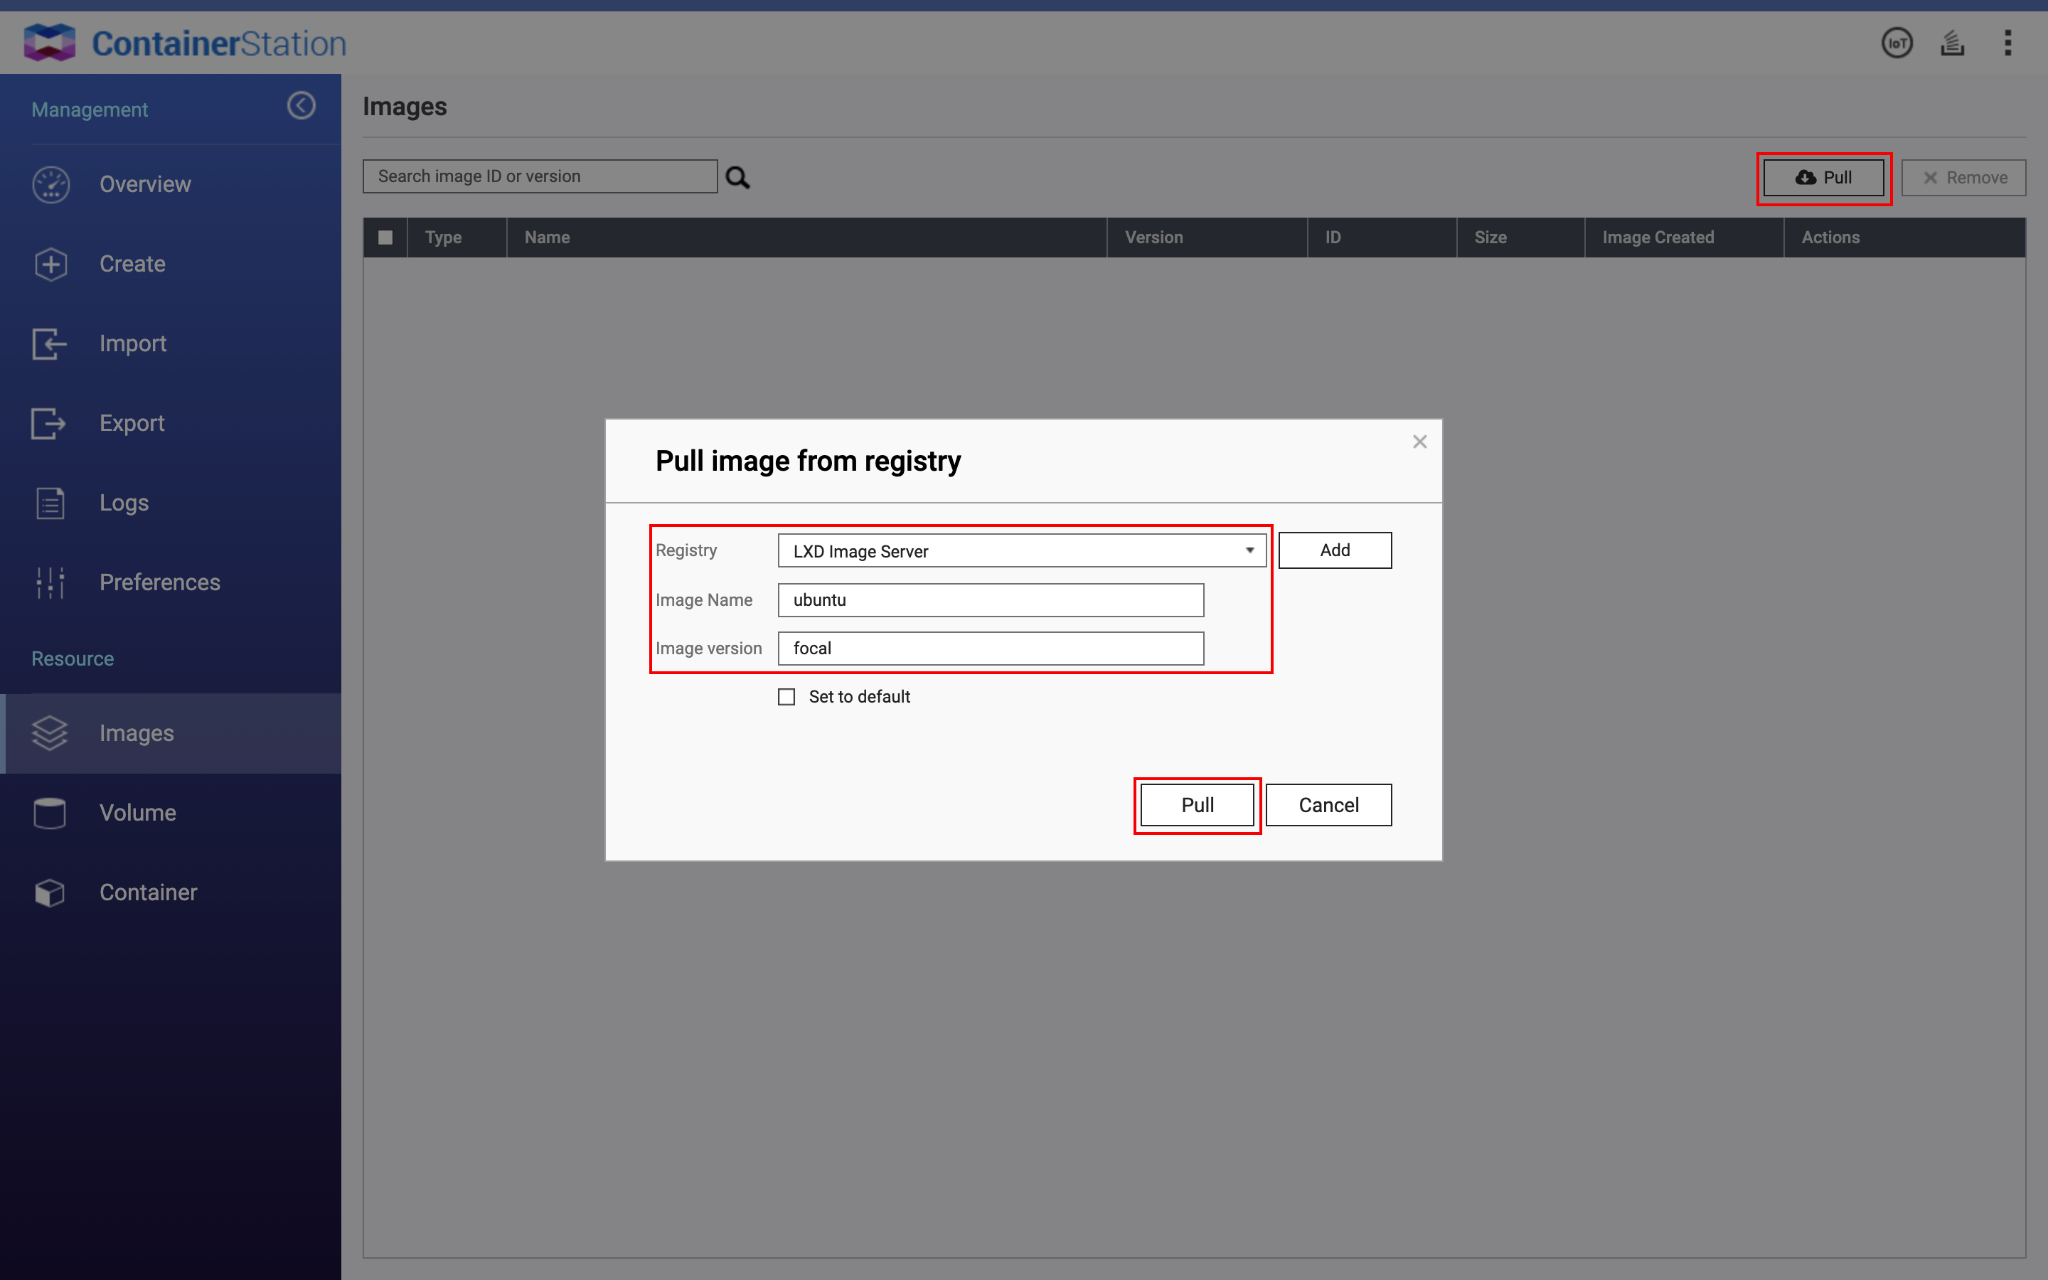
The LXD image is downloaded as a Background Task. When the download is complete the LXD image will appear in the Images list.
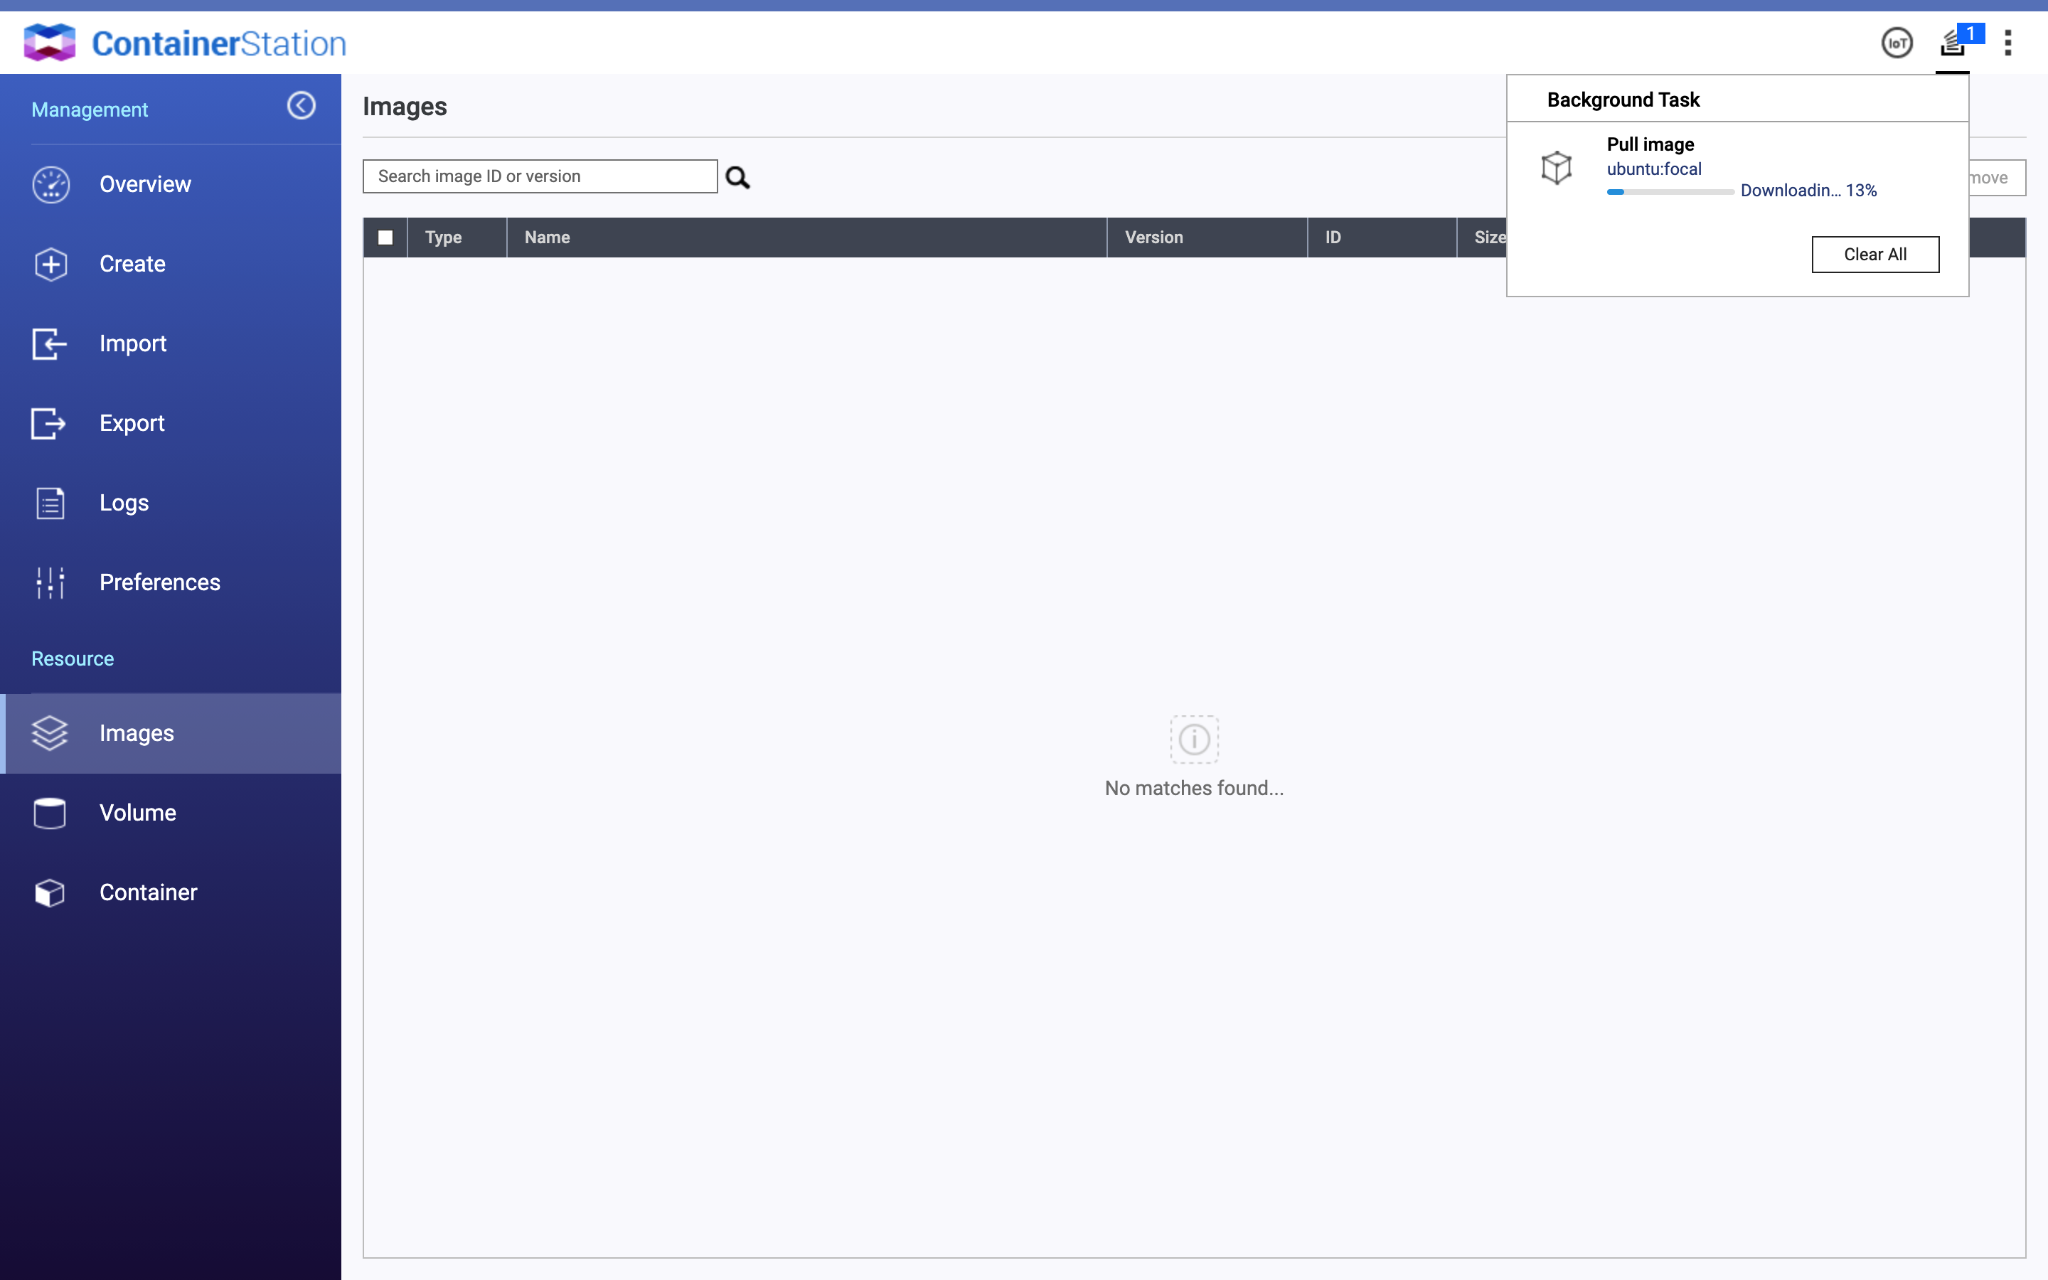
- Find the Image in the Images page.
- Click
 .
.
The Create Container window opens. - In the Create Container window, enter a name and allocate CPU and Memory resources to the LXD container.
 Important:
If Advanced Folder Permissions are enabled in the Control Panel, privileged mode for the LXD container must be enabled or it will not start.
Privileged mode can be enabled by following these steps:- Click Advanced Settings >>.
- Click Device.
- Check Run containers in privileged mode.

- Click Create.
The LXD container is created.
Creating a User in LXD Containers
Important: For most LXD containers, there will be no default user after the LXD container is created.
Note: The following steps use Ubuntu Focal Fossa as an example. The terminal commands may vary based on your operating system and distribution.
- Open Container Station.
- Go to Containers.
- Select your LXD container.

- Click Terminal.
- Enter /bin/sh in Command.
- Click Connect.
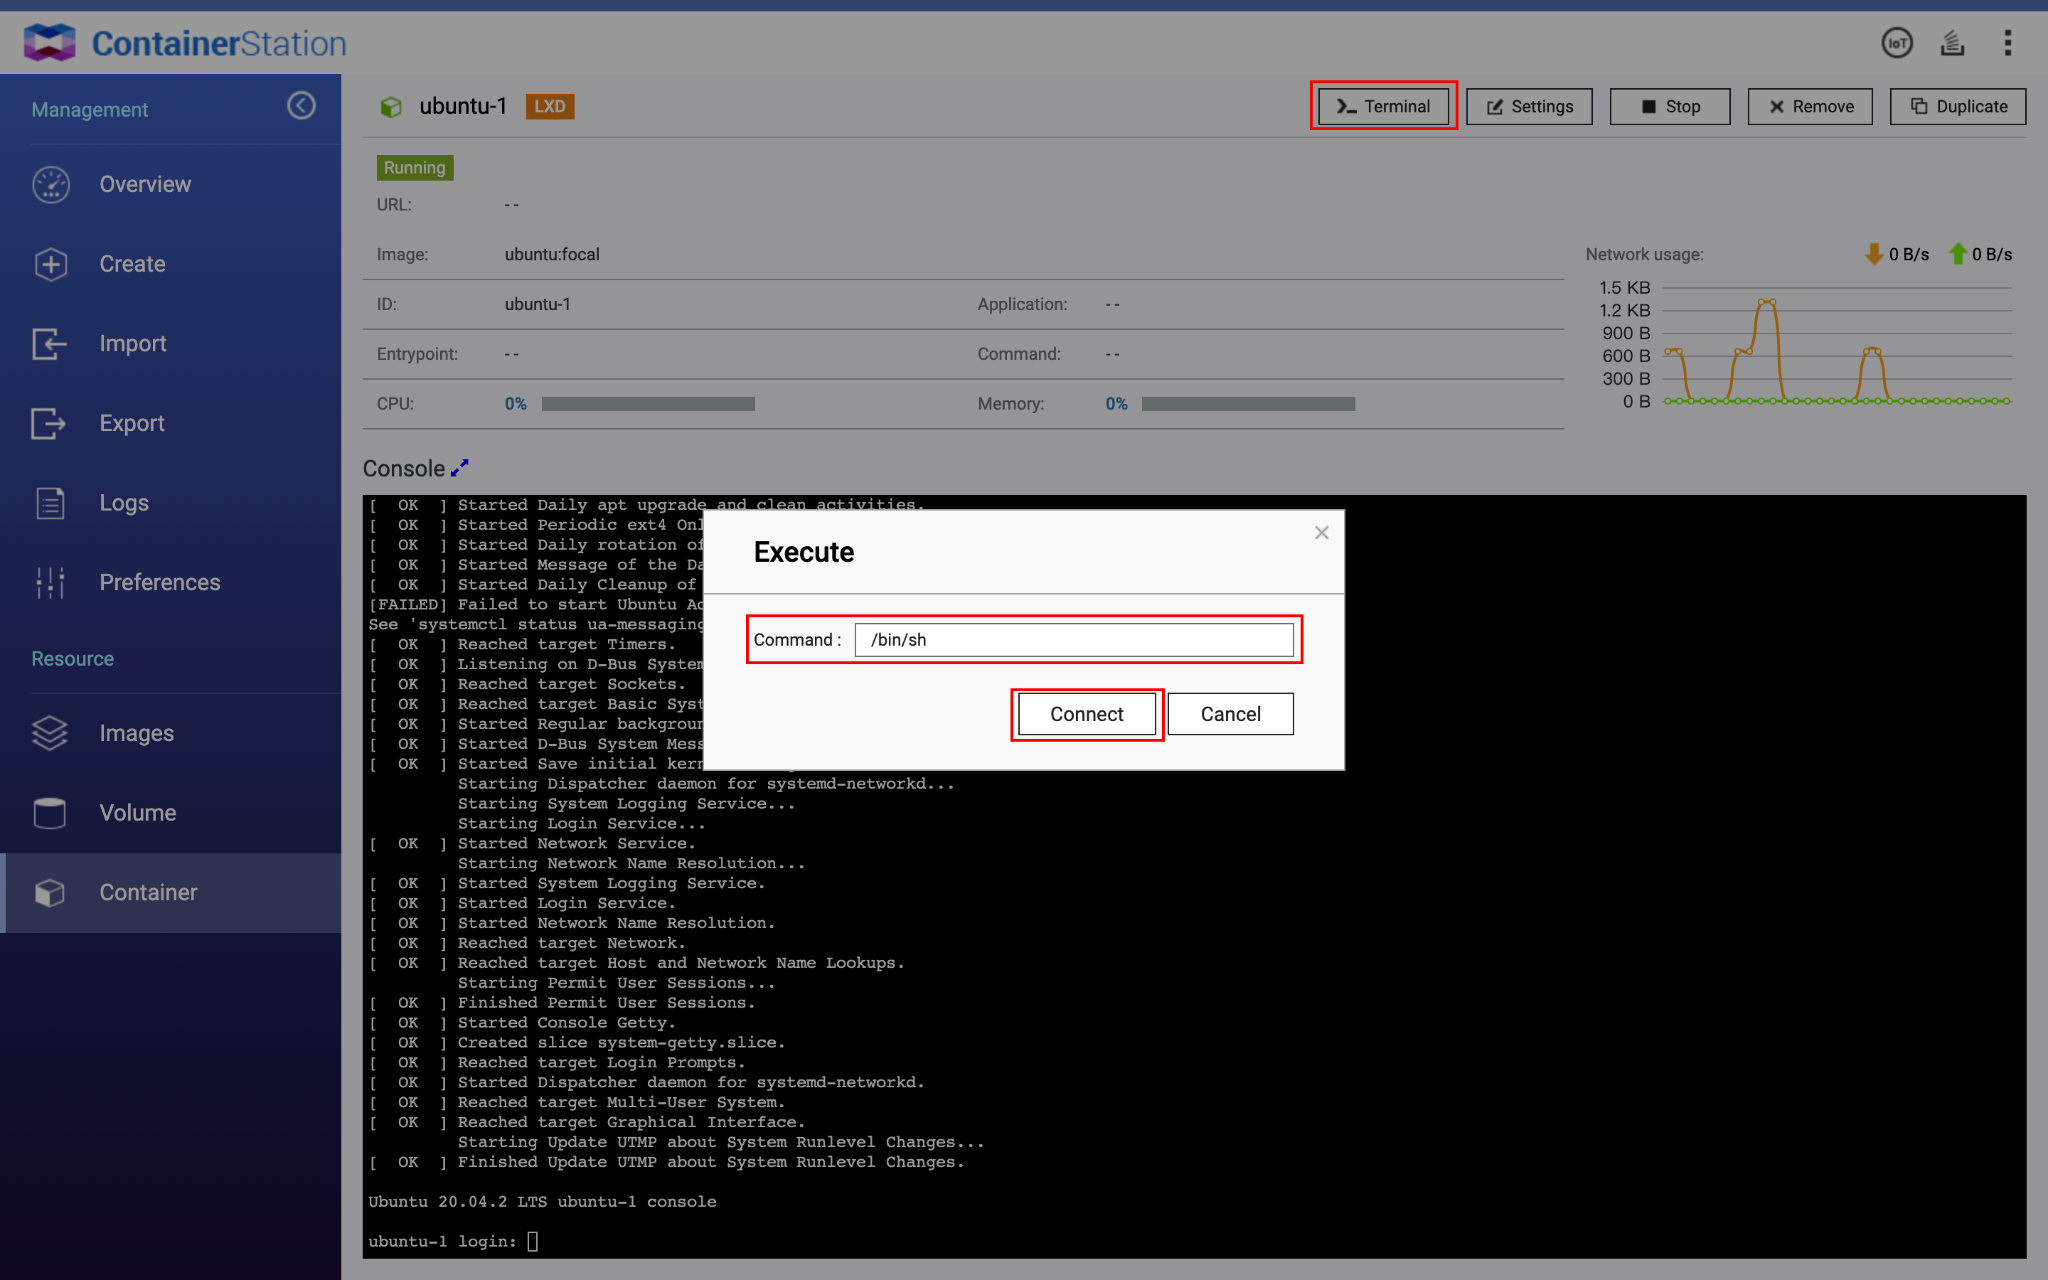
The terminal console is launched in a new browser tab. - Enter adduser {your_username}.
- Enter a password and follow the instructions.
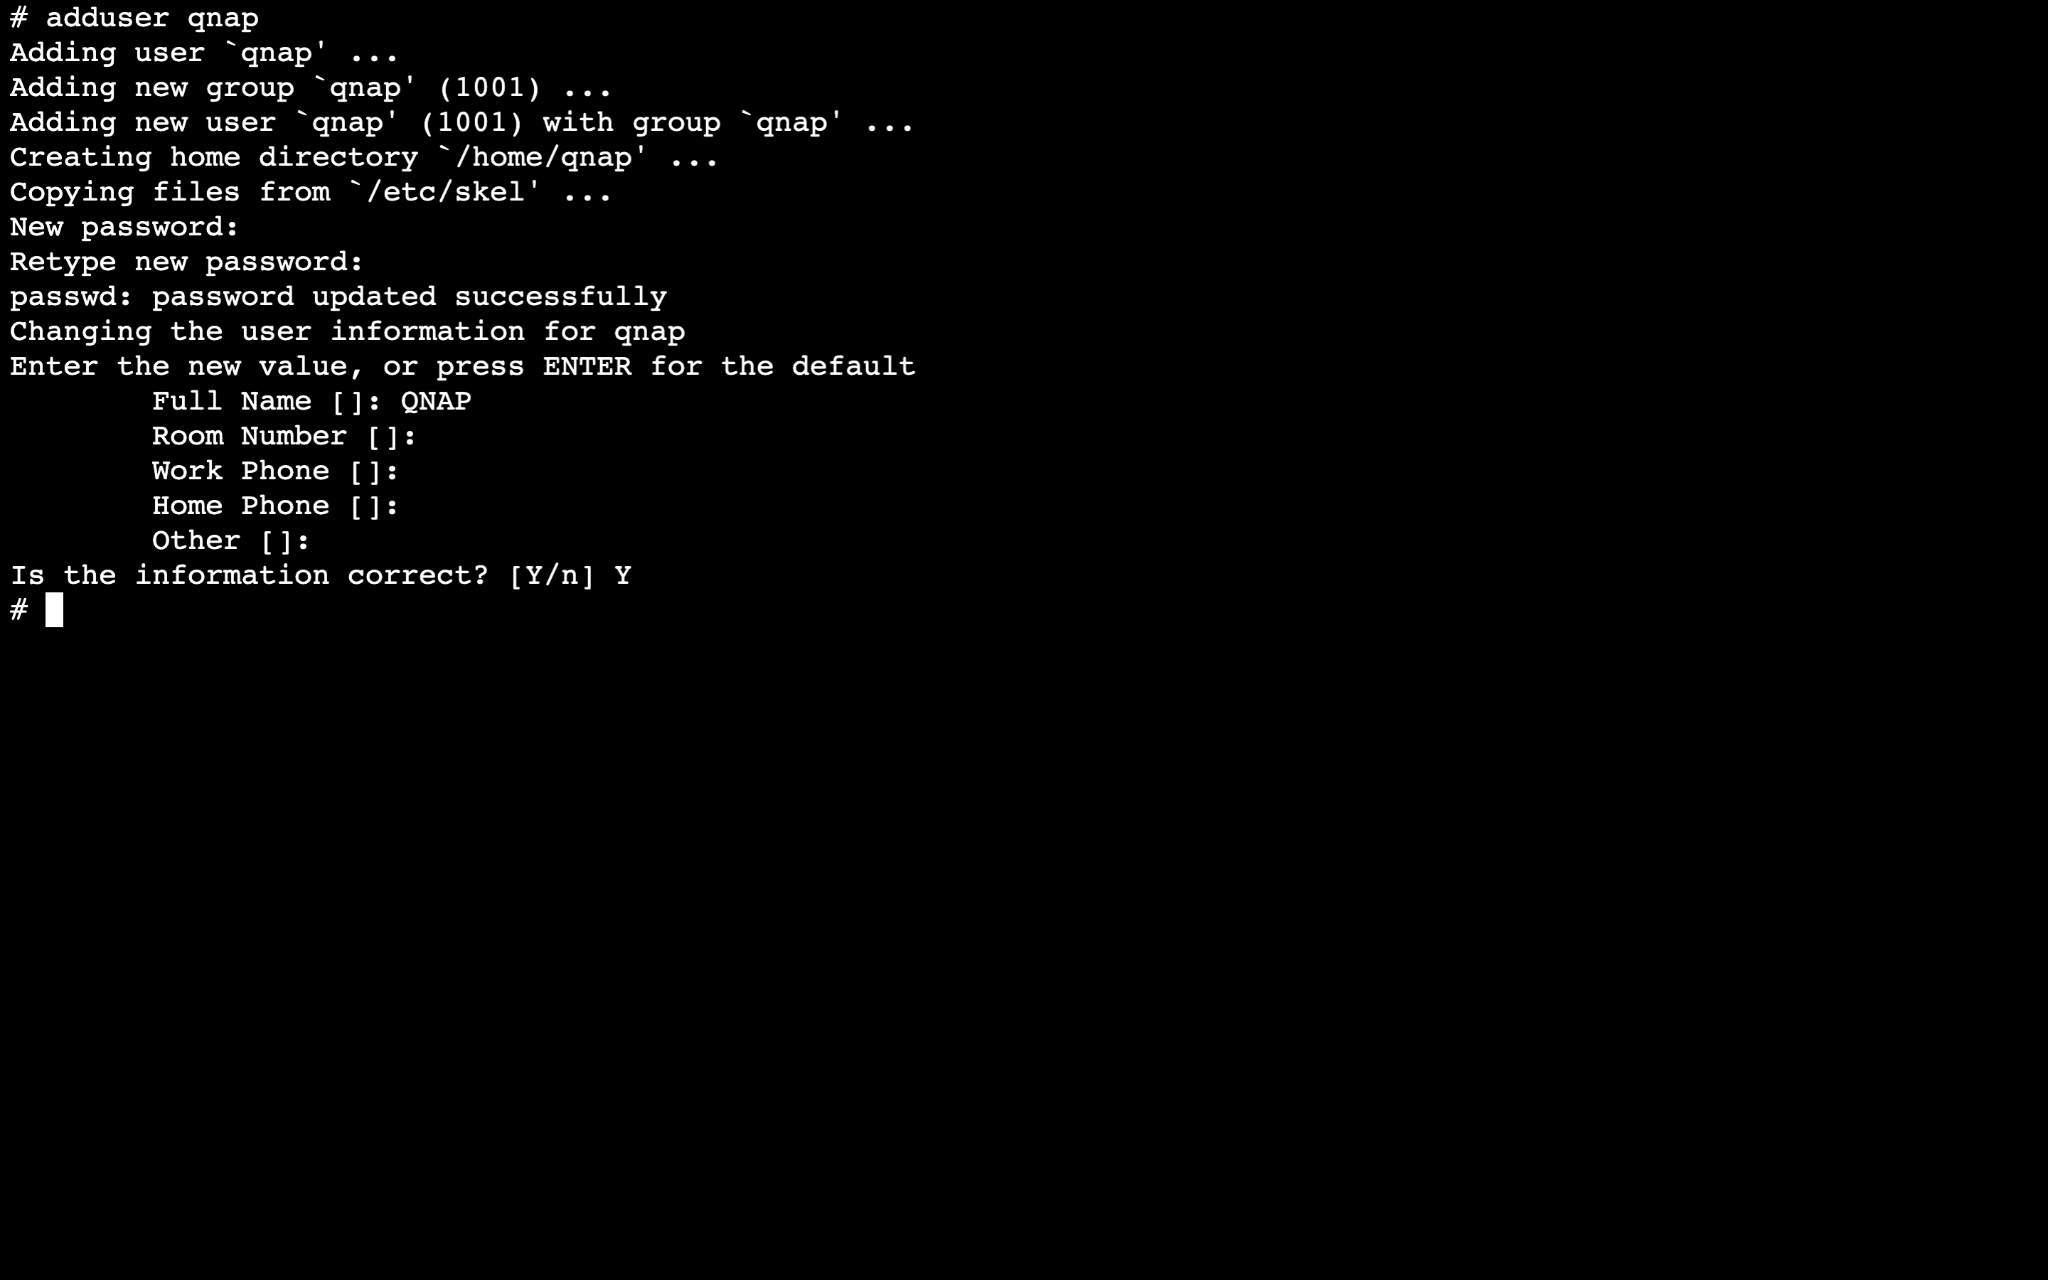
A user will be created for the LXD container. - (optional) To grant sudo access to the user, enter usermod -aG sudo {your_username} Important: Sudo access is required to allocate a static IP address to the LXD Container.
- Close the terminal console browser tab.
- Enter the user credentials in Console.
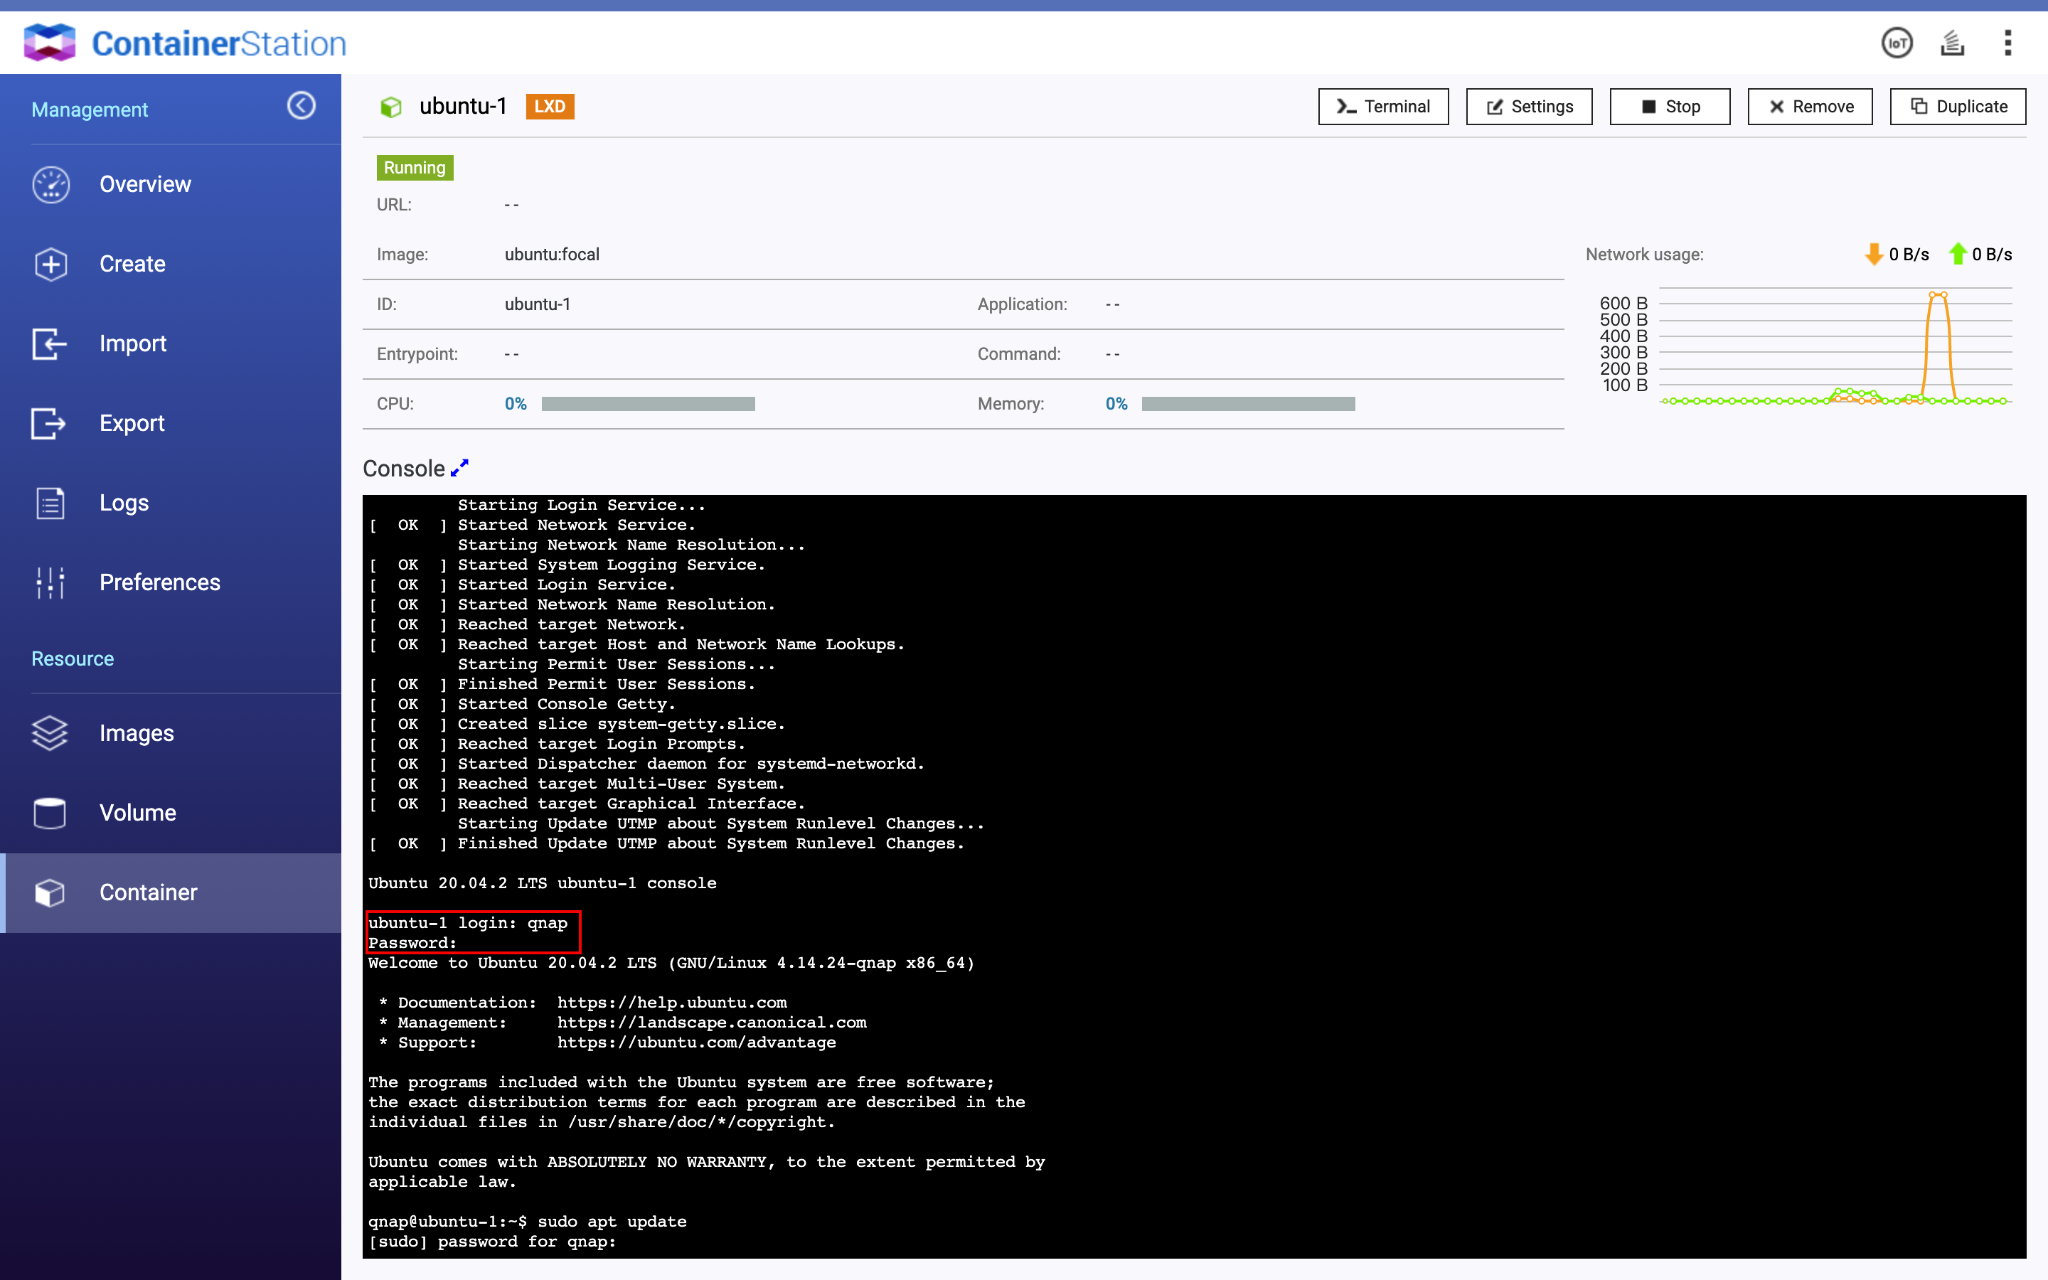
The LXD container can now be accessed by the new user.
Setting Up Static IP Address for LXD Containers
Important:
Sudo access is required for a static IP address to be set.
Sudo access is required for a static IP address to be set.
Note: The following steps use Ubuntu Focal Fossa as an example. The terminal commands may vary based on your operating system and distribution.
- Open Container Station.
- Go to Containers.
- Select your LXD container.
- Enter your user credentials in Console.
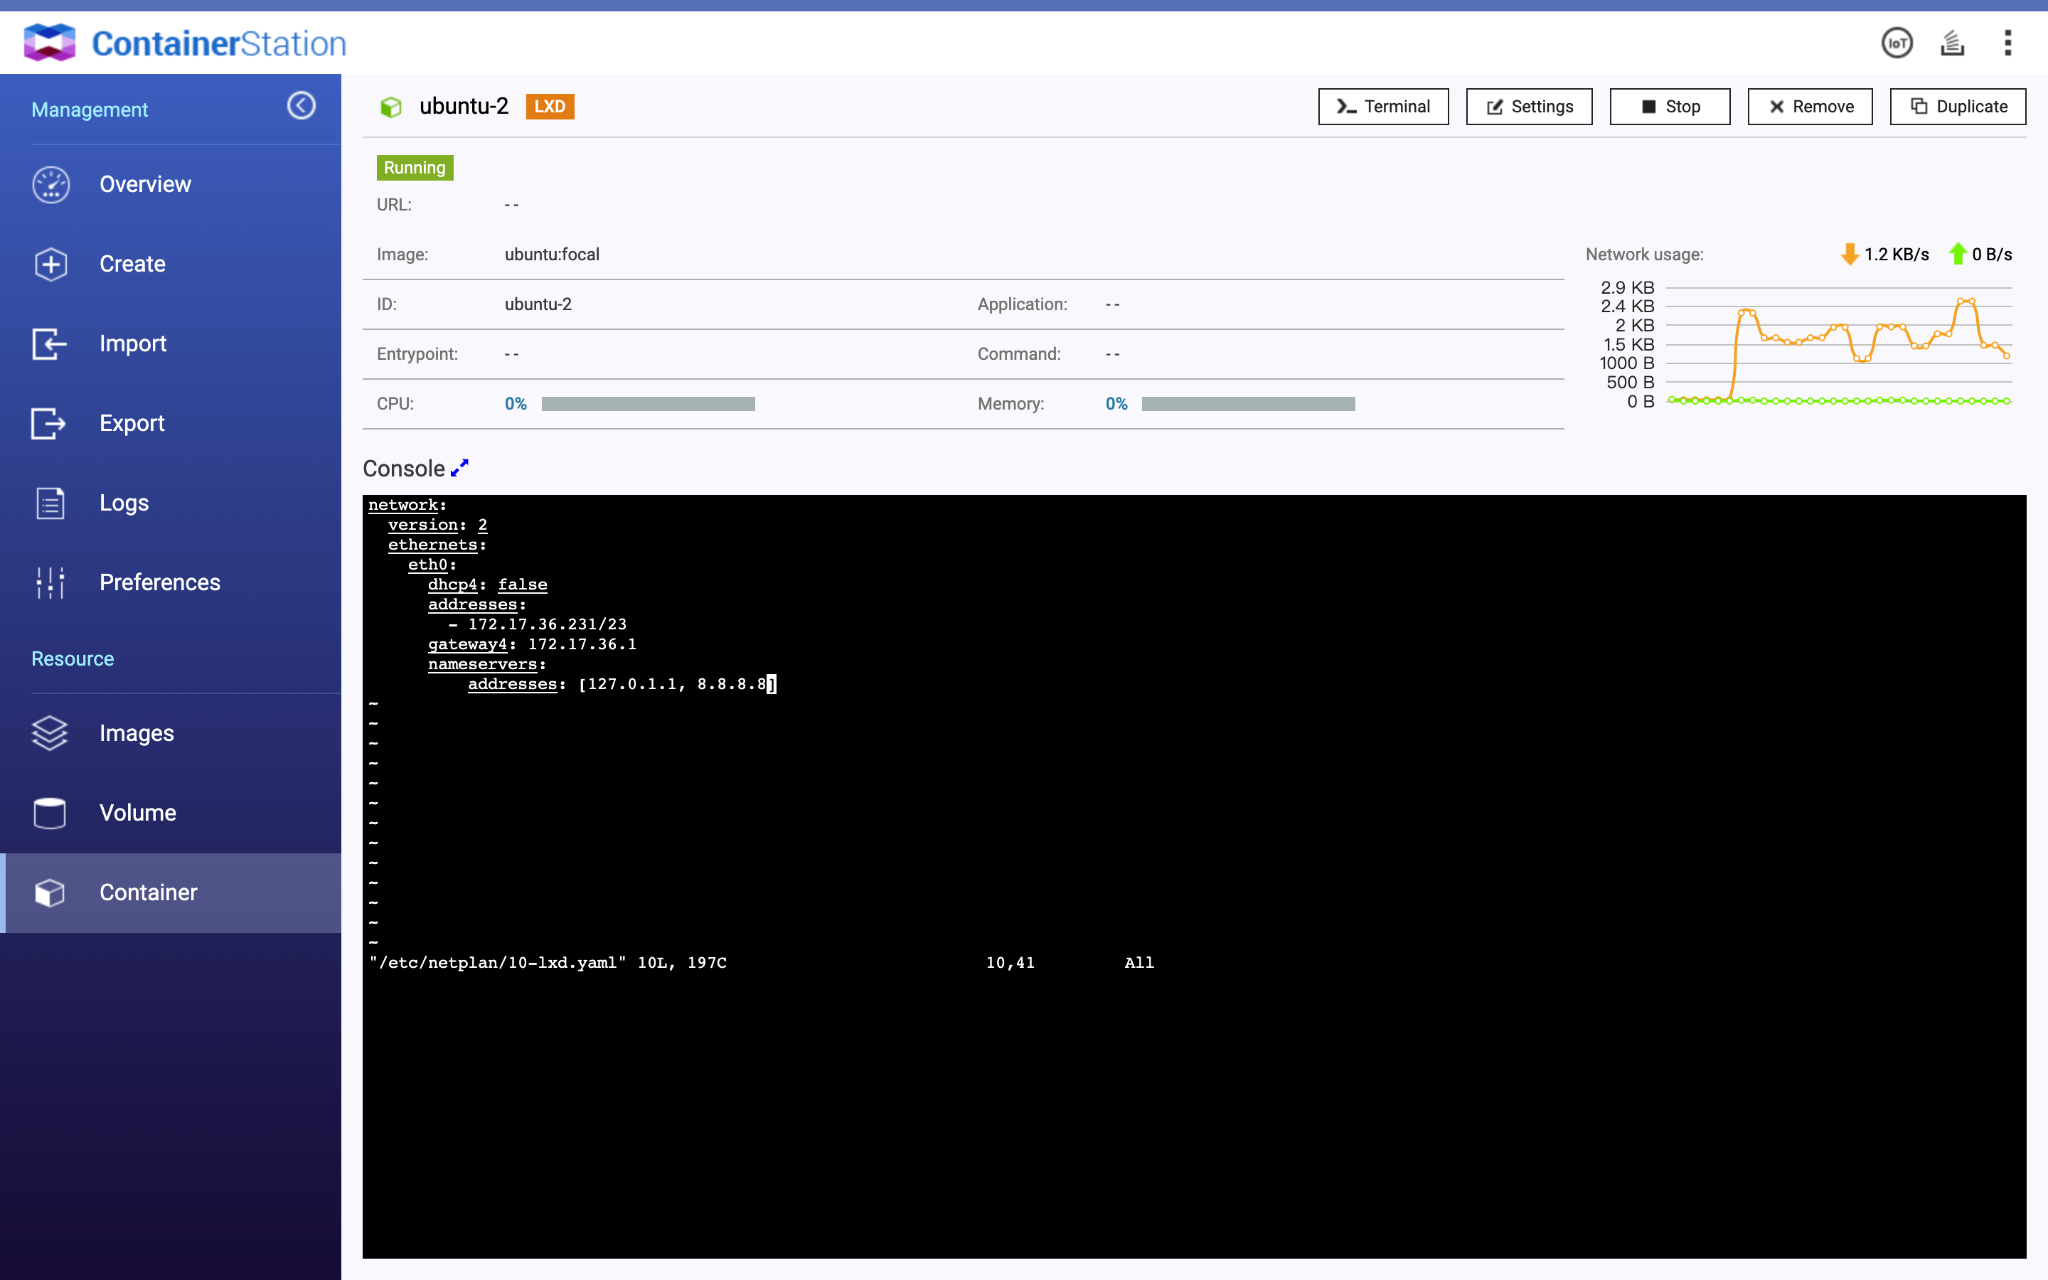
- Enter the command: sudo vi /etc/netplan/10-lxd.yaml.
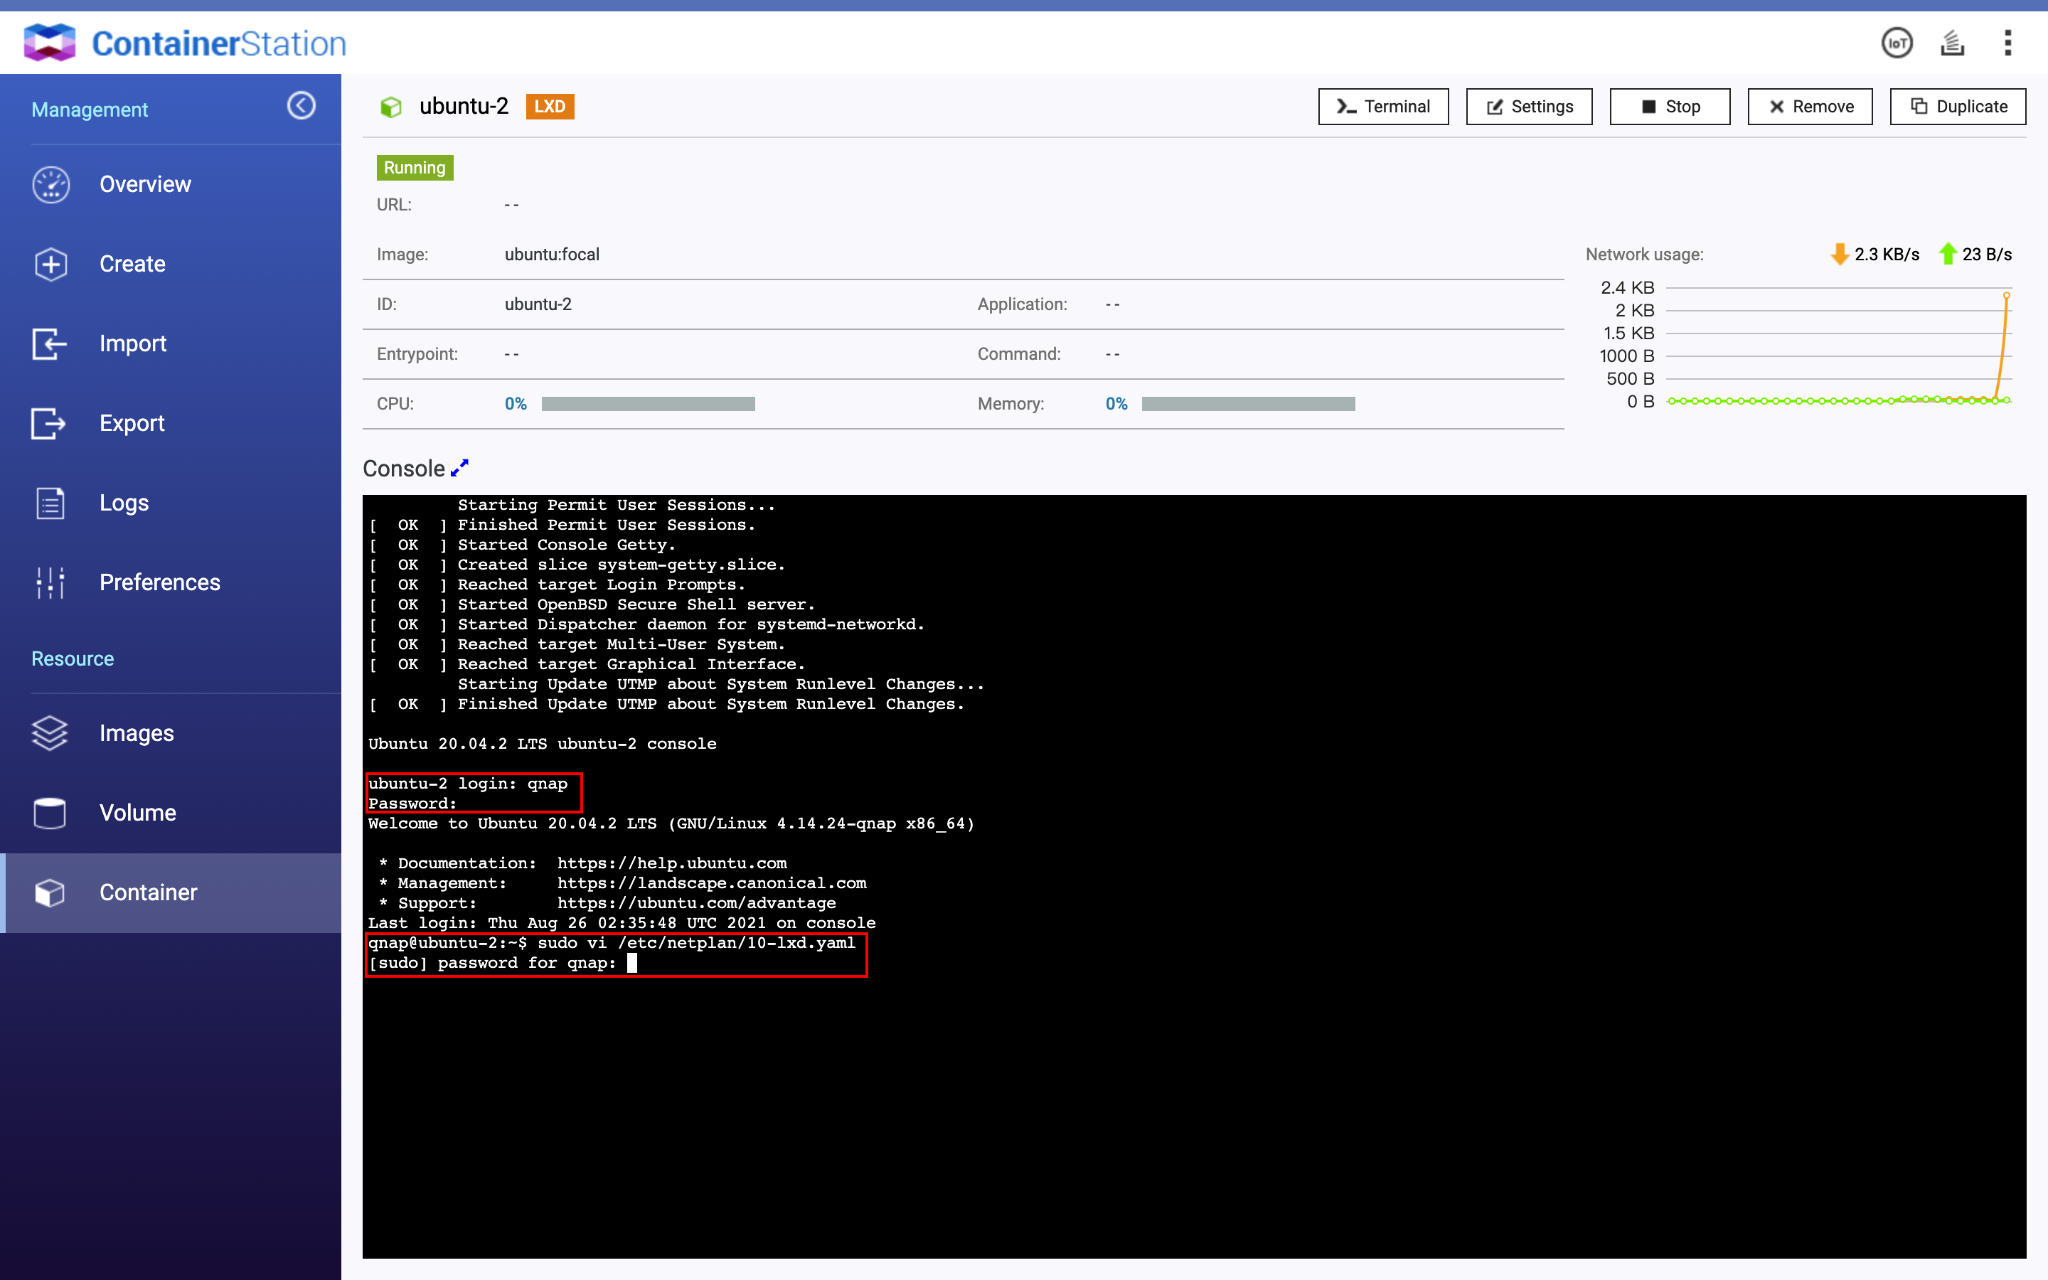
- Set dhcp4 to false and enter the address, gateway and nameservers based on your environment.
- Save the configuration file and enter the command: netplan apply
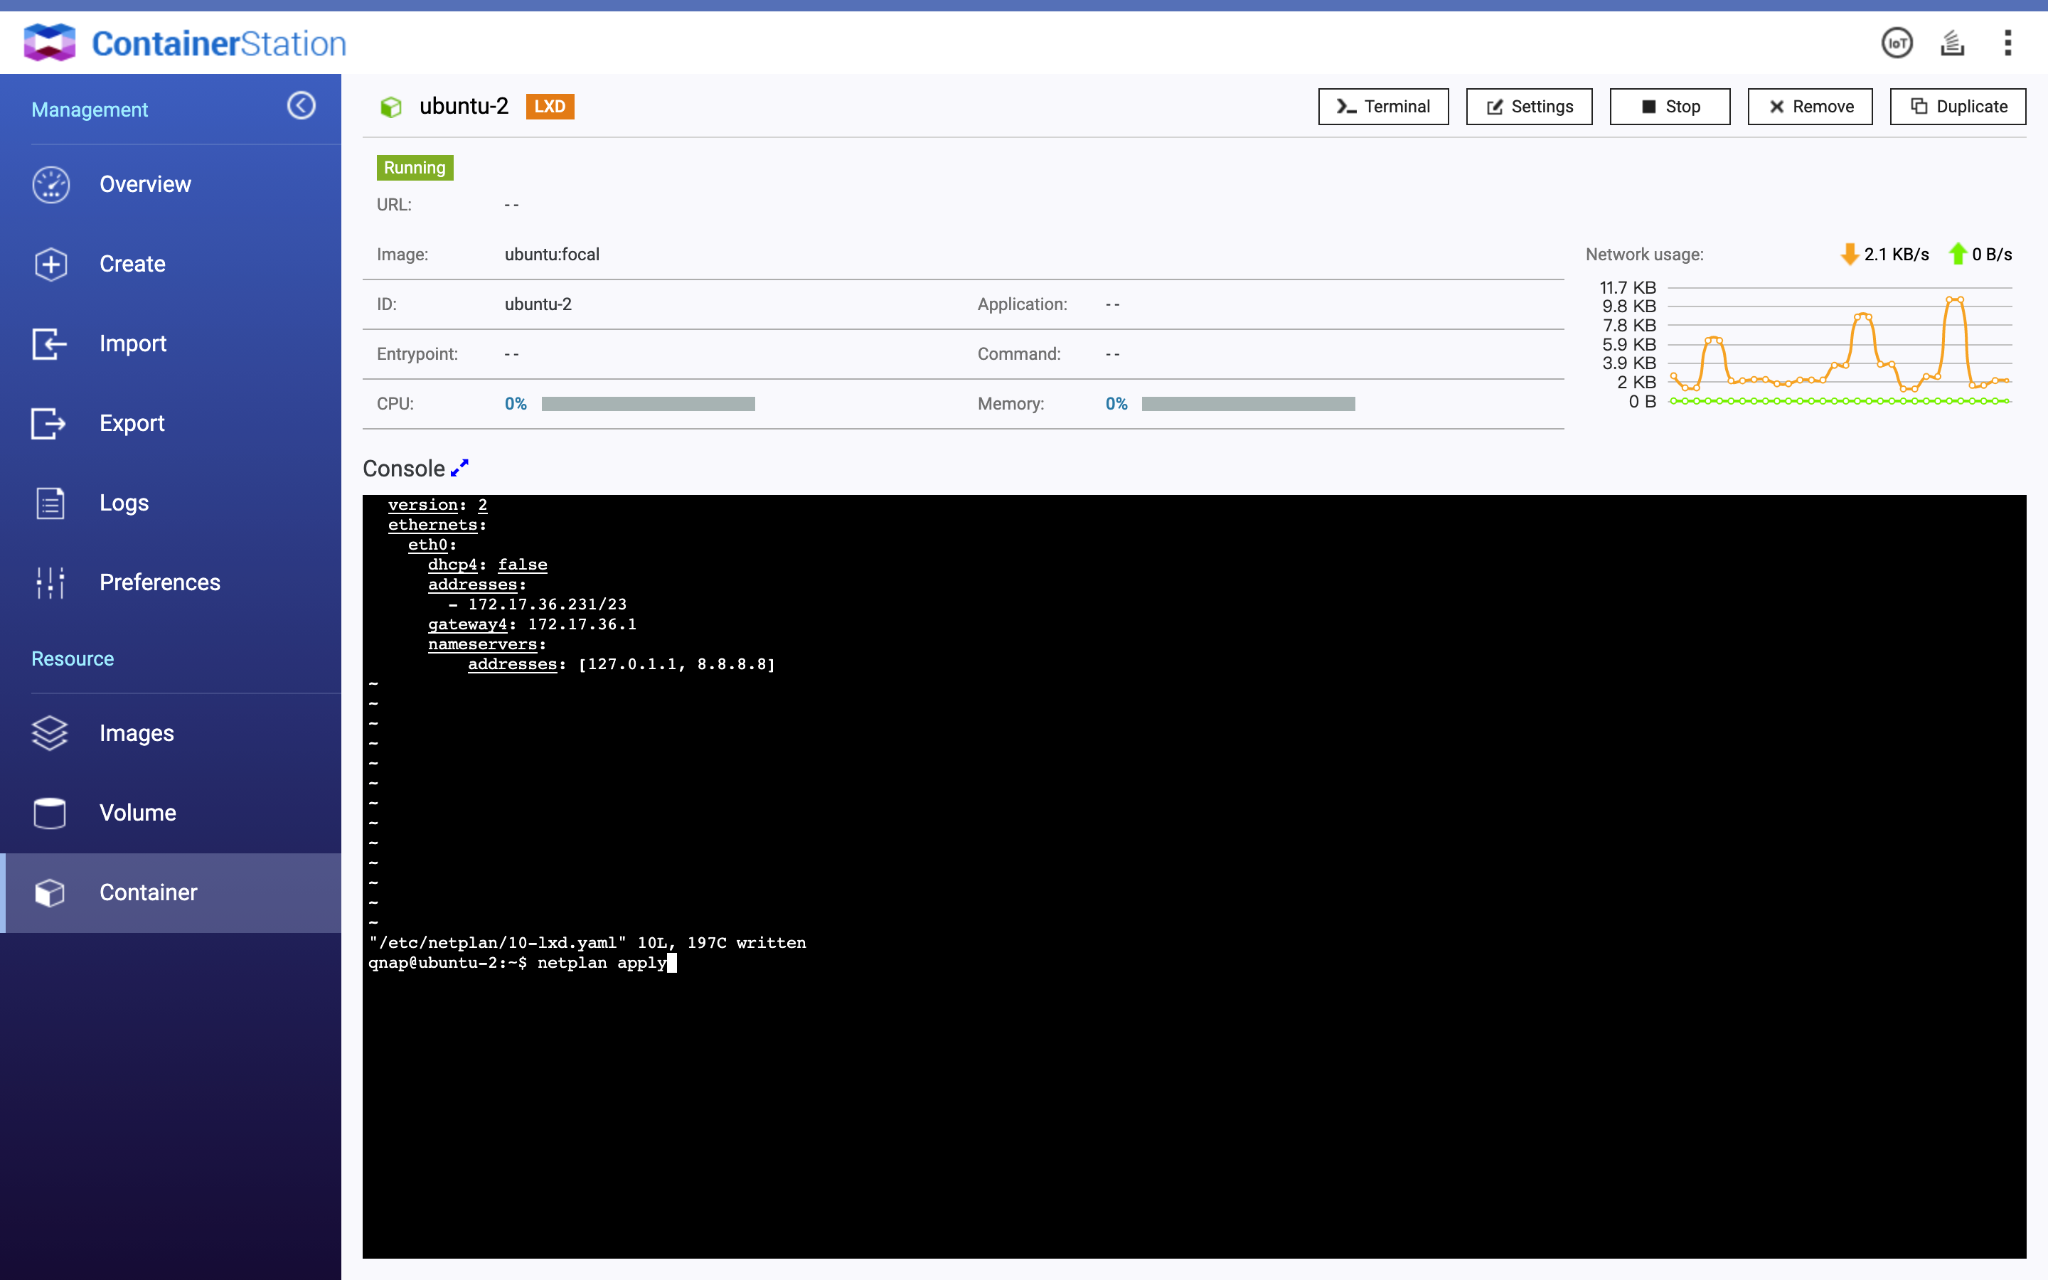
The LXD container now has a static IP address.


